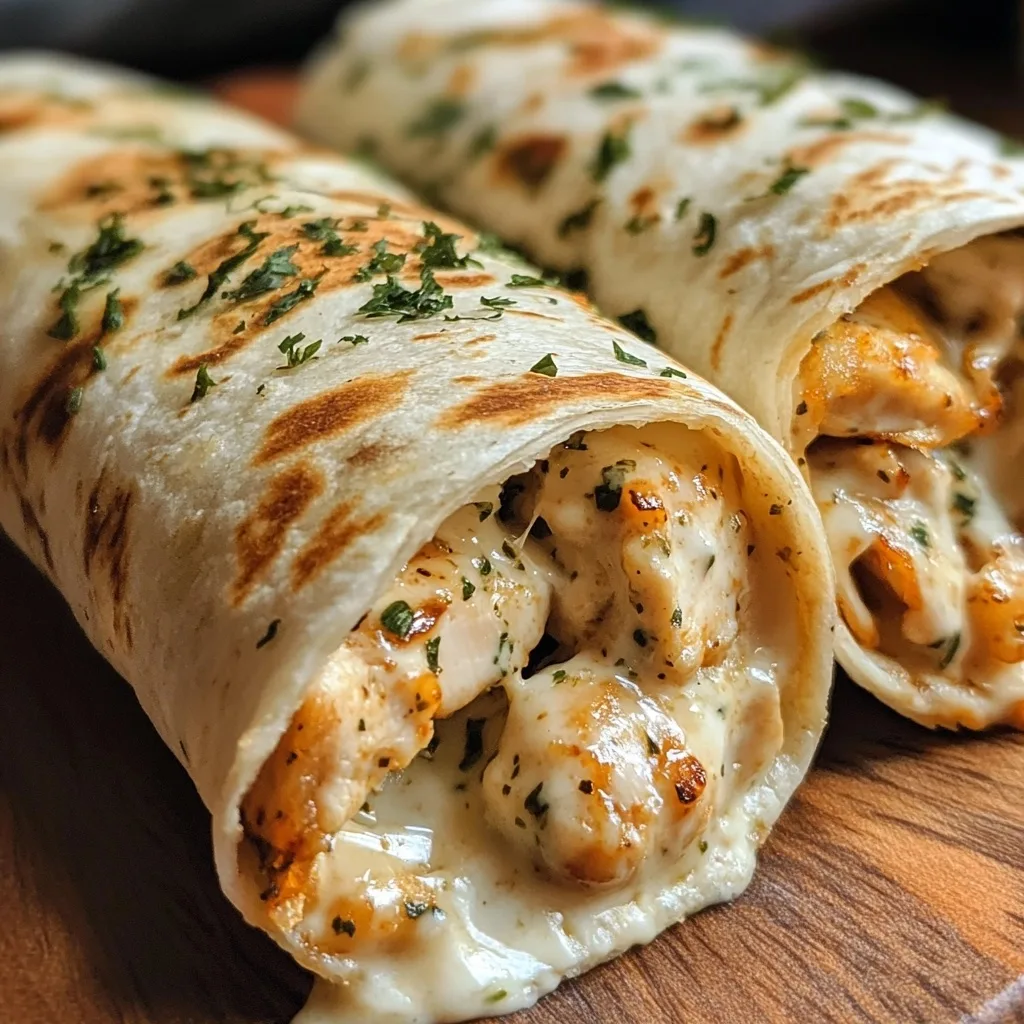
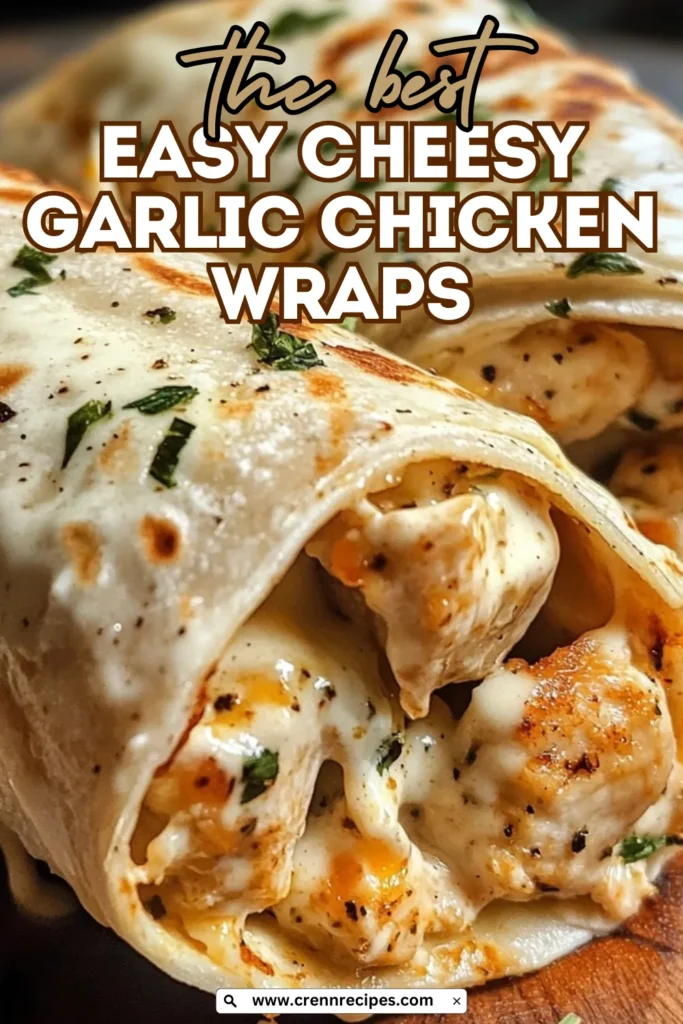
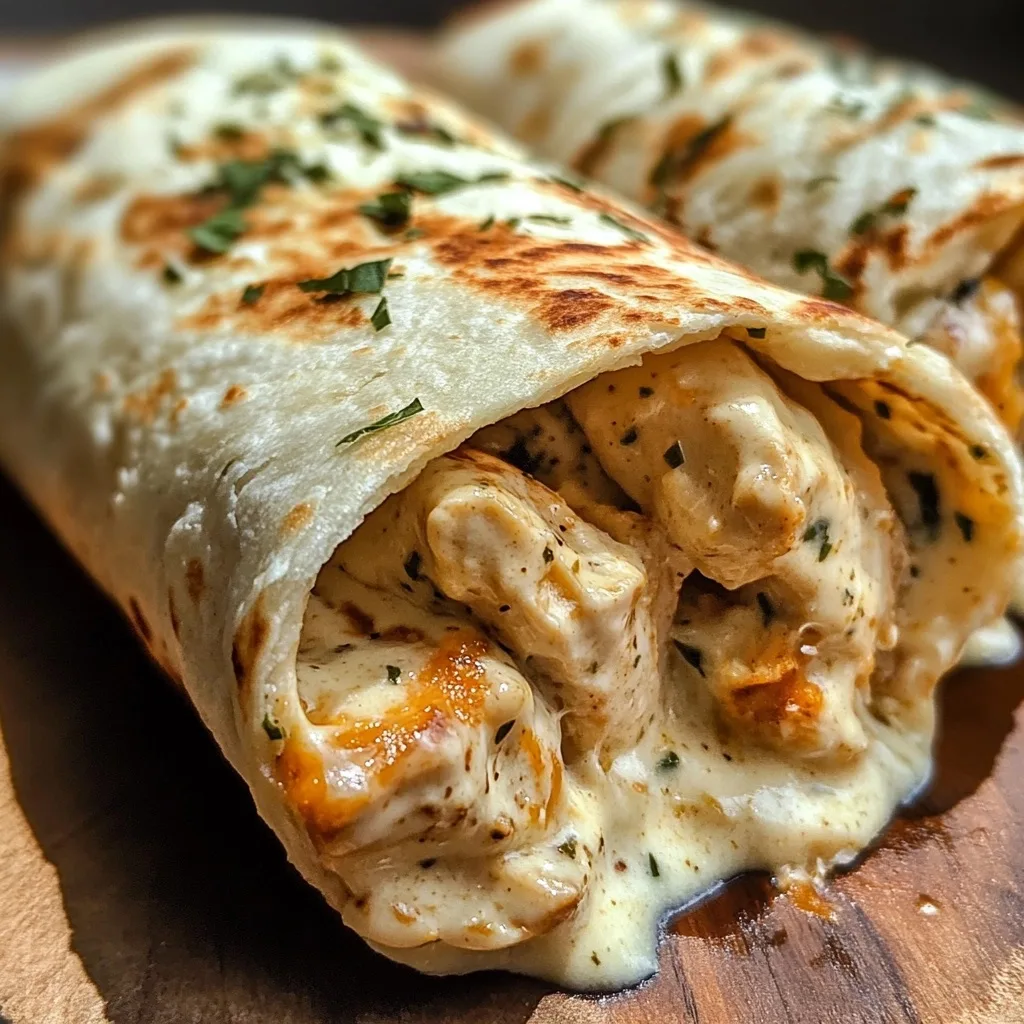
When it comes to weeknight dinner solutions that combine convenience with incredible flavor, few recipes hit the mark as perfectly as these Easy Cheesy Garlic Chicken Wraps. Imagine biting into a warm tortilla filled with juicy, perfectly seasoned chicken breast, bathed in a melty, garlicky cheese sauce and complemented by a creamy, tangy spread that brings everything together. These chicken wraps deliver restaurant-quality taste with home-kitchen simplicity, making them an instant family favorite that will have everyone asking for seconds.
The beauty of these chicken wraps lies in their perfect balance of flavors and textures. The chicken is seasoned just right with garlic and onion powders before being seared to juicy perfection. Then comes the star of the show – a decadent cheesy garlic butter that coats every bite with rich, melty goodness. Topped with a creamy garlic sauce that adds brightness and depth, these wraps elevate everyday ingredients into something truly special.
Whether you’re looking for a quick dinner solution, a crowd-pleasing lunch, or a satisfying meal prep option, these chicken wraps deliver on all fronts. They’re customizable, portable, and most importantly, absolutely delicious. Let’s dive into what makes these wraps so irresistible and how you can recreate this magic in your own kitchen.
Why You’ll Love These Cheesy Garlic Chicken Wraps
What sets these chicken wraps apart from ordinary wrap recipes is the thoughtful layering of flavors and textures. The chicken serves as a protein-packed foundation, perfectly seasoned and juicy. The cheesy garlic butter adds richness and depth that transforms these from basic wraps into a crave-worthy meal. And the creamy garlic sauce ties everything together with tangy brightness.
These wraps strike that perfect balance between comfort food indulgence and practical weeknight cooking. They come together in about 30 minutes from start to finish, making them accessible even on your busiest days. Plus, they’re endlessly customizable – add your favorite veggies for crunch, dial up the spice with jalapeños, or keep them simple and focused on that cheesy chicken goodness.
Another winning aspect of these chicken wraps is their portability. They make excellent packed lunches, picnic fare, or on-the-go dinners for busy families. Unlike many portable meals that sacrifice quality for convenience, these wraps maintain their delicious integrity for hours after assembly – the flavors actually meld and develop, making them possibly even better as leftovers.

Key Ingredients for Perfect Chicken Wraps
The Chicken Foundation
The cornerstone of these wraps is, of course, boneless, skinless chicken breast. This lean protein cooks quickly and takes on flavors beautifully. When shopping, look for plump, evenly-sized breasts that will cook uniformly. If your chicken breasts are particularly large, consider slicing them horizontally to create thinner cutlets that will cook more quickly and evenly.
The simple seasoning blend of kosher salt, black pepper, garlic powder, and onion powder creates a flavor foundation that complements the other components without overwhelming them. Kosher salt is preferred here for its clean flavor and the way it adheres to the meat. The garlic and onion powders infuse the chicken with savory notes that echo throughout the other elements of the wrap.
The Cheesy Garlic Butter Magic
The combination of Monterey Jack and sharp cheddar cheeses creates the perfect melty, flavorful cheese sauce. Monterey Jack brings a smooth, creamy meltability, while sharp cheddar contributes bold flavor and that signature cheese pull that makes these wraps so satisfying. Grating your own cheese fresh from the block (rather than using pre-shredded) will result in a smoother melt and better flavor.
Fresh garlic sautéed in butter forms the aromatic base of the cheese sauce, infusing it with rich, nutty garlic notes. Take care not to burn the garlic when sautéing – aim for a fragrant golden state rather than brown, which can introduce bitterness. This garlicky butter gets amplified when the cheeses melt into it, creating a sauce that’s utterly irresistible.
The Creamy Finishing Touch
The creamy garlic sauce combines mayonnaise and sour cream for richness and tanginess, brightened with fresh lemon juice that cuts through the richness of the cheese. Fresh parsley adds color and a herbaceous note that lifts the entire dish. This sauce isn’t just a condiment – it’s an integral component that balances and complements the other elements.
Don’t skip the fresh lemon juice – it’s that little bit of acidity that makes all the difference, preventing the wraps from feeling too heavy or one-dimensional. Similarly, the fresh parsley might seem like just a garnish, but it adds a necessary freshness and color contrast that enhances both the appearance and flavor profile.
The Perfect Wrap
The choice of tortilla matters more than you might think. A 10-inch flour tortilla provides the ideal ratio of filling to wrapper, while being large enough to securely contain all the delicious contents. Warming the tortillas before filling makes them more pliable and less likely to crack when rolling, while also enhancing their flavor and texture.
Step-by-Step Instructions for Cheesy Garlic Chicken Wraps
Preparing Perfect Chicken
Begin by trimming any excess fat from your chicken breasts. This ensures a cleaner flavor and more pleasant texture in the finished wraps. Once trimmed, rub each breast with olive oil, which helps the seasonings adhere and promotes better browning during cooking.
Season generously with the salt, pepper, garlic powder, and onion powder, making sure to coat all sides evenly. This direct application of seasoning to the meat ensures that the chicken itself is flavorful, not just relying on the sauces for taste.
Heat a large skillet over medium-high heat until hot but not smoking. Place the seasoned chicken breasts in the pan, being careful not to overcrowd – work in batches if necessary. Sear for 5-6 minutes on the first side without moving the chicken, which allows for proper browning and flavor development.
Flip the chicken and continue cooking for another 5-6 minutes, or until the internal temperature reaches 165°F. Using a meat thermometer takes the guesswork out of cooking chicken and ensures food safety while preventing overcooking. Once done, transfer the chicken to a cutting board and tent loosely with foil to rest for 5 minutes. This resting period is crucial as it allows the juices to redistribute throughout the meat, resulting in juicier chicken.
Creating the Cheesy Garlic Butter
Using the same skillet (without cleaning it) captures all the flavorful fond left from cooking the chicken. Reduce the heat to medium to prevent burning the garlic. Add the butter and allow it to melt completely, swirling the pan to coat the bottom.
Add the minced garlic and sauté just until fragrant, about 1 minute. Watch it carefully – garlic can go from perfectly golden to burnt and bitter in seconds. The aroma will tell you when it’s ready – it should be nutty and intensely garlicky but not acrid.
Add both cheeses to the garlic butter, stirring constantly with a wooden spoon or silicone spatula. The cheese will begin to melt immediately but continue stirring until it’s completely smooth and has a sauce-like consistency. This should take about 2-3 minutes. If the mixture seems too thick, you can add a splash of milk to thin it slightly.
Mixing the Creamy Garlic Sauce
In a small bowl, combine the mayonnaise, sour cream, lemon juice, and chopped parsley. Mix thoroughly until smooth and well-combined. The sour cream provides tanginess, while the mayonnaise adds richness and body.
The fresh lemon juice brightens the sauce, cutting through the richness of the mayo and sour cream. Don’t be tempted to substitute bottled lemon juice – the fresh version makes a noticeable difference. Add a small pinch of salt to enhance all the flavors, tasting and adjusting as needed.
This sauce can be made ahead of time and refrigerated, which actually allows the flavors to meld and develop more fully. If making in advance, store in an airtight container for up to two days.
Assembly and Serving
Warm your tortillas before assembling the wraps. You can do this in a dry skillet for about 10-15 seconds per side, in the microwave for 10 seconds, or wrapped in foil in a 300°F oven for a few minutes. Warm tortillas are more pliable, less likely to tear, and have a better flavor and texture.
Spread a couple tablespoons of the creamy garlic sauce down the center of each tortilla, creating a foundation for the filling. Slice the rested chicken into ½-inch strips across the grain, which ensures more tender bites. Layer these pieces down the center of each tortilla on top of the sauce.
Spoon the cheesy garlic butter generously over the chicken. This is where the magic happens – the warm cheese sauce envelops the chicken, creating pockets of gooey deliciousness throughout the wrap. Add any optional ingredients at this point – shredded lettuce adds freshness and crunch, tomato slices bring juicy acidity, and pickled jalapeños provide a spicy kick that balances the richness.
To wrap, fold in the sides of the tortilla, then roll from the bottom up, tucking the edges in as you go to create a secure bundle. If desired, return the assembled wraps to the skillet and toast briefly on each side until golden and crisp. This extra step adds textural contrast and helps seal the wraps.
Slice each wrap diagonally, which creates a more appealing presentation and makes them easier to eat. Garnish with additional fresh parsley for a pop of color and fresh flavor.

Customization Ideas for Chicken Wraps
One of the greatest attributes of these chicken wraps is their versatility. The base recipe is phenomenal as-is, but consider these delicious variations to keep things interesting:
Mediterranean Style: Add diced cucumber, crumbled feta cheese, and kalamata olives to the filling. Substitute the parsley with fresh dill in the creamy sauce and add a squeeze of lemon juice for brightness.
Southwest Flair: Mix some chipotle powder into the chicken seasoning. Add black beans, corn, and avocado slices to the filling. Top with cilantro instead of parsley and consider a dollop of salsa along with the creamy sauce.
Buffalo Chicken: Toss the cooked, sliced chicken in buffalo sauce before assembling the wraps. Add blue cheese crumbles to the cheese mixture and include chopped celery for crunch. You might also enjoy checking out these Buffalo Chicken Cottage Cheese Bowls for another take on buffalo chicken flavors.
Caesar Inspired: Mix grated Parmesan and a touch of anchovy paste into the creamy sauce. Add romaine lettuce and more Parmesan shavings to the filling.
BBQ Twist: Brush the chicken with your favorite BBQ sauce during the last minute of cooking. Add coleslaw to the filling for crunch and tanginess that complements the sweet BBQ notes.
Make-Ahead and Storage Tips
These chicken wraps are ideal for meal prep and planning ahead. Here are some tips to make the most of this recipe:
Prep Components Separately: Cook and slice the chicken, prepare the cheesy garlic butter, and mix the creamy sauce up to two days ahead. Store each component separately in airtight containers in the refrigerator. When ready to serve, gently reheat the chicken and cheese sauce before assembling.
Fully Assembled Storage: If you’ve already assembled the wraps, wrap each one tightly in parchment paper or aluminum foil. They’ll keep in the refrigerator for up to 24 hours. The flavors actually continue to develop, making them perfect for packed lunches.
Freezing Option: While fresh is always best, you can freeze these wraps for future meals. Wrap each assembled wrap (before toasting) tightly in plastic wrap, then aluminum foil. Freeze for up to 1 month. Thaw overnight in the refrigerator, then unwrap and toast in a skillet until heated through and crisp on the outside.
Reheating Tips: To reheat fully assembled wraps, warm them in a skillet over medium-low heat for about 2 minutes per side. This method crisps the exterior while gently warming the filling without making the tortilla tough. Alternatively, wrap loosely in foil and heat in a 350°F oven for about 10 minutes.

Serving Suggestions for a Complete Meal
These chicken wraps are satisfying on their own, but to round out the meal consider these complementary sides:
Fresh Green Salad: A simple green salad with a light vinaigrette balances the richness of the wraps and adds freshness to the plate. Consider arugula or mixed greens with a lemon vinaigrette for brightness.
Sweet Potato Fries: The subtle sweetness of sweet potato fries pairs beautifully with the savory, garlicky flavors of the wraps. For a healthier option, try baked sweet potato wedges seasoned with a pinch of cumin.
Roasted Vegetables: A tray of roasted seasonal vegetables makes for a nutritious and colorful side. Try bell peppers, zucchini, and cherry tomatoes roasted with olive oil, salt, and herbs.
Soup Pairing: A light tomato soup or broth-based vegetable soup complements these wraps beautifully, especially during colder months.
Pickle Assortment: A small plate of various pickled vegetables (cucumber pickles, pickled red onions, giardiniera) provides palate-cleansing acidity between bites of the rich wrap.
Nutritional Benefits of Chicken Wraps
Despite their indulgent flavor profile, these chicken wraps can be part of a balanced diet. Here’s a breakdown of their nutritional highlights:
Protein-Packed: The chicken breast provides lean, complete protein that helps build and maintain muscle mass while keeping you satisfied longer.
Calcium Source: Thanks to the cheese content, these wraps deliver a good dose of calcium, essential for bone health and various cellular functions.
Balanced Macronutrients: With protein from the chicken, carbohydrates from the tortilla, and healthy fats from the cheese and sauces, these wraps provide a balanced macronutrient profile that delivers sustained energy.
Customizable Nutrition: By adding optional vegetables like lettuce, tomatoes, or avocado, you can increase the fiber, vitamin, and mineral content to suit your dietary needs.
For those looking to reduce calories or fat, consider these modifications:
- Use reduced-fat cheese varieties (though they won’t melt quite as well)
- Substitute Greek yogurt for some or all of the mayonnaise in the creamy sauce
- Opt for smaller tortillas or lettuce wraps for a lower-carb option
- Increase the vegetable components for more volume with fewer calories
Why These Chicken Wraps Stand Out
What makes these chicken wraps truly special is the thoughtful layering of flavors and textures. Unlike basic wraps that might rely solely on a single sauce or cheese, these incorporate multiple flavor elements that work in harmony:
Depth of Flavor: The double hit of garlic (in both the chicken seasoning and the sauces) creates a flavor throughline that ties everything together.
Textural Contrast: The juicy chicken, gooey cheese sauce, creamy spread, and potentially crispy vegetables create a dynamic eating experience that keeps every bite interesting.
Balanced Flavor Profile: The combination of savory (garlic, cheese), tangy (lemon juice, sour cream), and potentially spicy elements (optional jalapeños) creates a well-rounded flavor that hits all the taste receptors.
For fans of handheld meals, you might also enjoy these Big Mac Wraps for another delicious wrap variation with a completely different flavor profile.
Common Questions About Chicken Wraps
Can I use chicken thighs instead of breasts? Absolutely! Boneless, skinless chicken thighs will work beautifully in this recipe and often result in juicier meat. They typically require slightly longer cooking time (about 7-8 minutes per side) and will have a higher fat content.
What can I substitute for Monterey Jack cheese? Mozzarella makes an excellent substitute with similar melting properties. Pepper Jack can be used for a spicier version, while provolone would add a more distinctive flavor.
How can I make these gluten-free? Simply substitute your favorite gluten-free tortillas or wraps. Just be sure to check that your other ingredients, particularly the sour cream, are certified gluten-free as well.
Can I make these without mayonnaise? Yes! Greek yogurt can be substituted for both the mayonnaise and sour cream for a tangier, lighter sauce. Alternatively, mashed avocado mixed with a bit of lemon juice makes a creamy, dairy-free alternative.
What’s the best way to pack these for lunch? Wrap tightly in parchment paper, then aluminum foil to maintain freshness and structure. If possible, keep them refrigerated until about 30 minutes before eating to allow them to come to room temperature for the best flavor.
For those interested in other portable, protein-rich meal options, you might want to try these Cottage Cheese Pizza Bowls for a different take on convenient comfort food.
Final Thoughts on Easy Cheesy Garlic Chicken Wraps
These Easy Cheesy Garlic Chicken Wraps represent the perfect intersection of convenience, flavor, and satisfaction. They transform simple ingredients into a meal that feels special enough for a weekend dinner yet accessible enough for a Tuesday night rush. The combination of tender seasoned chicken, melty garlic-infused cheese, and bright, creamy sauce creates a flavor profile that appeals to both sophisticated palates and picky eaters alike.
What makes this recipe truly valuable is its adaptability. Once you master the basic technique, you can customize endlessly according to your family’s preferences, available ingredients, or dietary needs. The wraps can be as simple or as elaborate as you like – add more vegetables for nutrition, vary the seasonings for different flavor profiles, or experiment with different cheeses and sauces.
Whether you’re serving these as a family dinner, packing them for lunch, or bringing them to a picnic, these chicken wraps deliver big flavor in a convenient package. They embody the idea that homemade food doesn’t have to be complicated to be delicious – sometimes the simplest combinations, executed thoughtfully, create the most satisfying meals.
So next time you’re wondering what to do with those chicken breasts in your refrigerator, remember this recipe. With just a few additional ingredients, you can transform them into a meal that will have everyone at the table asking for seconds – and the recipe.
Print
Cheesy Garlic Chicken Wraps: 15 Amazing Secrets for Ultimate Flavor
- Total Time: 30 minutes
- Yield: 4 wraps (serves 4) 1x
Description
These Easy Cheesy Garlic Chicken Wraps combine juicy seasoned chicken with a garlicky cheese sauce and creamy spread, all wrapped in a toasted tortilla. The perfect balance of flavors and textures makes this 30-minute meal an absolute family favorite that’s as good for weeknight dinners as it is for packed lunches!
Ingredients
- 1½ pounds boneless, skinless chicken breast (about 3 medium breasts)
- 1 tablespoon olive oil
- 1 teaspoon kosher salt
- ½ teaspoon freshly ground black pepper
- 1 teaspoon garlic powder
- 1 teaspoon onion powder
- 4 large flour tortillas (10-inch)
- 1 cup shredded Monterey Jack cheese
- 1 cup shredded sharp cheddar cheese
- 2 tablespoons butter
- 4 cloves garlic, minced
- ½ cup mayonnaise
- 2 tablespoons sour cream
- 1 tablespoon fresh lemon juice
- 1 tablespoon chopped fresh parsley (plus extra for garnish)
- Optional: shredded lettuce, sliced tomatoes, pickled jalapeños
Instructions
- Trim any excess fat from chicken breasts. Rub with olive oil, then season evenly with salt, pepper, garlic powder, and onion powder.
- Heat a large skillet over medium-high heat. Cook chicken for 5-6 minutes per side until internal temperature reaches 165°F. Remove to a cutting board, tent with foil, and rest for 5 minutes.
- Reduce heat to medium and add butter to the same skillet. Once melted, add minced garlic and sauté until fragrant, about 1 minute.
- Add Monterey Jack and cheddar cheeses, stirring constantly until completely melted and smooth, about 2-3 minutes.
- In a small bowl, combine mayonnaise, sour cream, lemon juice, chopped parsley, and a pinch of salt. Mix until smooth.
- Warm tortillas in a dry skillet or microwave for 10 seconds until pliable.
- Spread 2 tablespoons of the creamy garlic sauce down the center of each tortilla.
- Slice rested chicken into ½-inch strips and divide evenly among tortillas.
- Spoon the cheesy garlic butter sauce over the chicken.
- Add optional toppings if desired.
- Fold the sides of each tortilla in, then roll from bottom to top to create a secure wrap.
- Optional: Return assembled wraps to the skillet and toast for 1 minute per side until golden and crisp.
- Slice each wrap diagonally and garnish with additional fresh parsley.
Notes
- For the best melty cheese sauce, grate your own cheese from a block rather than using pre-shredded, which contains anti-caking agents.
- Don’t skip the resting time for the chicken—it ensures the meat stays juicy when sliced.
- Warming the tortillas before filling is crucial—cold tortillas will crack when rolled.
- These wraps can be made ahead and refrigerated for up to 24 hours—the flavors actually develop and improve over time!
- For a lighter version, substitute Greek yogurt for the mayonnaise and sour cream.
- Prep Time: 10 minutes
- Cook Time: 20 minutes
- Category: Main Dish
- Method: Stovetop
- Cuisine: American/Fusion
Nutrition
- Serving Size: 1 wrap
- Calories: 695
- Sugar: 3g
- Sodium: 1120mg
- Fat: 42g
- Saturated Fat: 18g
- Unsaturated Fat: 22g
- Trans Fat: 0g
- Carbohydrates: 28g
- Fiber: 2g
- Protein: 47g
- Cholesterol: 175mg


1 thought on “Cheesy Garlic Chicken Wraps: 15 Amazing Secrets for Ultimate Flavor”