There’s something magical about the holidays that brings out the baker in all of us. From traditional sugar cookies to gingerbread houses, festive treats fill our homes with irresistible aromas and sweet memories. Among these beloved holiday confections, Christmas Peanut Butter Balls stand out as a perfect blend of simplicity and decadence. These bite-sized delights combine creamy peanut butter with sweet powdered sugar, all wrapped in a smooth white chocolate coating and dressed up with festive sprinkles. Whether you call them peanut butter balls, buckeyes, or peanut butter truffles, these no-bake treats are guaranteed to be the star of your holiday dessert table.
Why You’ll Fall in Love with Christmas Peanut Butter Balls
Christmas Peanut Butter Balls are more than just a sweet treat – they’re a holiday tradition that brings people together. Their irresistible combination of rich peanut butter and smooth white chocolate creates a perfect balance of flavors that appeals to both kids and adults alike. These festive treats require no baking, making them an ideal project for busy holiday schedules or for getting the little ones involved in kitchen festivities.
What makes Christmas Peanut Butter Balls truly special is their versatility. They can be prepared well in advance and stored until your holiday gathering, making them perfect for those who like to plan ahead. Their eye-catching appearance, adorned with red and green sprinkles, adds a pop of color to any dessert spread. Plus, they make wonderful homemade gifts – just package them in a decorative tin or clear cellophane bag tied with a festive ribbon, and you have a personal, delicious present that anyone would be thrilled to receive.
The best part? Despite their impressive appearance, these Christmas Peanut Butter Balls are surprisingly simple to make, requiring just a handful of ingredients and no special equipment. It’s a recipe that’s been passed down through generations for good reason – it never fails to delight!
The Perfect Ingredients for Christmas Peanut Butter Balls
Creating the perfect Christmas Peanut Butter Balls starts with selecting quality ingredients. Each component plays a crucial role in achieving that classic taste and texture that makes these treats so irresistible.
Peanut Butter Selection
The foundation of any great peanut butter ball is, of course, the peanut butter itself. For this recipe, creamy peanut butter works best, creating a smooth, uniform texture throughout. While natural peanut butter offers health benefits, traditional creamy varieties like Jif or Skippy tend to yield more consistent results due to their stabilizers. The peanut butter should be at room temperature for easier mixing – simply leave it out for about 30 minutes before you begin.
The Perfect Sweetener
Powdered sugar (also called confectioners’ sugar) does more than just add sweetness to your Christmas Peanut Butter Balls. Its fine texture dissolves easily into the peanut butter mixture, and it contains a small amount of cornstarch that helps bind the ingredients together. This is what gives the balls their firm yet tender consistency. Make sure to sift your powdered sugar if it has lumps, as this will ensure a smooth texture in the final product.
Butter Matters
Unsalted butter allows you to control the salt content of your treats. The butter should be properly softened (but not melted) to cream easily with the peanut butter. This creates that melt-in-your-mouth texture that makes Christmas Peanut Butter Balls so addictive. If you’ve forgotten to soften your butter, you can cut it into small cubes to speed up the process, but avoid microwaving it as this can lead to partial melting.
Chocolate Coating Options
While this recipe calls for white chocolate to create that snowy holiday look, you have several options. High-quality white chocolate chips, baking bars, or candy melts all work well. Candy melts are specifically designed for coating and often set more quickly, but white chocolate offers a richer flavor. Whichever you choose, proper melting is key – gentle heat and frequent stirring will prevent the chocolate from seizing or becoming grainy.
Festive Decorations
The holiday spirit comes alive with decorative touches. Red and green sanding sugar offers a sparkly finish, while holiday-themed sprinkles can add playful shapes and colors. For a more elegant look, you might consider pearlized sugar or even a light dusting of edible gold or silver luster dust. These final touches transform simple Christmas Peanut Butter Balls into festive works of art.

Essential Tools for Perfect Peanut Butter Balls
Creating picture-perfect Christmas Peanut Butter Balls is easier with the right tools at hand. While this recipe doesn’t require specialized equipment, having these basics will streamline your process:
- Stand mixer or hand mixer: While you can mix by hand, an electric mixer makes combining the butter and peanut butter effortless.
- Measuring cups and spoons: Precision matters, especially with the powdered sugar.
- Cookie scoop: A 1-tablespoon scoop ensures uniform sizes for even coating and a professional appearance.
- Parchment paper: Essential for preventing sticking during chilling and setting.
- Baking sheets: Two standard sheets provide ample space for all your balls.
- Dipping tools: Two forks work well, but specialized chocolate dipping tools can make the process neater.
- Cooling rack: Optional but helpful for excess chocolate to drip off after dipping.
Having everything prepared and organized before you begin will make the process of creating your Christmas Peanut Butter Balls much more enjoyable.
Step-by-Step: Creating Perfect Christmas Peanut Butter Balls
Now let’s break down the process of making these delightful Christmas Peanut Butter Balls into manageable steps. Follow these instructions carefully for treats that look as good as they taste.
Preparing Your Work Area
Before diving in, set yourself up for success by organizing your workspace. Line two baking sheets with parchment paper – this prevents sticking and makes cleanup easier. Set aside a small bowl with extra powdered sugar for rolling the balls if they become sticky during handling. Having everything within reach will make the process smoother and more enjoyable.
Creating the Perfect Peanut Butter Mixture
In a large bowl, combine the room-temperature peanut butter and softened butter. Mix until the consistency is smooth and uniform – this should take about 2 minutes with an electric mixer on medium speed or 3-4 minutes by hand. The mixture should be light and fluffy, with no streaks of butter visible. At this point, add the vanilla extract and salt, mixing until well incorporated. The vanilla adds depth of flavor, while the salt enhances the peanut butter taste and balances the sweetness.
Incorporating the Powdered Sugar
This step requires patience and attention. Add the powdered sugar one cup at a time, mixing thoroughly after each addition. Starting with smaller amounts prevents a powdery explosion and allows you to achieve the right consistency gradually. As you add more sugar, the mixture will become increasingly stiff. The perfect dough for Christmas Peanut Butter Balls should hold its shape when rolled but still feel slightly soft – similar to play dough. If your mixture seems too sticky, add additional powdered sugar, a tablespoon at a time. Conversely, if it feels too dry or crumbly, add a teaspoon of milk to soften it slightly.
Shaping Your Peanut Butter Balls
Using a 1-tablespoon cookie scoop or measuring spoon, portion the dough evenly. Roll each portion between your palms to form smooth, round balls. Apply gentle, even pressure – pressing too hard can cause the balls to crack or become misshapen. Place the formed balls on your prepared baking sheets, spacing them about an inch apart to prevent them from sticking together. This recipe should yield approximately 36-40 Christmas Peanut Butter Balls, depending on their exact size.
The Critical Chilling Phase
Don’t skip this crucial step! Place your trays of peanut butter balls in the refrigerator for at least 30 minutes, though an hour is ideal. Chilling serves two important purposes: it firms up the balls so they hold their shape during dipping, and it helps the chocolate coating set more quickly. If you’re in a time crunch, you can place them in the freezer for 15 minutes instead, but don’t freeze them solid as this can cause the chocolate coating to crack as they warm up again.
Dipping and Decorating: Where the Magic Happens
The coating and decorating process is where your Christmas Peanut Butter Balls truly transform into festive holiday treats. This stage requires some attention to detail, but the beautiful results are well worth the effort.
Melting the White Chocolate
Proper chocolate melting is crucial for a smooth, glossy coating. You can use a double boiler (a heat-proof bowl set over a pot of simmering water) or the microwave. If using the microwave, heat in 30-second intervals at 50% power, stirring thoroughly between each burst. Stop heating when most of the chocolate is melted, and stir until completely smooth – residual heat will melt the remaining pieces. Adding a teaspoon of coconut oil or shortening to the white chocolate can help achieve a thinner consistency that’s easier for dipping.
The Perfect Dipping Technique
Remove only a few Christmas Peanut Butter Balls from the refrigerator at a time, as they’re easier to dip when chilled. Drop one ball into the melted chocolate, then use two forks to roll it until completely coated. Lift the ball out with one fork, allowing excess chocolate to drip off. Gently slide the ball off the fork onto the parchment-lined tray. If the chocolate begins to thicken during the dipping process, reheat it briefly to maintain the proper consistency.
Adding Festive Decorations
Timing is essential here – sprinkle the decorations immediately after dipping each ball, before the chocolate has a chance to set. Hold your hand high above the Christmas Peanut Butter Balls when sprinkling to ensure even distribution. Alternating between red and green sanding sugar creates a nice variety, or you can use holiday-themed sprinkle mixes for added interest. For a more elegant presentation, consider drizzling contrasting chocolate (dark or colored) over the white coating in fine lines.
Setting Your Masterpieces
Allow your decorated Christmas Peanut Butter Balls to set completely before moving them. At room temperature, this takes approximately 20 minutes, depending on the ambient temperature. For faster setting, you can return them to the refrigerator for about 10 minutes. Once set, they should have a smooth, firm coating that doesn’t stick to your fingers when touched lightly.

Troubleshooting Common Issues with Christmas Peanut Butter Balls
Even experienced bakers occasionally encounter challenges when making Christmas Peanut Butter Balls. Here are solutions to common problems:
Too Sticky or Too Dry
Finding the perfect consistency can be tricky. If your mixture is too sticky to roll, gradually add more powdered sugar until it reaches a workable consistency. Conversely, if the mixture seems too dry or crumbly, add a teaspoon of milk at a time until it comes together. Remember that humidity and the exact brand of peanut butter can affect your dough consistency.
Chocolate Coating Problems
If your white chocolate seizes (becomes grainy or stiff), it’s likely due to overheating or moisture contamination. In this case, it’s best to start over with fresh chocolate. If the coating is too thick, add a small amount of shortening or coconut oil. If the chocolate sets before you can add sprinkles, brush the tops lightly with a clean finger dipped in a tiny bit of coconut oil before applying decorations.
Misshapen Balls After Dipping
If your Christmas Peanut Butter Balls lose their round shape during dipping, they may not have been chilled enough. Return them to the refrigerator for additional chilling before continuing. Also, make sure your chocolate isn’t too hot, as this can cause the peanut butter centers to soften and misshape.
Storage and Make-Ahead Tips for Christmas Peanut Butter Balls
One of the greatest advantages of Christmas Peanut Butter Balls is their make-ahead potential. Here’s how to store them for maximum freshness:
Short-Term Storage
Once completely set, store your peanut butter balls in an airtight container in the refrigerator, where they’ll keep fresh for up to two weeks. Place them in single layers with parchment paper between layers to prevent sticking or damage to the decorations. Allow them to sit at room temperature for about 10 minutes before serving for the best flavor and texture.
Freezing for Longer Storage
Christmas Peanut Butter Balls freeze beautifully, making them perfect for advance holiday preparation. Place fully set balls in an airtight container with parchment paper between layers and freeze for up to three months. Thaw overnight in the refrigerator before serving. The quality and appearance remain excellent even after freezing, though some sprinkles may lose a bit of their vibrancy.
Gift-Giving Considerations
If packaging Christmas Peanut Butter Balls as gifts, wait until they’re completely set before arranging them in gift boxes or bags. For best results, place them in mini cupcake liners to prevent sticking and protect the decorations. If shipping, choose expedited shipping methods and alert recipients to refrigerate upon arrival.
Creative Variations on Classic Christmas Peanut Butter Balls
While traditional Christmas Peanut Butter Balls are irresistible, consider these festive variations to expand your holiday treat repertoire:
Chocolate Coating Alternatives
- Dark or milk chocolate coating: For a classic buckeye look, dip only partially in chocolate, leaving some peanut butter visible on top
- Colored candy melts: Use red or green candy melts instead of white chocolate for vibrant options
- Marbled effect: Swirl together white and colored chocolate for a stunning visual effect
Flavor Enhancements
- Crunchy center: Add 1/2 cup of crisp rice cereal to the peanut butter mixture for textural contrast
- Chocolate-peanut butter: Mix 1/4 cup cocoa powder into the peanut butter base
- Holiday spice: Add 1/4 teaspoon cinnamon or a pinch of nutmeg to the peanut butter mixture
Decorative Ideas
- Drizzled designs: After the base coating sets, drizzle with contrasting chocolate in zigzags or swirls
- Painted details: Use food-safe paint brushes to apply edible gold or silver luster dust for a touch of elegance
- Themed shapes: Shape the peanut butter mixture into bells, stars, or trees before chilling and dipping

Nutritional Information and Dietary Adaptations
While Christmas Peanut Butter Balls are undeniably an indulgent treat, it’s helpful to understand their nutritional profile. Each ball contains approximately 120-150 calories, 7-9 grams of fat, 15 grams of carbohydrates, and 3 grams of protein. The good news is that peanut butter provides heart-healthy monounsaturated fats and protein.
For those with dietary restrictions, consider these adaptations:
Gluten-Free Option
Good news! This recipe for Christmas Peanut Butter Balls is naturally gluten-free, as long as you verify that all ingredients, particularly the vanilla extract and chocolate coating, are certified gluten-free. Always check labels, as manufacturing processes can change.
Dairy-Free Adaptation
Replace the butter with solid coconut oil (same amount) and use dairy-free white chocolate or candy melts for coating. Several brands now offer vegan white chocolate alternatives that melt and set well.
Reduced Sugar Version
While powdered sugar is essential for the structure, you can reduce the quantity to 3 or 3 1/2 cups for a less sweet version. Consider using a natural peanut butter without added sugar to further reduce the sweetness.
Frequently Asked Questions About Christmas Peanut Butter Balls
Based on common queries about making Christmas Peanut Butter Balls, here are answers to the questions home bakers ask most frequently:
Can I use crunchy peanut butter instead of smooth?
Yes, but expect a different texture in the final product. If you enjoy the added crunch, go for it! You may need to add a touch more powdered sugar to achieve the right consistency for rolling.
Why do my peanut butter balls crack when I dip them?
This usually happens when the balls are too cold when dipped, or if the chocolate is too hot. Allow the chilled balls to sit at room temperature for about 5 minutes before dipping, and make sure your chocolate is melted but not hot.
How can I prevent the chocolate from getting too thick during dipping?
Working with a double boiler can help maintain the right temperature. Alternatively, divide the melted chocolate into smaller portions and reheat as needed. Adding a small amount of shortening or coconut oil to the chocolate helps maintain fluidity.
Can I make these with almond butter or another nut butter?
Absolutely! Almond, cashew, or sunflower seed butter can all work in this recipe. Each will impart its own unique flavor. You may need to adjust the amount of powdered sugar slightly, as the consistency of different nut butters varies.
How do I know if my peanut butter ball mixture has the right consistency?
The perfect consistency should be similar to play dough – pliable enough to roll into smooth balls without sticking to your hands, but not so dry that it crumbles. It should hold its shape when rolled.
More Related Recipes You Might Enjoy
If you love these Christmas Peanut Butter Balls, you’ll want to try these other festive holiday treats:
- Christmas Maraschino Cherry Shortbread – These buttery shortbread cookies are studded with bright red maraschino cherries for a festive holiday appearance that pairs beautifully with peanut butter balls on your dessert tray.
- Holiday Cranberry Meatballs – Looking for a savory option to balance out your sweet treats? These tangy-sweet meatballs make the perfect appetizer for your holiday gathering.
- Easy Potato Latkes – Celebrate the season of light with these crispy potato pancakes that are perfect for Hanukkah celebrations or any winter gathering.
Why Christmas Peanut Butter Balls Become Family Traditions
There’s something special about holiday recipes that transcend generations, and Christmas Peanut Butter Balls have earned their place in many family recipe collections. Their simple ingredients and no-bake preparation make them accessible to bakers of all skill levels, while their festive appearance brings holiday cheer to any dessert table.
Many families have cherished memories of making these treats together – children rolling the peanut butter balls while adults handle the chocolate dipping, everyone taking turns with the sprinkles. These shared moments in the kitchen often become more valuable than the treats themselves, creating traditions that children carry into their own families years later.
The versatility of Christmas Peanut Butter Balls also contributes to their staying power. They can be elegant enough for formal holiday gatherings or simple enough for an after-school treat during the festive season. Their make-ahead convenience makes them a reliable standby during the busiest time of year, when having ready-made treats on hand is particularly helpful.
Whether you’re continuing a long-standing family tradition or starting a new one this year, these Christmas Peanut Butter Balls are sure to bring sweet joy to your holiday celebrations. Their irresistible combination of creamy peanut butter, smooth white chocolate, and festive decorations captures the spirit of the season in each bite-sized morsel.
So gather your ingredients, clear some space in your refrigerator, and prepare to create not just delicious treats, but lasting holiday memories with these beloved Christmas Peanut Butter Balls. Happy baking – and happy holidays!
Christmas Peanut Butter Balls
Prep Time: 45 minutes
Chill Time: 30 minutes
Total Time: 1 hour 15 minutes
Yield: Approximately 36-40 balls
Ingredients:
- 1 ½ cups creamy peanut butter (room temperature)
- 4 cups powdered sugar (plus extra for rolling)
- 4 tablespoons unsalted butter (softened)
- 1 teaspoon pure vanilla extract
- ½ teaspoon kosher salt
- 12 oz white chocolate or candy melts, melted
- Red and green sanding sugar or festive sprinkles
Instructions:
- Prep Your Station: Line two baking sheets with parchment paper. Set aside a small bowl of extra powdered sugar for rolling later.
- Mix the Magic: In a large bowl, cream together the softened butter and peanut butter until smooth and fluffy—think light, like a snowdrift! Stir in the vanilla and salt.
- Sweeten the Deal: Gradually fold in the powdered sugar, one cup at a time, mixing until a stiff dough forms. If it’s too sticky, add a touch more powdered sugar; if too dry, a teaspoon of milk will do the trick.
- Roll ‘Em Out: Using a small cookie scoop or tablespoon, portion out dough and roll into 1-inch balls. Place on the prepared baking sheets, spacing them about 1 inch apart.
- Chill Time: Slide your trays into the fridge for at least 30 minutes—this helps the balls hold their shape when dunked in chocolate.
- Dip in White: Once chilled, dip each peanut butter ball into the melted white chocolate, letting excess drip off. Return them to the parchment-lined trays.
- Festive Finish: While the chocolate’s still wet, sprinkle on your red and green sanding sugar or festive sprinkles. This is where the holiday magic happens!
- Set & Serve: Let the peanut butter balls sit at room temperature until the chocolate sets—about 15–20 minutes. For a quicker set, pop them back in the fridge for 10 minutes.
Enjoy your homemade Christmas Peanut Butter Balls!
Print
Christmas Peanut Butter Balls: Ultimate Holiday Guide
- Total Time: 45 minutes
- Yield: 36–40 balls 1x
- Diet: Gluten Free
Description
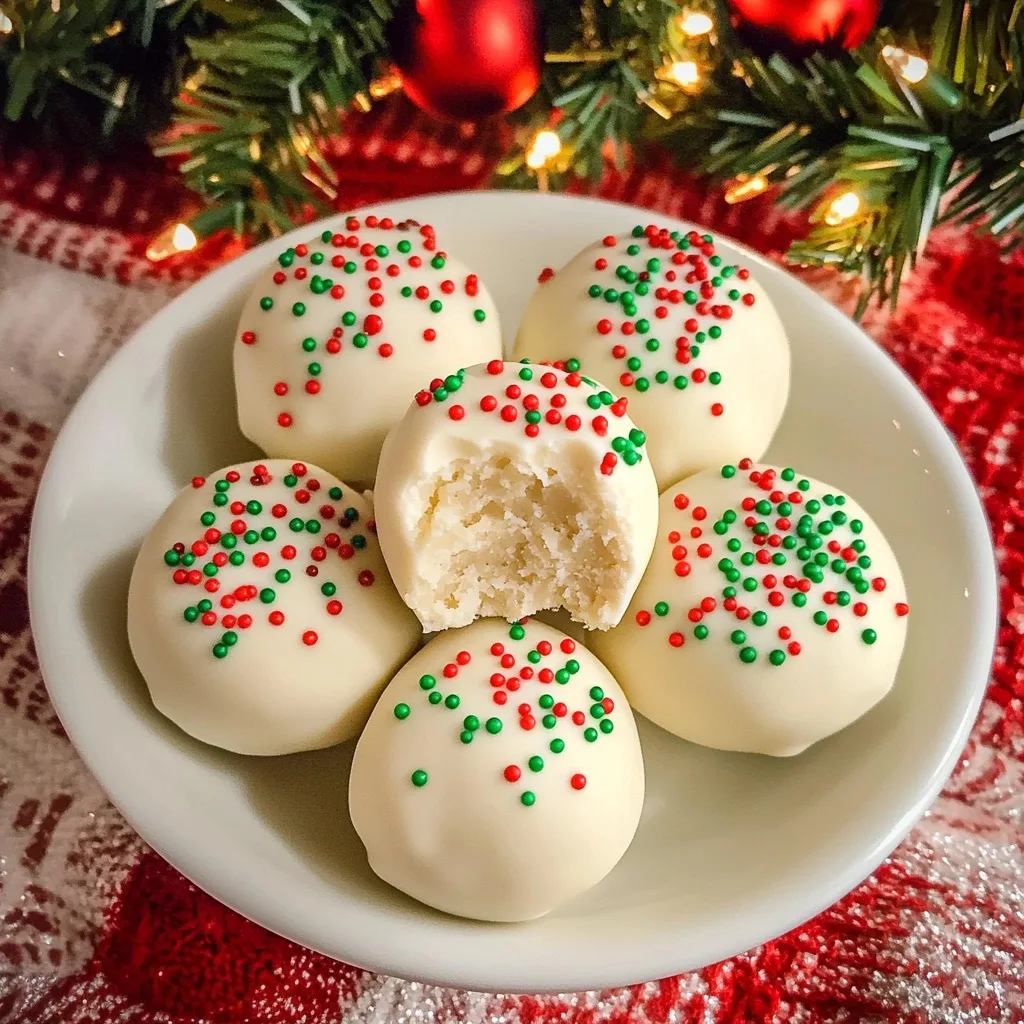
Bite-sized, no-bake holiday treats featuring creamy peanut butter rolled in powdered sugar, dipped in white chocolate, and finished with festive sprinkles.
Ingredients
4 cups powdered sugar (plus extra for rolling)
4 tablespoons unsalted butter (softened)
1 teaspoon pure vanilla extract
½ teaspoon kosher salt
12 oz white chocolate or candy melts, melted
-
Red and green sanding sugar or festive sprinkles
1½ cups creamy peanut butter (room temperature)
Instructions
Prep your station: Line two baking sheets with parchment paper.
Make the dough: In a large bowl, beat peanut butter and butter until smooth. Stir in vanilla and salt.
Add sugar: Gradually mix in powdered sugar, one cup at a time, until a firm, pliable dough forms.
Shape balls: Scoop 1-tbsp portions and roll into 1″ balls. Place on prepared sheets.
Chill: Refrigerate at least 30 minutes (or freeze 15 minutes).
Dip in chocolate: Melt white chocolate gently. Dip chilled balls, letting excess drip off.
Decorate: Immediately sprinkle with red/green sugars.
Set: Let set at room temperature (20 min) or refrigerate (10 min).
Notes
Consistency fix: If dough is too sticky, add extra powdered sugar; if too dry, add a splash of milk.
Chocolate tip: Stir in 1 tsp coconut oil for smoother coating.
Make-ahead: Store in fridge up to 2 weeks or freeze up to 3 months.
- Prep Time: 45 minutes
- Cook Time: 0 minutes (no-bake)
- Category: Dessert / Candy
- Method: No-Bake / Dipping
- Cuisine: American
Nutrition
- Serving Size: 1 ball
- Calories: 130
- Sugar: 12 g
- Sodium: 50 mg
- Fat: 8 g
- Saturated Fat: 3 g
- Unsaturated Fat: 5 g
- Trans Fat: 0 g
- Carbohydrates: 14 g
- Fiber: 1 g
- Protein: 3 g
- Cholesterol: 8 mg