There’s something absolutely magical about the sizzle of classic potato latkes hitting hot oil, filling your kitchen with that irresistible aroma of golden, crispy perfection. These traditional Jewish potato pancakes have been bringing families together around dinner tables for generations, and honestly, once you’ve mastered this recipe, you’ll understand why they’ve stood the test of time.
Classic potato latkes aren’t just a Hanukkah tradition—they’re comfort food at its finest. Moreover, they’re surprisingly versatile, working beautifully as a side dish, appetizer, or even the star of a hearty breakfast. The combination of perfectly seasoned grated potatoes, crispy edges, and tender centers creates a texture that’s simply addictive.
What makes these classic potato latkes truly special is their incredible simplicity. With just a handful of everyday ingredients, you can create something that tastes like it took hours of preparation. Furthermore, the technique is straightforward enough for beginners yet rewarding enough to keep experienced cooks coming back for more.
The Rich History Behind Classic Potato Latkes
Understanding the history behind classic potato latkes makes every bite more meaningful. These crispy treasures originated in Eastern European Jewish communities, where resourceful cooks needed to create satisfying meals from humble ingredients. Originally, latkes were made from cheese during Hanukkah, but when potatoes arrived in Europe in the 16th century, they quickly became the star ingredient.
The tradition of eating classic potato latkes during Hanukkah connects to the miracle of oil that burned for eight days in the ancient Temple. Consequently, foods fried in oil became symbolic of this celebration, making latkes an essential part of the holiday feast. Today, families worldwide continue this beautiful tradition, passing down their special recipes through generations.
Interestingly, different regions developed their own variations of classic potato latkes. Some families add grated apple for sweetness, while others incorporate herbs or different vegetables. However, the fundamental technique of grating, seasoning, and frying remains beautifully consistent across cultures.
Essential Ingredients for Perfect Classic Potato Latkes
The Potato Foundation
The secret to exceptional classic potato latkes starts with choosing the right potatoes. Russet potatoes are absolutely essential for achieving that perfect texture—their high starch content creates the ideal crispy exterior while maintaining a fluffy interior. Additionally, their lower moisture content means less water to squeeze out during preparation.
When selecting potatoes for your classic potato latkes, look for firm, unblemished russets with no green spots or sprouted eyes. The size doesn’t matter tremendously, but medium to large potatoes are easier to grate and work with. Moreover, storing potatoes in a cool, dark place helps maintain their quality.
Preparation Timing: For the best classic potato latkes, grate your potatoes just before cooking. Once exposed to air, potatoes begin oxidizing and turning brown, which can affect both flavor and appearance. However, if you must prep ahead, store grated potatoes in cold water with a splash of lemon juice.
The Supporting Cast
Yellow Onions: The mild sweetness of yellow onions complements the earthy potato flavor perfectly. When grated, onions release moisture and natural sugars that contribute to browning and overall flavor development. Furthermore, the onion adds aromatic depth that elevates these classic potato latkes beyond simple potato pancakes.
Eggs: Acting as both binder and enrichment, eggs help hold the grated ingredients together while adding richness. Additionally, the proteins in eggs contribute to the golden color and help create structure during frying.
Flour vs. Matzo Meal: Traditional classic potato latkes often use matzo meal, which adds subtle flavor and helps absorb excess moisture. However, all-purpose flour works equally well and is more readily available. Both ingredients serve the same purpose—binding the mixture and creating better texture.
Secret Ingredients for Superior Results
Baking Powder: This often-overlooked ingredient makes a significant difference in classic potato latkes. The slight lift it provides creates a lighter, crispier texture that’s absolutely irresistible. Moreover, it helps prevent dense, heavy latkes that can sometimes result from overworking the mixture.
Proper Seasoning: Salt and pepper might seem basic, but they’re crucial for bringing out the natural potato flavors. Additionally, seasoning the mixture before cooking ensures even distribution throughout each classic potato latke.

The Critical Technique: Removing Moisture
The difference between soggy, disappointing latkes and crispy, restaurant-quality classic potato latkes lies entirely in moisture removal. This step cannot be overlooked or rushed—it’s absolutely fundamental to success.
After grating potatoes and onions, immediately transfer them to a clean kitchen towel. Gather the towel corners and twist tightly, creating a pouch. Then, squeeze with all your strength over the sink. You’ll be amazed at how much liquid comes out. This process removes excess starch and water that would otherwise create steam during frying, preventing proper crisping.
Professional Tip: After the initial squeeze, let the mixture sit for 5 minutes, then squeeze again. This second extraction often yields surprising amounts of additional moisture. Some cooks even use a potato ricer for this step, though the towel method works perfectly well.
Visual Cues: Properly squeezed potato mixture should feel significantly drier and more compact. The color might appear slightly darker, and the mixture should hold together when squeezed gently. If liquid continues dripping after squeezing, give it another round.
Step-by-Step Instructions for Perfect Classic Potato Latkes
Preparation Phase
Begin by setting up your workspace efficiently. Have your grater, clean kitchen towels, mixing bowl, and all ingredients within easy reach. This organization becomes crucial once you start the frying process, as timing matters significantly for achieving perfect classic potato latkes.
Peel your potatoes and immediately place them in cold water to prevent browning. When ready to grate, work quickly and purposefully. Use the large holes of a box grater for the ideal texture—not so fine that the potatoes become mushy, but not so coarse that they don’t bind properly.
Grating Technique: Hold the grater at a slight angle for easier, more efficient grating. Work systematically through each potato, rotating to avoid the tough core area. For the onion, grate directly into the same bowl as the potatoes to save time and cleanup.
The Critical Moisture Removal
Transfer the grated potato-onion mixture to your clean kitchen towel immediately. This timing is crucial—the longer the mixture sits exposed to air, the more it will oxidize and potentially become bitter. Gather the towel tightly and begin the squeezing process described earlier.
After thorough squeezing, transfer the mixture to a large mixing bowl. The consistency should be noticeably drier and more compact than when you started. This transformed texture is your foundation for exceptional classic potato latkes.
Mixing and Seasoning
Crack the eggs directly into the bowl with the squeezed potato mixture. Add flour (or matzo meal), salt, pepper, and baking powder all at once. Using a fork or your hands, mix everything together until just combined. Overmixing can develop the flour’s gluten, resulting in tough classic potato latkes.
Consistency Check: The mixture should hold together when gently squeezed but not be overly wet or sticky. If it seems too dry, add one additional egg. If too wet, incorporate a tablespoon more flour. The perfect mixture will form cohesive patties that don’t fall apart during frying.
The Frying Process
Heat your oil to the proper temperature—this is absolutely crucial for perfect classic potato latkes. The oil should be about ¼ inch deep in a heavy-bottomed pan or cast iron skillet. Test the temperature by dropping in a small piece of the mixture; it should sizzle immediately and vigorously.
Temperature Management: Medium-high heat typically works best, but every stove is different. The goal is oil hot enough to create immediate sizzling but not so hot that the outside burns before the inside cooks. Adjust heat as needed throughout the cooking process.
Form each classic potato latke using a heaping tablespoon of mixture. Gently drop into the hot oil and immediately flatten with a spatula. Don’t press too hard—you want to create contact with the pan without compacting the mixture too much.
Timing and Flipping: Cook for 3-4 minutes on the first side until deep golden brown and crispy. The edges should look set and golden before flipping. Use a thin spatula for easier turning, and flip confidently in one smooth motion.
Expert Tips for Crispy Perfection
Oil Selection and Management
The type of oil significantly impacts your classic potato latkes. Vegetable oil, canola oil, or peanut oil work excellently due to their high smoke points and neutral flavors. Avoid olive oil, which has a lower smoke point and can impart unwanted flavors.
Oil Depth: Maintain consistent oil depth throughout cooking. As oil absorbs into the latkes, add more as needed. However, adding cold oil can lower the temperature, so have additional oil warming in a separate pan if cooking large batches.
Temperature Consistency: Oil temperature naturally fluctuates during cooking. Monitor carefully and adjust heat as needed. Too cool, and the classic potato latkes will absorb oil and become greasy. Too hot, and they’ll burn before cooking through.
Batch Cooking Strategy
Never overcrowd the pan—this is one of the most common mistakes when making classic potato latkes. Overcrowding lowers oil temperature and creates steam, preventing proper crisping. Cook in batches, allowing adequate space between each latke.
Keeping Warm: Place cooked classic potato latkes on a wire rack set over a baking sheet in a 200°F oven. This method keeps them warm while maintaining crispiness much better than paper towels alone.
Advanced Techniques
Double Frying Method: Some professional cooks partially fry classic potato latkes, drain them, then finish frying just before serving. This technique ensures maximum crispiness and allows for easier entertaining.
Texture Variations: For extra-crispy edges, spread the mixture slightly thinner. For fluffier centers, make them a bit thicker. Experiment to find your family’s preferred texture for these classic potato latkes.

Serving Suggestions and Traditional Accompaniments
Classic Pairings
Classic potato latkes shine brightest when paired with traditional accompaniments that complement their rich, crispy nature. Sour cream provides cool, tangy contrast that cuts through the oil and enhances the potato flavor. Meanwhile, applesauce offers sweet, fruity notes that create beautiful balance.
Serving Temperature: Always serve classic potato latkes immediately while they’re hot and crispy. The contrast between the crispy exterior and warm, fluffy interior is part of their magic. Cold latkes lose their textural appeal entirely.
Creative Serving Ideas
While traditional accompaniments are wonderful, classic potato latkes also work beautifully in modern applications. Top them with smoked salmon and crème fraîche for an elegant appetizer. Alternatively, serve alongside roasted meats as a sophisticated side dish.
Breakfast Applications: Classic potato latkes make an exceptional breakfast base. Top with fried eggs, crispy bacon, or fresh herbs for a hearty morning meal. The potato base provides satisfying substance that keeps you full for hours.
Sauce and Topping Variations
Beyond sour cream and applesauce, consider these creative toppings for your classic potato latkes: Greek yogurt with herbs, caramelized onions, or even a simple sprinkle of fresh chives. Each addition brings different flavor profiles while respecting the dish’s traditional roots.
Make-Ahead Strategies and Storage
Preparation Timeline
While classic potato latkes are best served immediately, smart preparation can make entertaining easier. Grate potatoes and store them in cold water up to 2 hours ahead. Have your mixing ingredients measured and ready. This preparation allows you to focus on cooking when guests arrive.
Batter Holding: The mixed batter for classic potato latkes should be used within 30 minutes for best results. Longer storage can result in excess liquid separation and compromised texture.
Reheating Methods
Leftover classic potato latkes can be successfully reheated, though they’ll never quite match fresh-fried quality. The oven method works best: place on a baking sheet and heat at 375°F for 5-8 minutes until crispy and heated through.
Microwave Caution: Avoid microwaving classic potato latkes as this makes them soggy and unappetizing. If you must use a microwave, place them on a microwave-safe rack to allow air circulation.
Troubleshooting Common Issues
Solving Texture Problems
Soggy Latkes: Usually caused by insufficient moisture removal or oil that’s too cool. Ensure thorough squeezing of grated ingredients and proper oil temperature before frying your classic potato latkes.
Falling Apart: Typically results from too much moisture or insufficient binding ingredients. Add an extra egg or tablespoon of flour to help hold the mixture together.
Uneven Browning: Often caused by inconsistent thickness or fluctuating oil temperature. Form classic potato latkes of uniform size and monitor heat carefully throughout cooking.
Preventing Common Mistakes
Oxidation: Grated potatoes brown quickly when exposed to air. Work efficiently and consider adding a splash of lemon juice to prevent discoloration in your classic potato latkes.
Oil Splatter: Too much moisture in the mixture or oil that’s too hot can cause dangerous splattering. Ensure proper moisture removal and controlled temperatures for safe cooking.

Nutritional Benefits and Dietary Considerations
Nutritional Profile
Classic potato latkes provide substantial carbohydrates for energy, along with potassium, vitamin C, and fiber from the potatoes. While they’re fried food, the homemade version allows you to control oil quality and quantity.
Portion Awareness: These classic potato latkes are calorie-dense due to the frying process. Typically, 2-3 latkes make an appropriate serving size when accompanied by other dishes.
Dietary Modifications
Gluten-Free Version: Substitute potato starch or gluten-free flour for regular flour to make classic potato latkes suitable for gluten-sensitive individuals. The texture remains excellent with these substitutions.
Lighter Preparation: For reduced oil consumption, try baking classic potato latkes on a preheated, oiled baking sheet at 425°F, flipping once during cooking. While different from traditional fried versions, they’re still delicious.
Creative Variations on Classic Potato Latkes
Vegetable Additions
While traditional classic potato latkes feature only potatoes and onions, creative additions can enhance flavor and nutrition. Grated carrots add sweetness and color, while zucchini contributes moisture and mild flavor. Sweet potatoes can replace some regular potatoes for interesting flavor variation.
Herb Enhancements: Fresh dill, chives, or parsley can be mixed into classic potato latkes for aromatic complexity. Use herbs sparingly—about 2 tablespoons fresh herbs per batch works well.
Seasonal Adaptations
Holiday Versions: During autumn, try adding grated apple to your classic potato latkes for seasonal sweetness. Winter versions might incorporate roasted garlic for warming flavor depth.
Spring Variations: Fresh green onions or chives add bright, oniony flavor perfect for spring celebrations. These lighter additions complement the traditional potato base beautifully.
More Related Recipes You Might Enjoy
If you’re loving these crispy classic potato latkes, you’ll definitely want to explore these other fantastic recipes that share similar comfort food appeal and crowd-pleasing qualities:
- Holiday Mocktail – The perfect festive beverage to serve alongside your latkes during holiday celebrations, offering refreshing balance to rich, fried foods
- Crunchy Buffalo Chicken Bacon Ranch Wraps – Another finger food favorite that delivers satisfying crunch and bold flavors, perfect for casual entertaining
- Cranberry Brie Bites – Elegant appetizers that pair beautifully with latkes for holiday parties, offering creamy richness and tart-sweet balance
Frequently Asked Questions
Can you make classic potato latkes ahead of time?
While classic potato latkes are best served immediately, you can prep components ahead. Grate potatoes and store in cold water for up to 2 hours. Mix the batter just before frying for optimal texture. Cooked latkes can be reheated in a 375°F oven for 5-8 minutes, though they won’t match the crispiness of fresh-fried versions.
Why do my classic potato latkes fall apart during cooking?
Falling apart usually indicates too much moisture in the mixture or insufficient binding ingredients. Ensure you’ve thoroughly squeezed the grated potatoes and onions to remove excess water. If the mixture still seems wet, add an extra egg or tablespoon of flour to help hold your classic potato latkes together during frying.
What’s the best oil temperature for frying classic potato latkes?
The ideal oil temperature is around 350°F, though most home cooks don’t use thermometers. Test by dropping a small piece of mixture into the oil—it should sizzle immediately and vigorously. If the oil is too cool, classic potato latkes will absorb oil and become greasy. Too hot, and they’ll burn before cooking through.
Can you freeze classic potato latkes?
Yes, classic potato latkes freeze well after cooking. Cool completely, then freeze in single layers on baking sheets before transferring to freezer bags. They’ll keep for up to 3 months. Reheat directly from frozen in a 375°F oven for 10-12 minutes until hot and crispy.
How do you keep classic potato latkes crispy?
The key to crispy classic potato latkes is removing moisture before cooking and maintaining proper oil temperature. After frying, drain briefly on paper towels, then transfer to a wire rack set over a baking sheet. Keep warm in a 200°F oven if serving later. Avoid covering them, as trapped steam will make them soggy.
Conclusion
Mastering classic potato latkes is one of those fundamental cooking skills that pays dividends for years to come. These crispy, golden treasures bring comfort and joy to any table, whether you’re celebrating Hanukkah traditions or simply craving satisfying comfort food.
The beauty of classic potato latkes lies in their perfect simplicity—humble ingredients transformed through proper technique into something truly special. Once you’ve experienced the satisfaction of creating perfectly crispy, golden latkes from scratch, you’ll understand why this recipe has remained beloved for generations.
Remember, practice makes perfect with classic potato latkes. Don’t be discouraged if your first batch isn’t restaurant-perfect. Each attempt teaches you more about oil temperature, moisture removal, and timing. Soon, you’ll be creating classic potato latkes that rival the best delicatessens.
So gather your ingredients, heat that oil, and get ready to fill your kitchen with the irresistible aroma of classic potato latkes. Your family and friends will be crowding around that skillet, just like the recipe promises, eager for their share of these crispy, comforting delights.
Print
Classic Potato Latkes: Ultimate Crispy Recipe Guide
- Total Time: 35 minutes
- Yield: 12–14 latkes (serves 4-6) 1x
- Diet: Vegetarian
Description
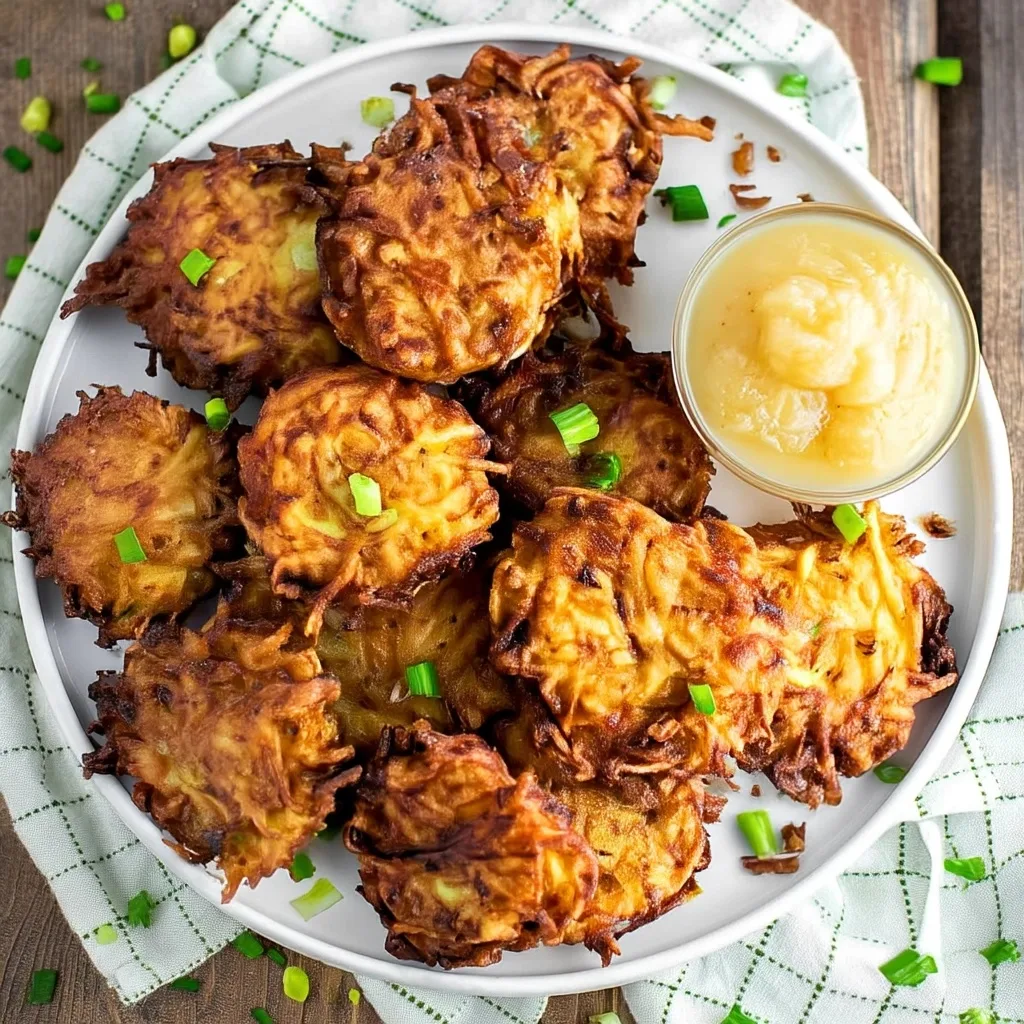
Traditional crispy potato latkes with golden-brown edges and fluffy centers. These classic Jewish potato pancakes are perfectly seasoned and fried to perfection, served with traditional applesauce and sour cream.
Ingredients
- 4 large russet potatoes, peeled and grated (about 4 cups packed)
- 1 medium yellow onion, grated
- 2 large eggs
- ¼ cup all-purpose flour (or matzo meal if you’re feelin’ traditional)
- 1 teaspoon salt
- ½ teaspoon black pepper
- ½ teaspoon baking powder (for a lil’ extra crisp)
- Vegetable oil, for frying
- Optional for serving: sour cream, applesauce, or both
Instructions
- Grate & Squeeze: Grate your potatoes and onion using the large holes of a box grater. Place the mix in a clean kitchen towel and wring it out real good to remove excess water.
- Mix It Up: Toss the squeezed potato-onion mix into a big bowl. Crack in your eggs, sprinkle in the flour, salt, pepper, and baking powder. Mix until everything’s coated and sticking together.
- Fry Time: Heat about ¼ inch of oil in a cast iron skillet over medium-high heat. When oil is hot, drop in heaping tablespoons of the latke mix and flatten gently with your spatula.
- Cook: Fry 3–4 minutes per side, until deep golden brown and crispy. Don’t crowd the pan.
- Drain & Serve: Let latkes drain on paper towel-lined plate. Serve hot with sour cream, applesauce, or both.
Notes
- Removing excess moisture is crucial for crispy latkes
- Test oil temperature with a small piece of mixture – it should sizzle immediately
- Keep cooked latkes warm in 200°F oven if making large batches
- Can be made ahead and reheated in oven at 375°F for 5-8 minutes
- Prep Time: 20 minutes
- Cook Time: 15 minutes
- Category: Side Dish, Appetizer
- Method: Pan-frying
- Cuisine: Jewish, Eastern European
Nutrition
- Serving Size: 1 latke
- Calories: 95
- Sugar: 2g
- Sodium: 180mg
- Fat: 4g
- Saturated Fat: 0.5g
- Unsaturated Fat: 3.5g
- Trans Fat: 0g
- Carbohydrates: 14g
- Fiber: 1g
- Protein: 2g
- Cholesterol: 25mg