There’s something magical about the aroma of fresh cookie dough wafting through your kitchen. That irresistible combination of butter, sugar, and chocolate chips has captivated dessert lovers for generations. But what if you could transform that beloved cookie dough experience into something even more indulgent? Enter Gooey Chocolate Chip Cookie Dough Bars – the internet sensation that’s been breaking baking records and dominating social media feeds. These gloriously indulgent treats combine everything we love about chocolate chip cookies with the added decadence of a bar format, creating the ultimate comfort dessert that’s perfect for everything from family gatherings to late-night cravings.
Unlike traditional drop cookies, these Gooey Chocolate Chip Cookie Dough Bars feature two distinct layers of dough – a baked foundation topped with dollops of barely-set cookie dough studded with extra chocolate chips. The result? A textural masterpiece that delivers crisp edges, a tender middle layer, and pockets of melty, gooey cookie dough goodness in every bite. It’s no wonder these treats have captivated the internet and become a staple in home bakers’ repertoires worldwide.
In this comprehensive guide, we’ll explore everything you need to know about creating perfect Gooey Chocolate Chip Cookie Dough Bars. From ingredient selection to baking techniques, storage tips to serving suggestions, you’ll discover how to master this beloved treat and make it your own. Whether you’re an experienced baker or just getting started, these bars offer the perfect combination of simplicity and wow-factor that’s sure to impress everyone who takes a bite.
Why Cookie Dough Bars Outshine Regular Cookies
Traditional chocolate chip cookies will always have their place in our hearts, but Gooey Chocolate Chip Cookie Dough Bars bring several advantages to the dessert table that have helped them surge in popularity.
First and foremost, these bars deliver exceptional textural contrast. The bottom layer bakes to perfection – slightly crisp at the edges while maintaining tenderness throughout. Meanwhile, the top layer offers that coveted cookie dough experience: dense, rich, and punctuated with pockets of melted chocolate. This dual-texture approach creates a more complex eating experience than standard cookies can provide.
Time efficiency represents another significant advantage. While traditional drop cookies require multiple batches and constant oven monitoring, these cookie dough bars bake in a single pan. Simply prep your dough, press it in, and the oven does the rest – no endless rotation of cookie sheets required. For busy home bakers, this streamlined approach makes it possible to create an impressive dessert without dedicating an entire afternoon to the kitchen.
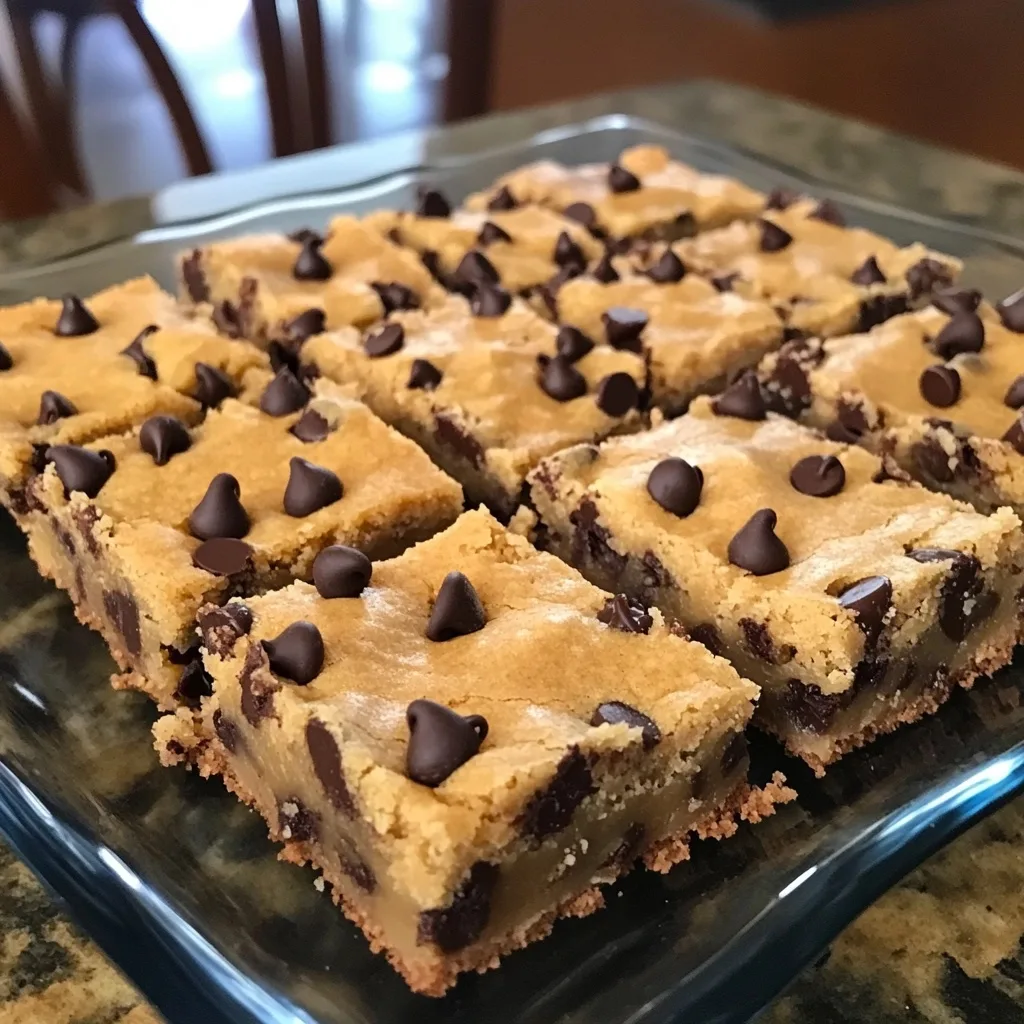
The presentation factor cannot be overlooked either. When sliced into perfect squares, these Gooey Chocolate Chip Cookie Dough Bars offer a visual appeal that’s distinctly different from ordinary cookies. The visible layers and height create a more substantial dessert presence, making these treats perfect for potlucks, bake sales, or gift-giving occasions when you want to make a memorable impression.
Essential Equipment for Perfect Cookie Dough Bars
Before diving into the baking process, gathering the right tools will set you up for success with your Gooey Chocolate Chip Cookie Dough Bars.
A 9×13-inch baking pan forms the foundation of this recipe. While metal pans conduct heat efficiently and create well-defined edges, glass or ceramic dishes work beautifully as well. The key is using the correct size – this ensures proper thickness and baking time. Whichever material you choose, remember that darker-colored pans tend to brown baked goods more quickly than lighter ones.
Parchment paper is non-negotiable for this recipe. Creating a parchment sling by lining your pan with overhang on two sides allows you to easily lift the entire slab of cookie bars out after cooling, making clean cuts much simpler. This approach also prevents sticking, particularly important with a gooey recipe like this one.
A stand mixer or hand mixer significantly reduces the effort required to cream butter and sugar to the proper consistency. While you can certainly mix by hand with a wooden spoon and some determination, mechanical assistance ensures the light, fluffy texture that forms the base of exceptional cookie dough. If using a stand mixer, the paddle attachment works best for cookie dough.
Additional helpful tools include a rubber spatula for scraping down bowl sides and folding in chocolate chips, measuring cups and spoons for accurate ingredient portions, and a wire cooling rack that allows air circulation around your baked bars. A sharp knife will make the cutting process cleaner – some bakers even prefer a bench scraper for perfectly straight edges.

Understanding the Key Ingredients
The Butter Factor
The foundation of truly outstanding Gooey Chocolate Chip Cookie Dough Bars begins with butter – specifically, unsalted butter at the proper temperature. This recipe calls for two whole sticks, and that generous amount serves multiple essential purposes.
First, butter provides the rich, distinctive flavor that forms the backbone of great cookie dough. The milk solids in butter brown during baking, creating complex caramel notes that elevate the entire dessert. Unsalted varieties allow you to control the total salt content precisely, preventing any overly salty results.
Temperature matters tremendously. The butter should be softened but not melted – ideally around 65°F. At this temperature, it’s pliable enough to incorporate air when creamed with sugar but firm enough to maintain structure. If you press your finger into properly softened butter, it should make an indentation while still offering some resistance. Too cold, and your dough will be dense; too warm, and you’ll lose the air incorporation that creates perfect texture.
For those looking to experiment, European-style butter with higher butterfat content (usually 82-84% versus the standard 80%) can create an even richer result, though the recipe works perfectly with any quality unsalted butter.
Sweet Foundations: Understanding the Sugar Duo
This recipe employs both granulated and brown sugar in equal amounts, a deliberate choice that significantly impacts the final result of your Gooey Chocolate Chip Cookie Dough Bars.
Granulated sugar contributes several critical elements: it creates crispness, particularly around the edges; it helps with moisture retention; and it promotes even browning through caramelization. Its neutral sweetness forms the background canvas for other flavors to shine.
Brown sugar, with its molasses content, brings moisture, chewiness, and depth. The light brown sugar called for in this recipe adds subtle caramel undertones without overwhelming the butter flavor. The hygroscopic nature of brown sugar (its ability to attract and hold water molecules) is particularly important for the gooey texture we’re aiming to achieve in the top layer of these bars.
The equal ratio of these sugars strikes the perfect balance. Too much granulated sugar would create bars that are overly crisp and potentially dry, while excess brown sugar might make them too soft and lacking in structure. This careful equilibrium contributes significantly to achieving that coveted texture contrast between the two layers.
Chocolate Chip Selection: More Important Than You Think
While it might seem like any chocolate chips will do, your selection can dramatically influence the final character of your Gooey Chocolate Chip Cookie Dough Bars.
Semisweet chocolate chips, with their balanced flavor profile (typically around 60% cacao), provide the classic cookie dough experience most people expect. They offer enough sweetness to complement the dough while maintaining distinct chocolate character. The standard chip size also distributes well throughout the batter, ensuring chocolate in every bite.
For those looking to customize, several variations are worth considering. Milk chocolate chips create a sweeter, more mellow flavor profile that children particularly enjoy. Dark chocolate chips (around 70% cacao) bring a more sophisticated, less sweet experience with enhanced chocolate intensity. For texture contrast, consider using a combination of regular chips and chocolate chunks, which melt differently and create interesting pockets of molten chocolate.
Quality matters significantly. Higher-quality chocolate chips with real cocoa butter (rather than substitute fats) will melt more smoothly and offer superior flavor. The additional sprinkle of chips on top before the final bake isn’t merely decorative – these chips maintain their distinct shape while partially melting, creating the visually appealing gooeyness that makes these bars irresistible.
Mastering the Mixing Techniques
The Art of Proper Butter-Sugar Creaming
The foundation of exceptional Gooey Chocolate Chip Cookie Dough Bars lies in the initial creaming process – a step that’s often rushed but deserves your full attention.
True creaming goes beyond simply mixing butter and sugar together. The goal is to incorporate air into the fat, creating microscopic bubbles that expand during baking and contribute to perfect texture. For optimal results, beat the softened butter and both sugars for a full 2-3 minutes at medium speed. The mixture should transform from dense and grainy to light and fluffy, increasing noticeably in volume and turning several shades lighter in color.
Visual cues matter more than strict timing. Look for a mixture that appears almost whipped, with no visible sugar granules. The butter should cling to the sides of the bowl and have a distinctly fluffy appearance. Proper creaming not only affects texture but also helps sugars dissolve more completely, preventing grittiness in your finished bars.
Scraping down the bowl at least once during this process ensures even incorporation. Pay special attention to the bottom of the bowl, where butter can hide unmixed. This attention to detail in the creaming stage sets the foundation for bakery-quality results.
The Gentle Touch: Incorporating Dry Ingredients
Once your wet ingredients are properly creamed, how you incorporate the dry components significantly impacts the final texture of your Gooey Chocolate Chip Cookie Dough Bars.
The instruction to add dry ingredients gradually isn’t merely about preventing a flour cloud – it’s about proper gluten development. Flour contains proteins that, when hydrated and agitated, form gluten networks. While bread benefits from strong gluten development, cookies and bars require minimal gluten formation to maintain tenderness.
Add your whisked dry ingredients in 2-3 portions, mixing on low speed just until each addition disappears. The final mixture should look slightly underblended rather than perfectly smooth. When you can no longer see raw flour but can still detect a few small streaks, it’s time to stop. Overmixing at this stage leads to tough, dense bars that lack the tender crumb we’re seeking.
The same gentle approach applies when folding in chocolate chips. Use a rubber spatula rather than the mixer, incorporating them with broad strokes that preserve the carefully created texture of your dough.
The Two-Stage Baking Process: Creating Perfect Layers
First Bake: Setting the Foundation
The two-stage baking process is what distinguishes these Gooey Chocolate Chip Cookie Dough Bars from standard cookie bars, creating their signature texture contrast.
When pressing the initial two-thirds of dough into your prepared pan, aim for an even layer with consistent thickness throughout. Some bakers find slightly dampened fingertips or the bottom of a measuring cup helpful for creating a smooth surface without the dough sticking to their hands. Pay particular attention to the corners, which often receive less dough but need equal coverage.
The first 10-minute bake is crucial but easy to misjudge. You’re looking for edges that have just begun to set while the center remains quite soft – visually, the edges will appear slightly dry and may have just started to pull away from the pan sides. The center will look underbaked and shiny. This interim stage might trigger concern that the bars are underdone, but remember: they’ll return to the oven after adding the top layer.
This partially-baked foundation provides structure while remaining tender, creating the perfect base for the gooier top layer. If baked too long initially, the bottom becomes overly firm and crisp; too short, and the entire bar may lack sufficient structure.
Second Layer Magic: Creating the Gooey Top
The technique for adding the remaining dough creates the distinctive appearance and texture that makes these Gooey Chocolate Chip Cookie Dough Bars internet-famous.
Rather than spreading the remaining dough in a continuous sheet, dollop it in spoonfuls across the hot, partially-baked layer. This creates deliberate irregularity – valleys where the bottom layer shows through and peaks of dough that retain more of their raw character during the final bake. The visual effect is rustic and inviting, while the eating experience offers delightful textural surprises.
When gently pressing to fill gaps, resist the urge to create a perfectly smooth top. The natural variations allow some areas to bake more thoroughly while others remain extra gooey. The additional chocolate chips sprinkled on top will partially melt during the final bake, creating pockets of molten chocolate that enhance both appearance and flavor.
The final 12-15 minute bake requires careful attention. You’re seeking golden brown edges with a center that looks slightly underdone. A toothpick test isn’t reliable here – these bars are meant to be gooey in the center. Instead, look for a top that appears set but still has a slight jiggle when the pan is gently shaken. Remember that carryover cooking will continue after removal from the oven, so it’s better to slightly underbake than overbake.

Perfecting the Cooling and Cutting Process
The Patience Test: Proper Cooling
Perhaps the most challenging aspect of making Gooey Chocolate Chip Cookie Dough Bars isn’t the mixing or baking – it’s having the patience to let them cool completely before cutting.
Cooling serves several critical purposes. First, it allows the structure to set properly; the starches in the flour gel and strengthen, giving the bars enough integrity to hold their shape when cut. Second, the chocolate chips need time to return to a semi-solid state that contributes to the perfect gooey (not liquid) texture. Finally, flavors continue developing during cooling, with various compounds interacting at different temperatures.
For best results, allow the pan to cool completely on a wire rack, which usually takes 1-2 hours at room temperature. Some bakers expedite this process by cooling for 30 minutes at room temperature, then transferring to the refrigerator for an additional 30 minutes. This approach works well but may slightly affect texture, making the bars a bit firmer.
Resist the temptation to cut into warm bars – the molten chocolate and underset structure will create a delicious but messy experience that lacks the clean presentation these treats deserve.
The Art of the Perfect Cut
Once cooled, the parchment paper sling becomes invaluable. Gently lift the entire slab from the pan using the overhanging edges and transfer to a cutting board. This allows you to use proper cutting techniques without damaging your baking pan or the bars themselves.
For the cleanest cuts, use a large, sharp knife. Run it under hot water between cuts, wiping it clean each time. The heat helps the knife glide through the chocolate chips, while removing residue prevents dragging and tearing. For perfectly even pieces, measure and mark the top before cutting or use a ruler as a guide.
Standard 9×13-inch pans typically yield 24 bars when cut into a 6×4 grid, creating pieces that are substantial without being overwhelming. For larger gatherings or more modest portions, a 6×6 grid creates 36 smaller squares that allow guests to sample without committing to a full-sized bar.
Serving Suggestions and Flavor Variations
Elevation Through Accompaniments
While Gooey Chocolate Chip Cookie Dough Bars shine brilliantly on their own, thoughtful accompaniments can transform them into an elevated dessert experience.
A scoop of vanilla ice cream alongside a slightly warmed bar creates temperature and texture contrast that highlights the gooey character of the bars. For an extra touch, warm the bar for just 10-15 seconds in the microwave before adding ice cream. The slight melting of the chocolate chips creates an irresistible experience.
Drizzles offer another simple enhancement. Consider warm caramel sauce, which complements the brown sugar notes in the dough; chocolate ganache for double-chocolate intensity; or even a cream cheese glaze that adds tangy contrast to the sweet bars. Apply these after the bars have completely cooled but before cutting for the most professional appearance.
For special occasions, consider creating a dessert board centered around these bars. Pair bite-sized pieces with fresh berries, small scoops of ice cream, various dipping sauces, and perhaps some candied nuts for an interactive dessert experience that encourages sampling and conversation.
Creative Flavor Variations
While the classic version of Gooey Chocolate Chip Cookie Dough Bars deserves its legendary status, several variations can keep this recipe fresh and exciting in your baking rotation.
For a holiday spin, incorporate crushed candy canes or peppermint chips along with the chocolate chips in the top layer. The mint-chocolate combination creates a festive treat perfect for December gatherings. Similarly, orange zest added to the dough creates chocolate-orange bars that offer sophisticated flavor complexity.
Butterscotch lovers can substitute butterscotch chips for half the chocolate chips, creating a caramelized sweetness that pairs beautifully with the brown sugar base. Adding a teaspoon of espresso powder to the dry ingredients doesn’t create coffee-flavored bars but rather enhances the chocolate flavor with subtle depth.
For texture variations, consider incorporating 1/2 cup of toffee bits or toasted coconut flakes into the dough. Each adds distinctive character while maintaining the essential gooey nature that makes these bars special.
Storage Tips for Maximum Freshness
Room Temperature Storage
Properly stored, Gooey Chocolate Chip Cookie Dough Bars maintain their quality at room temperature for 3-4 days – though they rarely last that long before being devoured!
The key to room temperature storage lies in proper containment. Once completely cooled and cut, arrange the bars in a single layer in an airtight container. If you need to stack them, place parchment paper between layers to prevent sticking. Keep the container away from direct sunlight and heat sources, which can melt the chocolate and alter textures.
For the first day, a slightly looser covering (like foil with small openings) actually benefits texture, allowing excess moisture to escape and preventing the bars from becoming too soft. After the first 24 hours, switch to fully airtight storage to prevent drying.
Refrigeration and Freezing
For extended freshness, refrigeration works wonderfully. Refrigerated bars will stay fresh for up to a week, though their texture becomes more firm and dense – some people actually prefer this chilled version for its intensified chewiness.
Freezing offers a fantastic way to preserve these treats for future enjoyment. Wrap individual bars or rows tightly in plastic wrap, then place in freezer bags with air removed. Label with the date, as they maintain quality for up to three months frozen. To thaw, unwrap and let sit at room temperature for about an hour, or microwave individual bars for 20-30 seconds for a warm treat.
If planning to freeze from the beginning, consider slightly underbaking the bars by 1-2 minutes, as this compensates for the slight texture change that occurs during freezing and reheating.

Nutritional Insights and Dietary Adaptations
Understanding the Indulgence
Gooey Chocolate Chip Cookie Dough Bars are decidedly a treat rather than an everyday snack. A typical bar contains approximately 250-300 calories, primarily from carbohydrates and fats, with modest protein content from the eggs and flour.
The bars derive their rich character from butter and sugar, with each square containing roughly 14-16 grams of fat and 25-30 grams of sugar. This composition creates the satisfying mouthfeel and flavor that makes them so craveable. While not a nutritional powerhouse, these bars deliver precisely what they promise – an indulgent, soul-satisfying dessert experience.
For those tracking intake, consider cutting smaller portions or pairing a half-size bar with fresh fruit for balance. Remember that truly enjoying an occasional indulgence often proves more satisfying than consuming larger quantities of less satisfying “light” versions.
Dietary Modifications
While the classic recipe creates unmistakable magic, several modifications can accommodate dietary preferences without sacrificing the essential character of these beloved bars.
For gluten-free versions, substitute a high-quality 1:1 gluten-free flour blend that contains xanthan gum. These blends have improved dramatically in recent years, often producing results nearly indistinguishable from wheat-based versions. Add 1/4 teaspoon additional leavening to compensate for the different protein structure.
Vegan adaptations require more significant changes but remain possible. Replace butter with a plant-based stick butter alternative specifically formulated for baking (not spreadable tub varieties). Substitute eggs with a combination of 2 tablespoons ground flaxseed mixed with 5 tablespoons water, allowed to gel for 10 minutes. Ensure your chocolate chips are dairy-free varieties.
For reduced sugar options, cutting total sugar by up to 25% works without drastically affecting texture, though the bars will be less moist and have shortened shelf life. Alternative sweeteners generally don’t perform well in this recipe due to their different crystallization and moisture-retention properties.
Frequently Asked Questions
The most common culprits for cakey bars are overmixing the dough after adding flour (which develops too much gluten) or overbaking. Remember that these bars should look slightly underdone when removed from the oven – they’ll continue setting as they cool. Also check your measuring technique: too much flour, often from compacting it in the measuring cup, leads to drier results. Try fluffing flour before measuring or switching to weight measurements for precision.
Can I prepare the dough in advance?
Absolutely! The dough can be prepared up to 24 hours ahead and refrigerated before baking. When ready to bake, let it sit at room temperature for 30 minutes to soften slightly before pressing into the pan. For longer storage, the dough freezes beautifully for up to three months. Thaw overnight in the refrigerator before bringing to room temperature and baking as directed.
How do I know when the bars are done baking?
These bars should appear golden brown around the edges but still soft in the center when done. The top surface should look mostly set but not completely firm. If you gently shake the pan, there should be a slight jiggle in the center. Remember that they continue cooking from residual heat after removal from the oven, so it’s better to slightly underbake than overbake.
My chocolate chips sank to the bottom. What happened?
This usually occurs when the dough is too warm or too loose. Make sure your butter isn’t melted, just softened. If baking in very warm conditions, consider chilling the dough for 30 minutes before baking the first layer. Another tip: toss chocolate chips in a tablespoon of the flour mixture before adding them to the dough, which helps them stay suspended.
Can I double this recipe for a crowd?
Yes, this recipe doubles well for larger gatherings. Use two 9×13-inch pans rather than one larger pan to maintain proper thickness and ensure even baking. The baking time remains the same, though you may want to rotate pans halfway through baking if your oven has hot spots.
More Related Recipes You Might Enjoy
If you loved these Gooey Chocolate Chip Cookie Dough Bars, you’ll definitely want to explore these other crowd-pleasing sweet treats:
- Warm Fluffy Cinnamon Sugar Doughnut Holes – These bite-sized delights feature the same comforting sweetness in a different format, perfect for morning gatherings or afternoon treats.
- No-Bake Oreo Cheesecake – Another beloved dessert that combines creamy texture with chocolate elements for an irresistible no-bake option.
- Sweet Tooth Treats Collection – Discover more indulgent desserts that satisfy those sweet cravings with the same attention to texture and flavor.
Why You’ll Love These Gooey Chocolate Chip Cookie Dough Bars
After exploring every aspect of these delectable treats, it’s clear why Gooey Chocolate Chip Cookie Dough Bars have captured the hearts (and taste buds) of dessert lovers everywhere. They offer the perfect balance of convenience and indulgence – easier than individual cookies but more impressive than a standard cookie bar.
The textural contrast between the baked bottom layer and the gooey top creates an eating experience that’s impossible to forget. Each bite delivers the nostalgic comfort of chocolate chip cookies with an elevated twist that feels special enough for celebrations yet approachable enough for everyday treats.
Whether you’re an experienced baker or just starting your culinary journey, these bars provide reliable results with remarkable flavor. The recipe’s flexibility invites personalization while its forgiving nature ensures success. As you master the techniques outlined in this guide, you’ll find yourself returning to this recipe again and again – both for your own enjoyment and for the joy of sharing these irresistible treats with others.
Give these Gooey Chocolate Chip Cookie Dough Bars a place in your baking repertoire, and discover why they’ve earned their status as the internet’s favorite sweet treat. Your friends, family, and your own taste buds will thank you!
Print
Gooey Chocolate Chip Cookie Dough Bars: The Ultimate Sweet Treat
- Total Time: 40 minutes (plus cooling time)
- Yield: 24 bars 1x
- Diet: Vegetarian
Description
These Gooey Chocolate Chip Cookie Dough Bars combine the best of both worlds – a golden-baked cookie base topped with irresistible dollops of chocolate-studded cookie dough. With their perfect balance of textures – crisp edges, tender middle, and pockets of melty chocolate – these bars elevate the classic chocolate chip cookie experience into something truly special. Perfect for family gatherings, potlucks, or satisfying late-night cravings!
Ingredients
- 1 cup (2 sticks) unsalted butter, softened
- 1 cup granulated sugar
- 1 cup packed light brown sugar
- 2 large eggs, room temperature
- 2 teaspoons pure vanilla extract
- 2 ½ cups all-purpose flour
- 1 teaspoon baking soda
- ½ teaspoon fine sea salt
- 2 cups semisweet chocolate chips, divided (1½ cups for dough, ½ cup for topping)
- Optional: ½ cup chopped pecans or walnuts
Instructions
- Preheat & Prep: Preheat your oven to 350°F. Line a 9×13-inch baking pan with parchment paper, leaving overhang on two sides for easy removal later.
- Cream the Good Stuff: In a large bowl, use a stand mixer (or hand mixer) to cream together the softened butter with both sugars until light and fluffy, about 2–3 minutes. The mixture should look pale and increase in volume.
- Eggs & Vanilla Magic: Add eggs one at a time, beating well after each addition. Stir in the vanilla extract until fully incorporated.
- Dry Meets Wet: In a separate bowl, whisk together the flour, baking soda, and salt. Gradually add this dry mixture to your butter-sugar mixture, stirring just until no flour streaks remain. Avoid overmixing.
- Chocolate Chip Love: Gently fold in 1½ cups of the chocolate chips (and nuts, if using) with a rubber spatula.
- First Layer Bake: Press about two-thirds of the dough evenly into the prepared pan. Bake for 10 minutes – edges should be set, but center still soft.
- Top It Off: While the bottom layer bakes, stir the remaining ½ cup chocolate chips into the leftover cookie dough. After the first bake, dollop spoonfuls of the remaining dough over the hot baked layer, then gently press to fill in gaps. Sprinkle additional chocolate chips on top if desired.
- Final Bake & Cool: Return the pan to the oven for 12–15 minutes more, until golden brown around the edges but still slightly soft in the center. Remove and let cool completely in the pan on a wire rack.
- Serve & Enjoy: Once completely cooled, lift the slab out using the parchment overhang. Cut into 24 bars and serve.
Notes
- For clean cuts, refrigerate the cooled bars for 30 minutes before slicing.
- The key to perfect texture is slightly underbaking – the bars will continue to set as they cool.
- Store in an airtight container at room temperature for up to 4 days, or freeze for up to 3 months.
- For added richness, try using high-quality chocolate chips or a mix of semisweet and dark chocolate.
- These bars can be prepared a day ahead – the flavors actually improve overnight!
- Prep Time: 15 minutes
- Cook Time: 25 minutes
- Category: Dessert
- Method: Baking
- Cuisine: American
Nutrition
- Serving Size: 1 bar
- Calories: 275
- Sugar: 24g
- Sodium: 120mg
- Fat: 14g
- Saturated Fat: 8g
- Unsaturated Fat: 5g
- Trans Fat: 0g
- Carbohydrates: 37g
- Fiber: 1g
- Protein: 3g
- Cholesterol: 35mg