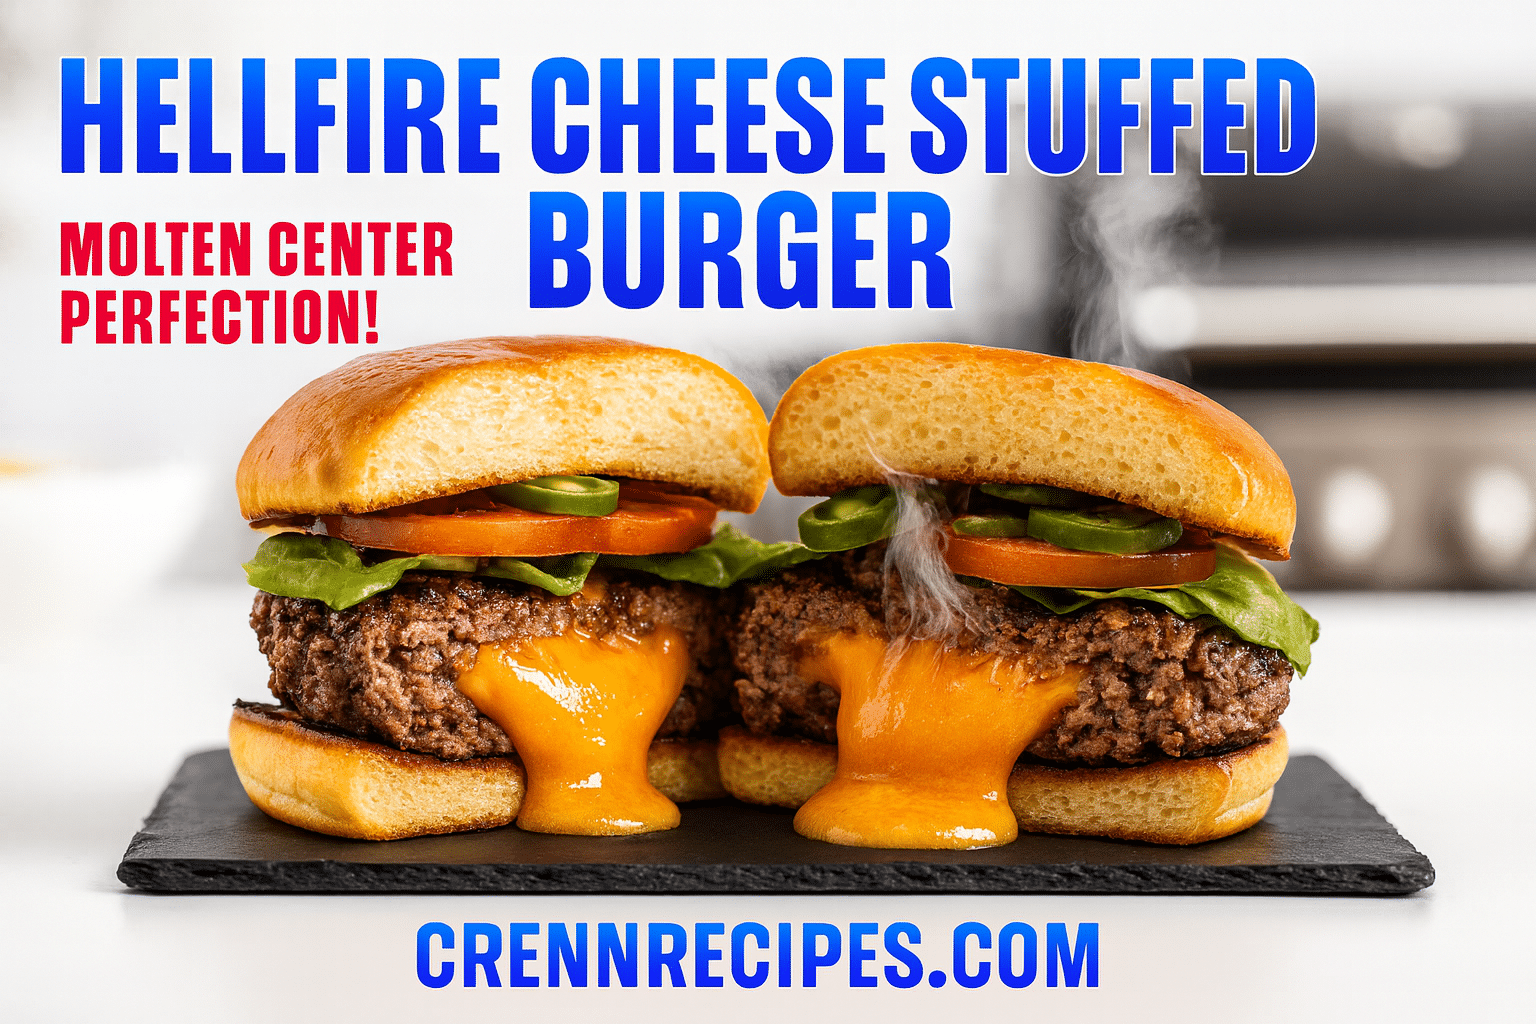
I set out to build a bold, melty sandwich that balances heat, texture, and beefy satisfaction. I use 1 lb ground beef, 4 oz cubed Hellfire cheese, jalapeños, bell peppers, onions, bread crumbs, garlic and chili powders, salt, and pepper to form patties that hold a molten center.
On the grill I aim for medium-high heat with patties about 1/2 to 3/4 inch thick. Typical cooking runs about 5–7 minutes per side so the filling reaches a gooey melt between 130–150°F while the exterior crisps.
I prefer brioche or a classic bun, toasted, with lettuce and tomato for brightness. This guide walks you through forming, sealing, and cooking so the core stays contained and the result feels like a top local joint.
Key Takeaways
- Expect a spicy, melty core with a crisp exterior when sealed and cooked at medium-high heat.
- Use patties 1/2–3/4″ thick and aim for 5–7 minutes per side on the grill.
- Choose brioche or classic buns and toast for added textural contrast.
- I include tips for sealing patties, checking doneness, and avoiding leaks.
- This method works on the grill or in a skillet for flexible weeknight or weekend cooking.
Why I Made This Hellfire Cheese Stuffed Crunch Burger Guide
I wrote this guide to demystify a bold, molten-centered sandwich and give you a clear path from pantry to plate. I explain why I use 1 lb ground beef, jalapeños, bell peppers, onions, spices, and a spicy melting cheese so you can recreate craveable heat and crisp texture at home.
My experience cooking for friends and testing fillings shaped these choices. I focused on techniques that lock in juiciness and prevent leaks. The goal was a method that beats many restaurants and still works on a weeknight.
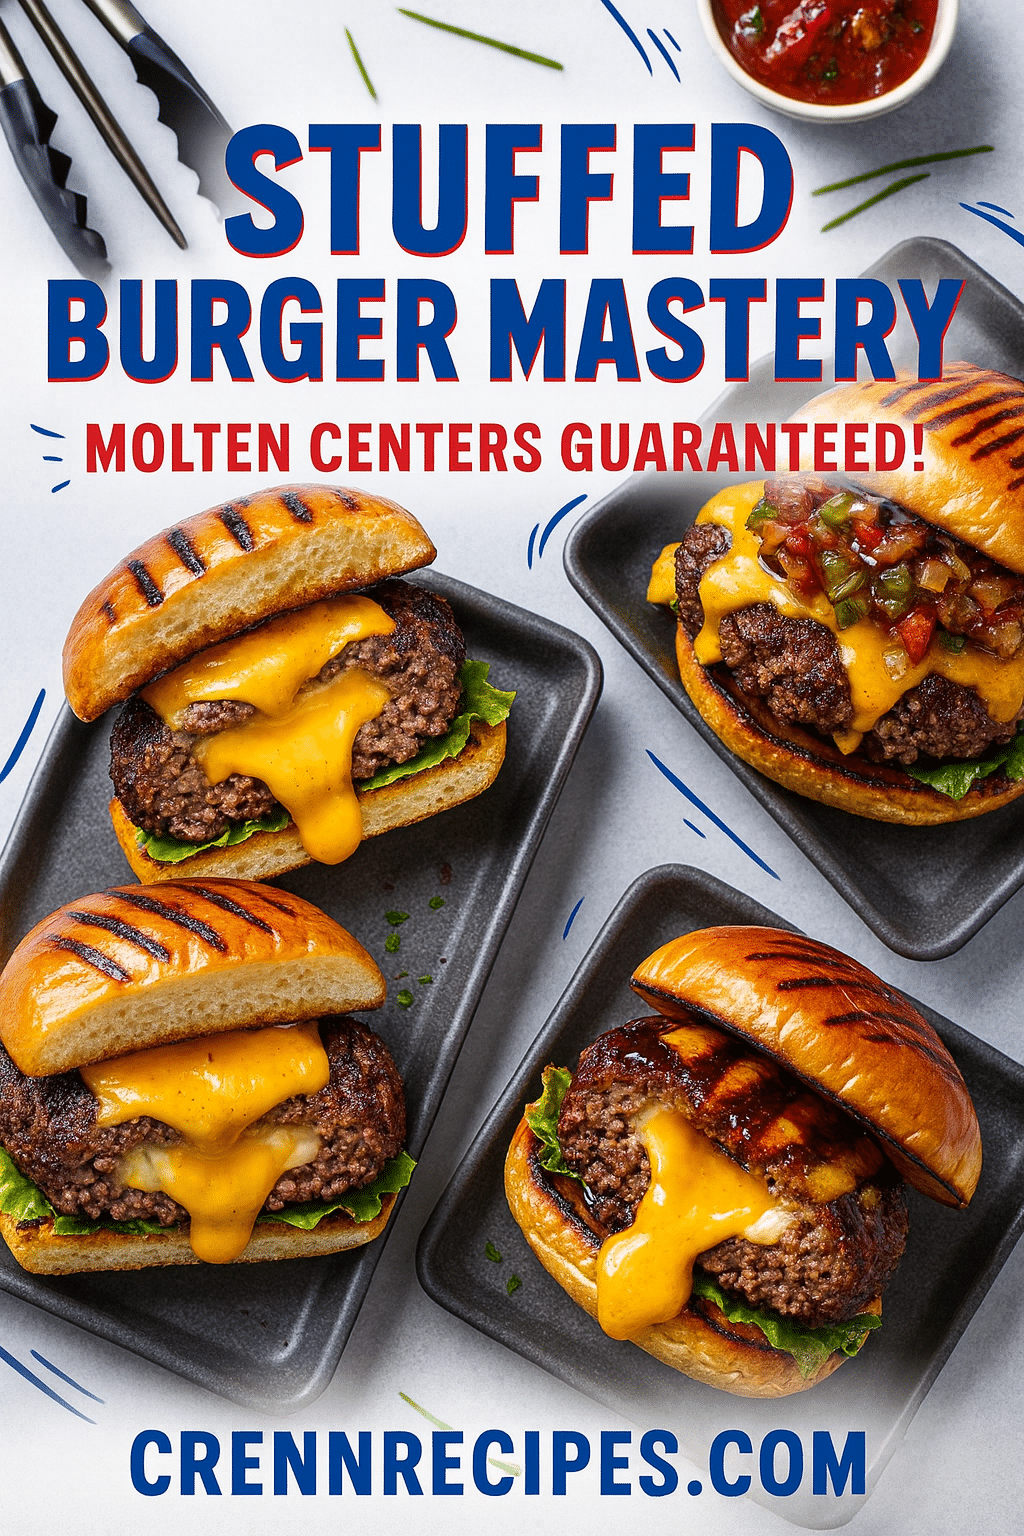
Many diners prefer medium to well-done stuffed patties cooked at medium-high heat for 5–7 minutes per side. I translate that into simple timing cues and checks you can use on the grill or stovetop.
- I show how to get a molten center without blowouts and keep dependable crunch and flavor.
- I answer the “that roadside or gas station favorite” feeling with a repeatable plan.
- The guide empowers your choices with easy feel, look, and thermometer checks so each burger comes out great.
Ingredients You’ll Need for My Hellfire Cheese Stuffed Crunch Burger
My ingredient list focuses on balance: fat for juiciness, a binder for structure, fresh aromatics for flavor, and a cubed melting center. Below is a compact pantry and prep guide so you can assemble everything before you form patties.
Ground, peppers, and spice breakdown
I use 1 lb 80/20 ground beef for a good fat-to-lean ratio. It helps the patty stay juicy and hold shape.
- 1 lb ground beef (80/20)
- 1/2 cup bread crumbs (binder)
- 1/4 cup diced onions
- 1/4 cup diced bell peppers
- 1/4 cup diced jalapeños
- 1 tsp garlic powder; 1 tsp chili powder
- Salt and pepper to taste (add just before forming)
I recommend 1/2–3/4″ patty thickness so the center melts as the exterior cooks at medium-high heat.
Core cheeses compared
For the molten center I cube 4 oz of my chosen cheese. Each option changes the profile:
- Pepper jack: creamy melt and gentle heat, a safe, melty choice.
- Blue cheese: bold, tangy flavor and a different melt—great for contrast.
- My core option: cubes that melt between ~130–150°F for reliable ooze.
Finish with 4 burger buns, lettuce, tomato, and any other desired toppings to balance heat and add fresh crunch.
Gear, Heat, and Setup: Grill and Cast Iron Choices
Good results start with a clear plan for heat, tools, and surface prep. I prep both the grill and the stovetop so the same 1 lb ground beef batch cooks to a molten center and crisp exterior. Small steps at setup cut down on mistakes once patties hit the surface.
Grill setup: medium-high and grate prep
I target a medium-high zone on the grill and clean the grates first. I oil them lightly and preheat so patties slide and develop even sear lines.
I often build a two-zone fire to move patties off direct flame if flare-ups start. I keep a lid ready to help the interior reach the ~130–150°F melt window without burning the outside.
Cast iron on the stovetop: steady sear at medium
For cast iron, I heat the pan to steady medium heat so the surface stays hot but won’t scorch. I add a thin film of high smoke point oil just before cooking.
I set patties down and leave them undisturbed to build a crust. A splatter screen helps retain heat and pushes the center toward that same melt temperature.
- I use identical patty thickness (1/2–3/4″) and timing (5–7 minutes per side) on either surface.
- Tools I rely on: wide metal spatula, instant-read thermometer, and neutral oil with a high smoke point.
- I adjust only for hot spots or wind; managing heat proactively keeps the center sealed and molten.
| Gear | Target Temperature | Setup Tip | Best Use |
|---|---|---|---|
| Gas or charcoal grill | Medium-high (direct and indirect zones) | Clean, oil, preheat grates; keep lid handy | Classic sear and grill lines |
| Cast iron skillet | Steady medium surface temp | Thin oil film; avoid overcrowding | Even sear, consistent surface contact |
| Thermometer & spatula | Cheese melt ~130–150°F; patty target per recipe | Check center temp; flip once | Reliable doneness and sealed center |
| Other options | Variable | Two-zone fire, splatter screen, high smoke point oil | Control flare-ups and retain heat |
For variations and a linked technique, see my bacon-jalapeño popper version for extra assembly ideas.
How I Form, Fill, and Seal the Burger Patties
I divide my pound of ground meat into even portions so each patty cooks the same and seals cleanly around the filling. This step sets timing and texture consistency for the grill or cast iron.
Portioning and creating the pocket
I split the meat into matched pieces and press a shallow well into the lower patty. I tuck in 4 oz of cubed Hellfire cheese so it melts quickly and evenly as the exterior sears.
Sealing edges to prevent leaks
I cap with the second patty, then pinch, press, and smooth the seam all the way around. A tight seal keeps the molten center contained and preserves the desired crunch.
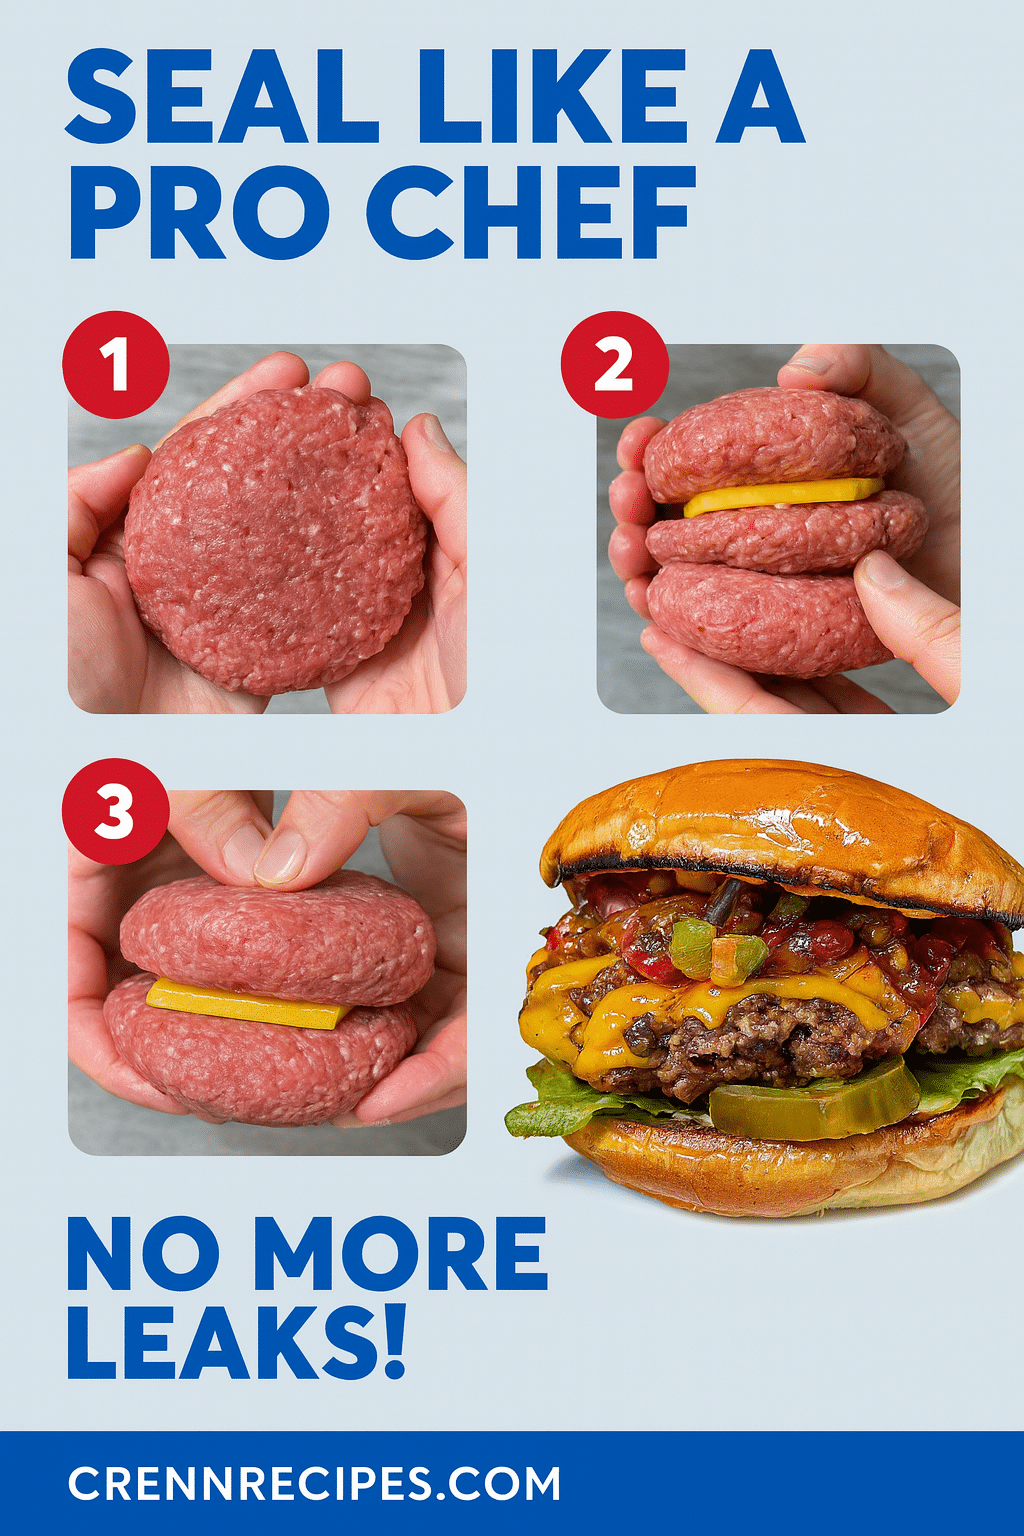
Ideal thickness and finishing tips
Aim for a 1/2 to 3/4 inch size for a reliable cook time. I keep edges slightly thicker to reduce doming and chill formed patties briefly to hold shape when they hit heat.
- Light touch: avoid overworking the ground mix to keep patties tender.
- No pressing: don’t poke or press while cooking to retain juices and a sealed center.
Cooking Times, Temperatures, and Doneness
I focus on simple, repeatable targets so each patty finishes safe and melty. My baseline is a medium-high grill or a steady cast iron surface and a 1/2–3/4″ patty thickness.
Target internal temperatures in degrees Fahrenheit
I use an instant-read thermometer to verify internal temperature and protect both safety and texture. For ground beef safety I aim for the doneness that meets my preference while ensuring the center has reached a safe level before resting.
- Thermometer check: insert to the patty center to read true doneness.
- Degrees guide: watch for the probe to reach the target before pulling from heat.
Cheese melting points and timing cues (cook minutes per side)
My timing baseline is 5–7 minutes per side. That range adjusts with surface heat and thickness.
The filling begins to flow around 130–150 degrees. I look for slight softening and a subtle swelling at the center as a visual cue.
| Element | Target | Note |
|---|---|---|
| Surface heat | Medium-high | Builds crust without burning |
| Cook minutes | 5–7 per side | Adjust for thickness and wind |
| Melting window | 130–150 degrees | Cheese flows; carryover finishes |
I avoid cutting to check doneness. Instead, I rely on elapsed minutes, thermometer readings, and visual cues—edges browned, juices beading—then rest a few minutes so the cheese settles and juices redistribute.
Grill or Skillet: My Step-by-Step Cooking Method
I walk you through a focused cook sequence that locks in juiciness while bringing the core to a glossy melt. My process applies whether you use a gas grill or a heavy pan, and it keeps timing predictable for home cooks.
Medium-high grill technique for juicy burgers
Preheat the grill to medium-high and oil the grates so patties release cleanly. I place formed patties over direct heat for a quick sear, about 1–2 minutes, to build color and a good crust.
After that initial sear I shift each patty to indirect heat and close the lid. This two-zone approach prevents flare-ups and lets the center rise to the melt window—aim for the filling to reach about 130–150°F over the remaining minutes.
Cast iron sear plus finish: managing heat and flare-ups
For cast iron, I preheat the pan on medium until it’s evenly hot. I set down patties and leave them alone to form a crust, then lower the flame slightly to finish without burning.
- Do not press the patty — that squeezes juices and risks leaks.
- Flip once mid-cook so total cook time aligns with thickness (typically 5–7 minutes per side).
- If flare-ups start, move burgers to the cool zone or briefly close vents to tame the flame.
- Watch surface color and use an instant-read thermometer to confirm the final temperature for a consistent finish.
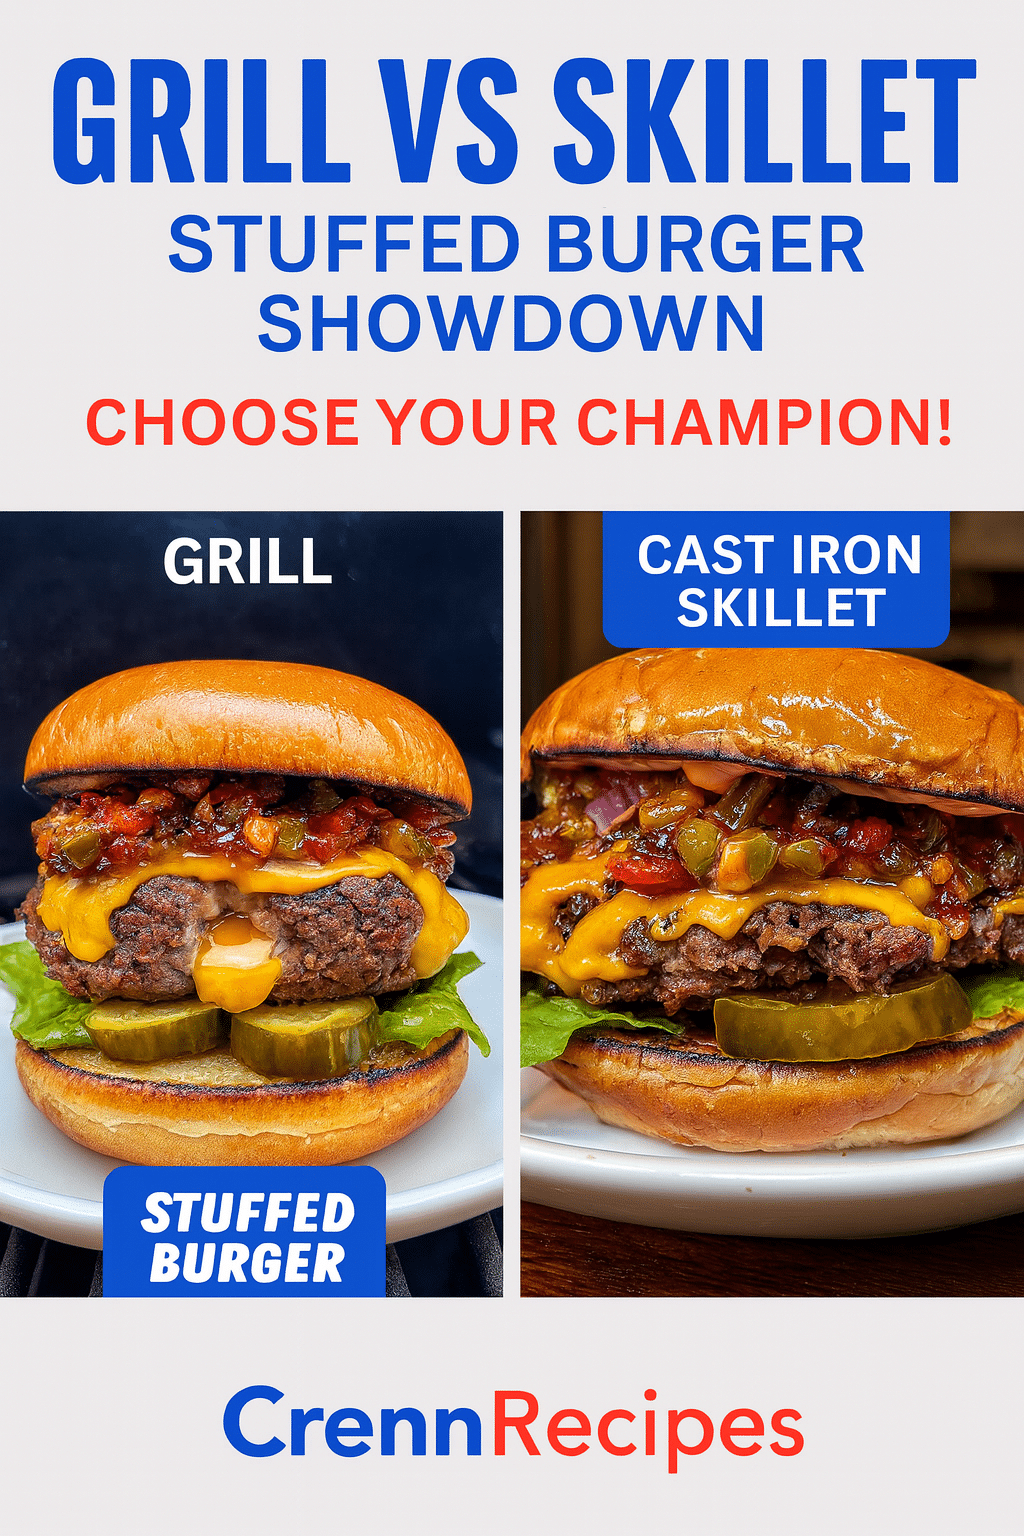
| Surface | First step | Finish |
|---|---|---|
| Grill | Sear direct 1–2 minutes | Indirect heat until done |
| Cast iron | Sear undisturbed on medium | Lower heat to finish evenly |
| Key cues | Good crust, no pressing | Thermometer + color check |
Assemble the Burger: Buns, Toppings, and Crunch Options
I build the final stack so each bite balances a hot core with cool, bright toppings. Proper assembly protects the sealed center and keeps textures distinct.
Brioche vs. classic buns
I lightly butter and toast each bun to add a crisp edge that supports the juicy patty and molten center. Brioche brings slight sweetness, while a classic hamburger bun offers sturdiness for heavy toppings.
| Option | Texture | Best for |
|---|---|---|
| Brioche | Soft, rich, slightly sweet | Balanced heat and richness |
| Classic bun | Neutral, sturdy | Lots of toppings and sauces |
| Toasting | Crisp edge | Prevents sogginess |
Toppings and fresh layers
I stack cool lettuce and a thin slice of ripe tomato for freshness. I often add caramelized onions for sweet-savory depth and keep raw onions optional for bite.
Crunch options
I add crunch with kettle chips, store-bought crispy onions, or shredded lettuce to contrast the melty core. A thin slice of pickle or extra tomato helps cut richness.
- I choose between brioche and classic based on sweetness and sturdiness.
- I keep the bottom bun dry by placing lettuce first or a thin sauce barrier.
- I center the patty carefully so sealed edges stay intact while topping.
- I finish with the top bun pressed gently—enough to set the stack without squeezing out juices.
For step-by-step assembly tips, see my guide on how to assemble a perfect burger.
Sauces and Sides That Love the Heat
To tame the heat, I lean on sauces and sides that add contrast without hiding the core flavors. I offer cooling dressings, bold spice hitters, and simple plates that refresh the palate between bites.
Cool-down sauces I rely on
I reach for ranch, a creamy mayo blend, or a tangy blue cheese dressing to cut through spice. A swipe of one of these on the bun calms heat and adds silky texture.
Spicy partners I recommend
When I want to amplify heat, I use chipotle mayo, spoon on chili crisp for crunch and umami, or drizzle hot honey for sweet fire. These options let you tune each mouthful from mild to bold.
Side ideas to balance flavor and heat
Good sides bring acidity, crunch, or a clean finish. I pair with vinegar slaw, crisp fries, charred corn, or a simple green salad.
- I cool the heat with ranch, creamy mayo, or a blue cheese dressing.
- I add spice with chipotle sauce, chili crisp, or hot honey.
- Sides I serve: vinegar slaw, fries, charred corn, or a green salad.
- For milder meals, I top with pepper jack for extra creaminess rather than more burn.
| Pairing | Why it works | Best with |
|---|---|---|
| Ranch or creamy mayo | Cooling, smooth contrast to heat | Spicy patties, tomato, lettuce |
| Blue cheese dressing | Tangy and rich; cuts spice with sharpness | Hearty patties, caramelized onion |
| Chipotle or chili crisp | Smoky, textural heat that layers flavor | Those who want more spice and umami |
| Hot honey | Sweet heat that brightens and balances fat | Fried sides, salty pickles, simple buns |
| Vinegar slaw / green salad | Acidic cut to richness; refreshes the palate | Any spicy main, especially grilled versions |
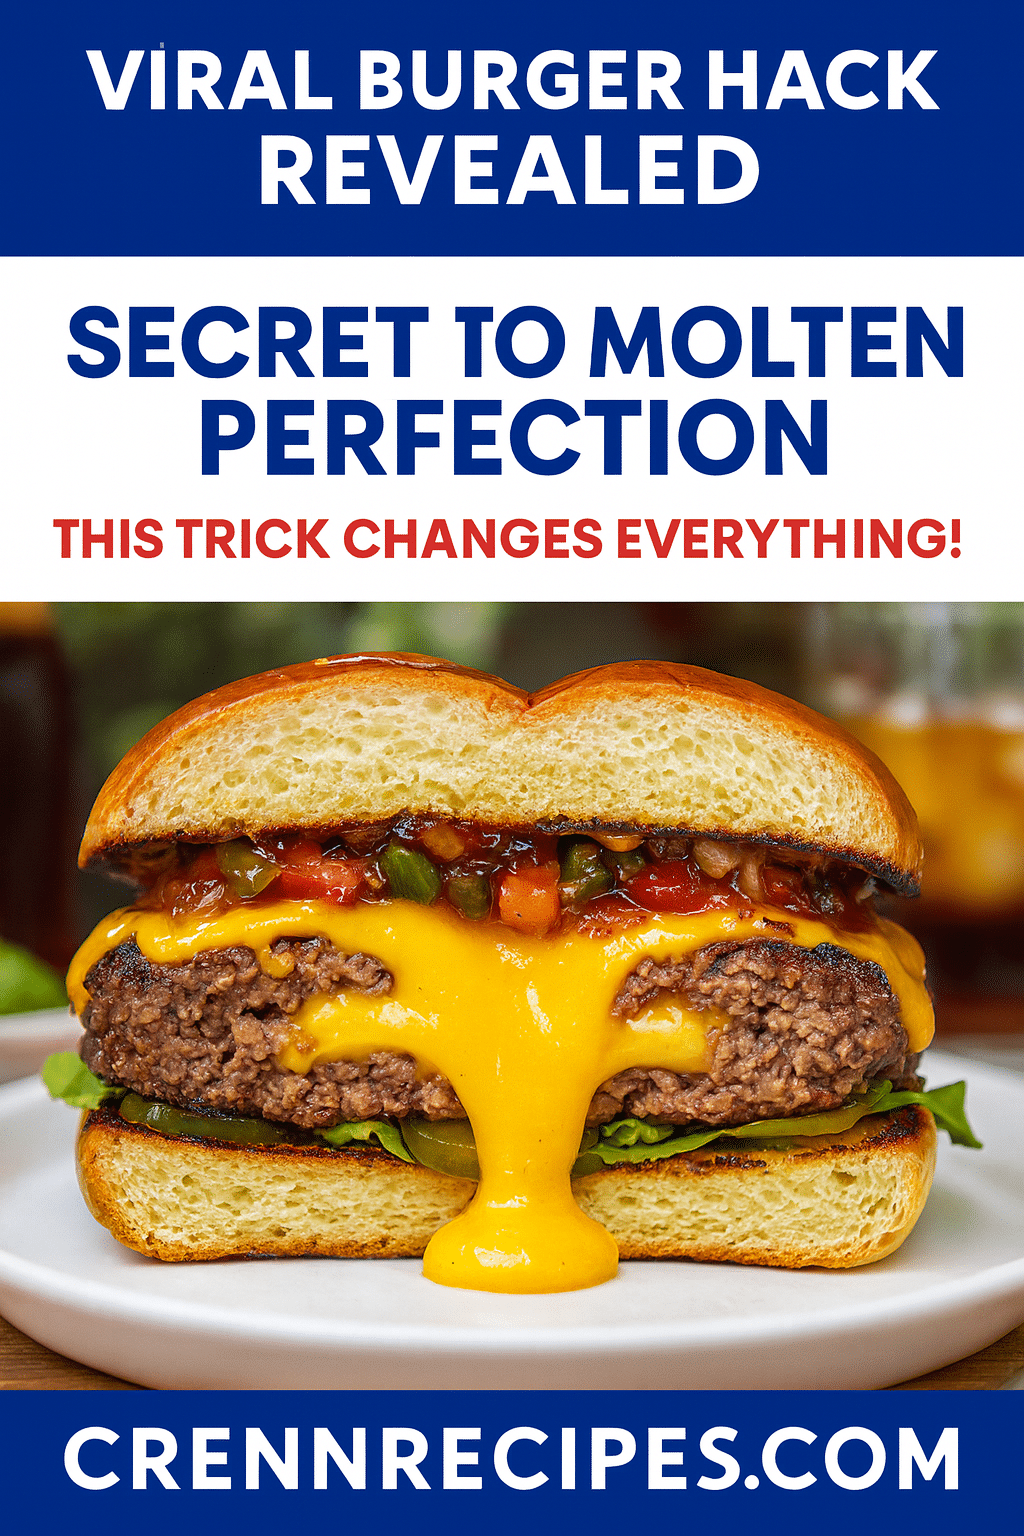
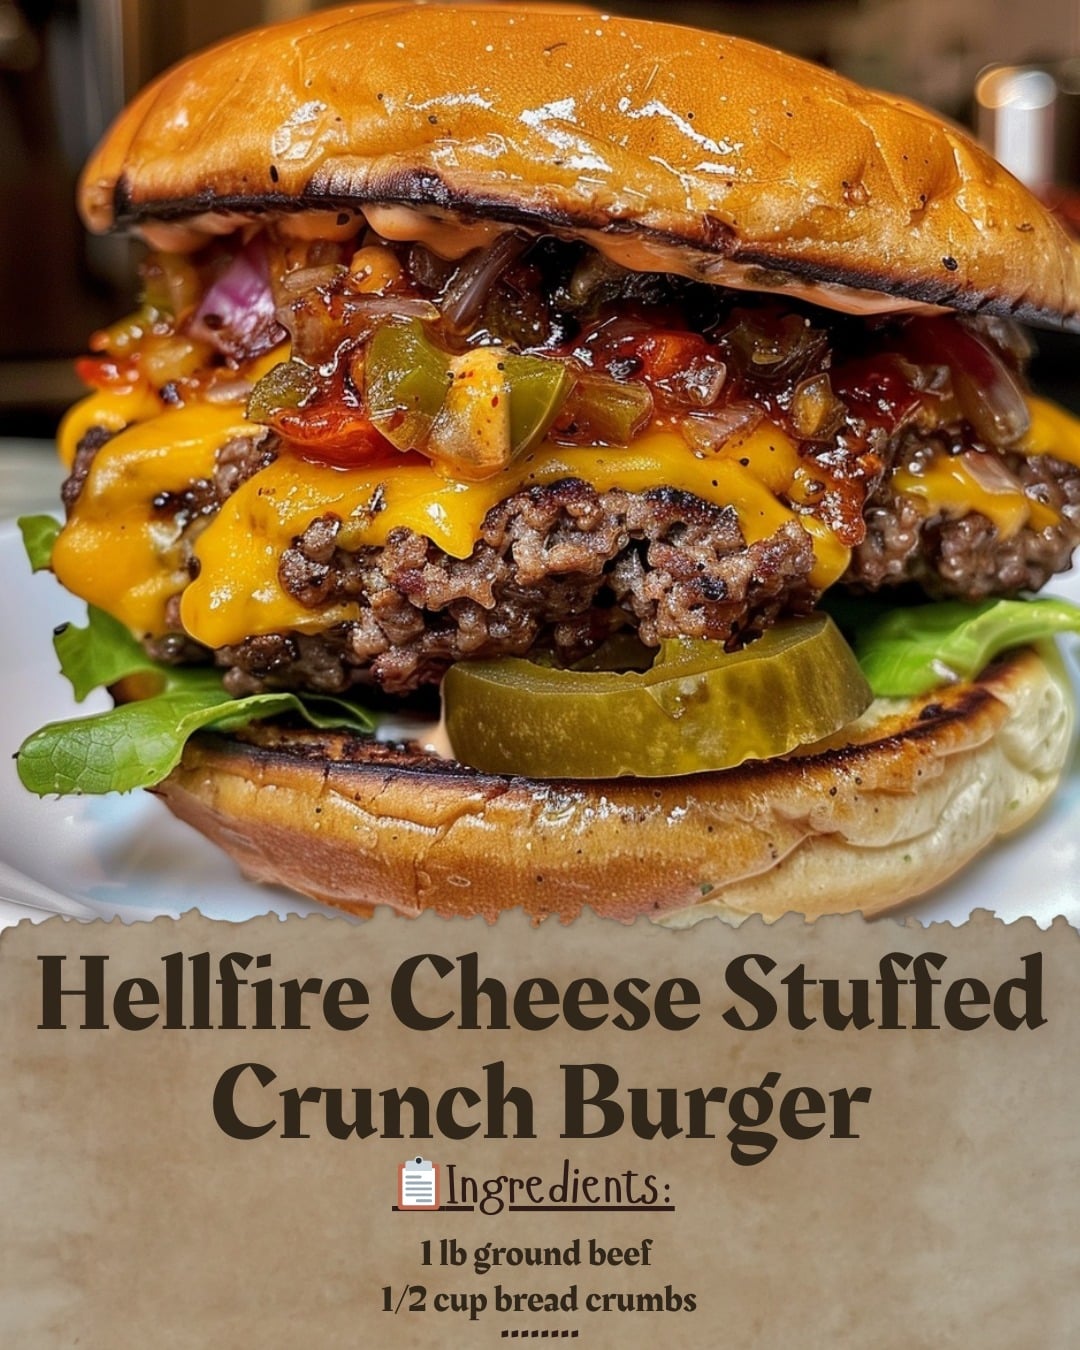
Hellfire Cheese Stuffed Crunch Burger
This recipe centers on a tight, sealed patty that delivers a molten core and a crisp exterior every time.
I use 1 lb ground beef mixed with the seasoning, peppers, and onions, then wrap 4 oz of cubed Hellfire cheese in the center. I form two thin patties per sandwich, seal the edge fully, and keep each patty 1/2–3/4″ thick for a dependable cook.
Cook at medium-high for about 5–7 minutes per side. Watch the melt window (130–150°F) so the center becomes creamy without leaking. Rest briefly so juices redistribute and the core sets to a smooth flow.
Assemble on toasted brioche or classic buns with crisp greens, tomato, and your chosen crunch layer. Taste before slathering heavy sauce so the core and peppers can shine.
| Component | Amount | Key Note |
|---|---|---|
| Ground beef | 1 lb | Use 80/20 for juiciness |
| Core cheese | 4 oz cubed | Melts at ~130–150°F |
| Patty thickness | 1/2–3/4″ | Predictable 5–7 min per side |
| Buns & toppings | 4 buns, lettuce, tomato | Toast buns to prevent sogginess |
This method works on both grill and stovetop. For more assembly tips and a similar approach, see my linked guide on a classic stuffed cheese recipe.
Portions, Timing, and Scaling for Any Crowd
My approach to scaling keeps every patty the right size so heat and melt stay uniform across the grill. Small, consistent steps in prep and cook order make the process repeatable and calm when I feed a group.
From single patty to multiple patties
I standardize each portion by weight so the patty thickness stays at 1/2–3/4 inch. That size aligns with about 5–7 minutes per side and helps the center melt at a steady rate.
I weigh each portion when scaling up. This keeps texture and doneness consistent across all patties.
Keeping consistency across batches
Workflow matters: I stagger patties on the grill or in cast iron to avoid crowding and temperature drops. I rotate positions to counter hot spots.
- I batch-toast buns and prep toppings ahead so assembly is fast.
- I rest cooked patties on a warm rack to hold heat without steaming the crust.
- I keep a simple timing grid with start and flip times to manage multiple patties at once.
- I set out build-your-own topping trays so plated burgers move quickly from grill to guest.
| Scaling Step | Why it helps | How I do it | Result |
|---|---|---|---|
| Weigh portions | Uniform cook and melt | Use a kitchen scale; match gram/oz per patty | Even doneness across batch |
| Stagger cooking | Maintains surface heat | Cook in waves; avoid overcrowding | Consistent crust and interior melt |
| Timing grid | Simple timing control | Note start/flip/remove times | Predictable finish for many patties |
| Prep toppings & buns | Faster assembly, less heat loss | Batch-toast buns; set trays | Smoother service, hot plates |
For more on scaling recipes for groups, I link to a practical guide on techniques for scaling recipes that I often reference when planning larger cookouts.
Troubleshooting: Dry Patties, Leaking Cheese, and Heat Control
A sealed center and steady heat are what I chase; when they fail, specific steps get you back on track. These fixes focus on sealing, juiciness, and sensible temperature control so the filling melts where it belongs.
Preventing leaks and blowouts
Seal thoroughly: press and smooth the seam around the entire patty and patch any tiny gaps before it hits the surface. Fixing seams cold is faster than chasing leaks over heat.
Maintaining juiciness with 80/20 ground beef
I use 80/20 ground beef to avoid dry results. Mix gently, avoid overworking, and rest patties a few minutes after cooking so juices redistribute rather than run out when cut.
Managing medium heat and avoiding overcooking
Start with a short sear, then finish at steady medium heat so the exterior browns while the core reaches the melt window (~130–150°F). I cook 1/2–3/4″ patties about 5–7 minutes per side as a baseline.
- I check temperature often near the end to avoid overshoot.
- Reduce flare-ups with a two-zone grill or lower burner intensity under cast iron.
- If a patty domes, press the center gently early, then leave it alone.
- Pull patties promptly at target to prevent carryover from forcing the filling out.
| Problem | Quick Fix | Why it works |
|---|---|---|
| Leaking filling | Reseat seam; chill before cooking | Tighter seal prevents molten escape |
| Dry meat | Use 80/20; minimal handling; rest | Fat content and rest retain juices |
| Burned outside, cold core | Sear then finish at medium heat | Allows center to reach melt temp without overcooking crust |
Tools and Products That Make It Easier
A few well-chosen products make forming even patties and managing the cook far less fiddly. I recommend tools that speed prep, tighten seams, and keep results consistent when working with a molten core.
Stuffed patty makers and presses
I use a stuffed press to create consistent wells and matching lids. Models like the Cuisinart CSBP-100 and Grillaholics press give uniform size and cleaner edges.
Why it helps: presses with patty papers simplify stacking and chilling. The Shape+Store tray and Meykers press let me batch, freeze, and match bun sizes without guesswork.
Cast iron and grill accessories
A heavy cast iron skillet delivers even heat and a great crust when I’m not on the grill. For outdoor cooking, I keep a sturdy spatula, a grate brush, and neutral high-smoke-point oil on hand.
- I choose products for durability, ease of cleaning, and how they fit my workflow.
- These options streamline prep, improve consistency, and make multiple cooks manageable.

| Tool | Benefit | Best use |
|---|---|---|
| Stuffed press (Cuisinart/Grillaholics) | Uniform wells, patty papers included | Batch forming and chill-ready stacks |
| Shape+Store / Meykers | Batch freezing and size control | Scaling cooks and portioning |
| Cast iron / grill tools | Even heat, reliable sear | Finish on stovetop or grill |
Conclusion
Follow a clear plan for heat, sealing, and timing, and your patties will match what you love from local spots. Use 1 lb ground beef, Hellfire cheese, peppers, onions, spices, and simple toppings to get repeatable, melty results.
Cook on medium-high for about 5–7 minutes per side with patties 1/2–3/4″ thick. Let patties rest and toast buns—small steps save texture and improve the final stack.
With this guide, you can rival many restaurants and even chase that satisfying gas station flavor at home. For a linked variation, see the BBQ bacon and pepper variation.
FAQ
What internal temperature should I aim for to get a juicy, safe patty?
I aim for 160°F for ground beef to ensure safety while keeping the patty juicy. For medium doneness I target 155–160°F, and I use an instant-read thermometer placed in the side of the patty near the center to check. Rest the burger for a few minutes off the heat so carryover evens out the temperature and the melted filling sets.
How do I prevent the cheese pocket from leaking during cooking?
I tightly seal the edges when I form the patty, using a slight ridge of meat around the filling and pressing firmly. I also chill the assembled patties for 15–30 minutes before cooking so the filling firms up. Using a thicker cheese or mixing shredded cheese with a binder like cream cheese helps reduce leaks.
How thick should I make each patty for even cooking?
I form patties about ¾ inch thick before cooking; after sealing they finish around 1 inch. That thickness gives a good sear while allowing the center to reach the right temperature without burning the exterior. If I stack multiple patties, I adjust the thickness and time accordingly.
Should I cook these on a gas grill or in a cast iron skillet?
I use both depending on mood. A gas grill at medium-high gives great char and smoke, while cast iron on medium heat gives a reliable, even sear and easier flare-up control. For stuffed burgers I often prefer cast iron because it lets me manage heat and press gently to finish melting cheese.
How many minutes per side should I cook the patties?
I typically cook 3–4 minutes per side on a hot cast iron or grill for a 1-inch stuffed patty, then reduce heat if needed and cook another 2–3 minutes to allow the filling to heat through. Times vary with thickness and heat, so I rely on an instant-read thermometer rather than a strict minute count.
What ground beef ratio keeps the burger juicy but stable?
I use 80/20 ground beef (meat to fat) for the best balance of juiciness and structure. Leaner blends dry out quickly and make leaks more likely; fattier mixes hold up better when enclosing a cheese filling.
What buns and toasting method do you recommend for texture and support?
I prefer brioche or a sturdy potato roll toasted lightly in butter on the griddle. Toasting adds structure to hold sauces and crunch layers, and it prevents the bun from becoming soggy from melted filling and condiments.
Which cheeses melt best inside a stuffed patty?
I choose cheeses with good meltability and flavor—pepper jack melts nicely and adds spice, while blue cheese gives a bold tang but can be runnier. Combining cheeses, or blending a semi-soft melting cheese with a stronger-flavored crumbly cheese, helps balance melt and taste.
What crunchy options pair best with the spicy filling?
I layer chips, crispy fried onions, or shredded iceberg for crunch. Each gives a different texture and temperature contrast: chips add a salty snap, crispy onions bring savory crispness, and shredded lettuce offers fresh crunch without extra oil.
What sauces cool down heat without flattening flavor?
I use creamy dressings like ranch or blue cheese to temper heat, and I like mayo blends with lime or garlic for richness. For contrast, a drizzle of hot honey or chipotle mayo keeps complexity while balancing spice.
How can I scale this recipe for a crowd while keeping consistency?
I portion meat with a kitchen scale—about 6–8 ounces per stuffed patty—then assemble in batches and chill until cooking. I set up a two-station cook line (grill and resting area) and use a thermometer to ensure each patty reaches target temperature for consistent results.
What are common troubleshooting tips for dry patties or blowouts?
I avoid overworking the meat when forming patties and keep the fat content at 80/20. For blowouts, I overwrap the edges slightly and chill patties before cooking. If patties dry out, I reduce direct high heat and finish on indirect heat or with a lid to retain moisture.
Are there tools that make stuffed patties easier to form?
I use a stuffed burger press or a patty maker to get even, well-sealed pockets quickly. A good instant-read thermometer, a cast iron skillet or reliable gas grill, and a fish spatula for gentle flipping also make a big difference.
Can I prepare patties ahead and freeze them?
I assemble patties, flash-freeze them on a tray until firm, then bag and freeze. Cook from frozen but add a few extra minutes per side and check internal temperature carefully so the filling fully heats without overcooking the exterior.
My Hellfire Cheese Stuffed Crunch Burger: A Spicy Delight
- Total Time: 30
- Yield: 4 1x
Description
Bold, melty Hellfire Cheese Stuffed Crunch Burger with molten center perfection. Crafted for discerning home chefs seeking restaurant-quality results with a spicy, gooey core and crisp exterior.
Ingredients
1 lb ground beef (80/20)
1/2 cup bread crumbs
4 oz Hellfire cheese, cubed
1/4 cup diced onions
1/4 cup diced bell peppers
1/4 cup diced jalapeños
1 tsp garlic powder
1 tsp chili powder
Salt and pepper to taste
4 burger buns (brioche preferred)
Lettuce leaves
Tomato slices
High smoke point oil for cooking
Instructions
1. Mix ground beef with bread crumbs, diced onions, bell peppers, jalapeños, garlic powder, chili powder, salt and pepper in large bowl
2. Divide mixture into 8 equal portions for 4 stuffed burgers
3. Flatten 4 portions into thin patties for bottoms
4. Place cubed Hellfire cheese in center of each bottom patty
5. Top with remaining 4 patties and seal edges completely, pressing firmly around entire perimeter
6. Form into 1/2 to 3/4 inch thick patties, keeping edges slightly thicker
7. Chill formed patties for 15-30 minutes to help hold shape
8. Preheat grill to medium-high or heat cast iron skillet to medium
9. Cook patties 5-7 minutes per side without pressing, until internal temperature reaches 160°F
10. Check that cheese center reaches 130-150°F for perfect melt
11. Toast burger buns lightly with butter
12. Rest cooked burgers 2-3 minutes before assembly
13. Assemble with lettuce, tomato, and desired toppings on toasted buns
Notes
SEALING TIP: Press edges firmly and patch any gaps before cooking to prevent cheese leaks.
TEMPERATURE GUIDE: Use instant-read thermometer to check both meat (160°F) and cheese center (130-150°F).
COOKING METHODS: Works equally well on grill or cast iron skillet – maintain medium-high heat.
MAKE-AHEAD: Form patties and chill up to 24 hours before cooking.
PIN THIS RECIPE: Save to your Pinterest boards for your gourmet burger collection!
FOLLOW CRENNRECIPES: For chef-tested recipes that deliver restaurant results every time.
- Prep Time: 15
- Cook Time: 15
- Category: Main Course
- Method: Grilling
- Cuisine: American
Nutrition
- Serving Size: 1
- Calories: 520
- Sugar: 3g
- Sodium: 680mg
- Fat: 32g
- Saturated Fat: 14g
- Unsaturated Fat: 16g
- Trans Fat: 0g
- Carbohydrates: 28g
- Fiber: 2g
- Protein: 35g
- Cholesterol: 95mg

