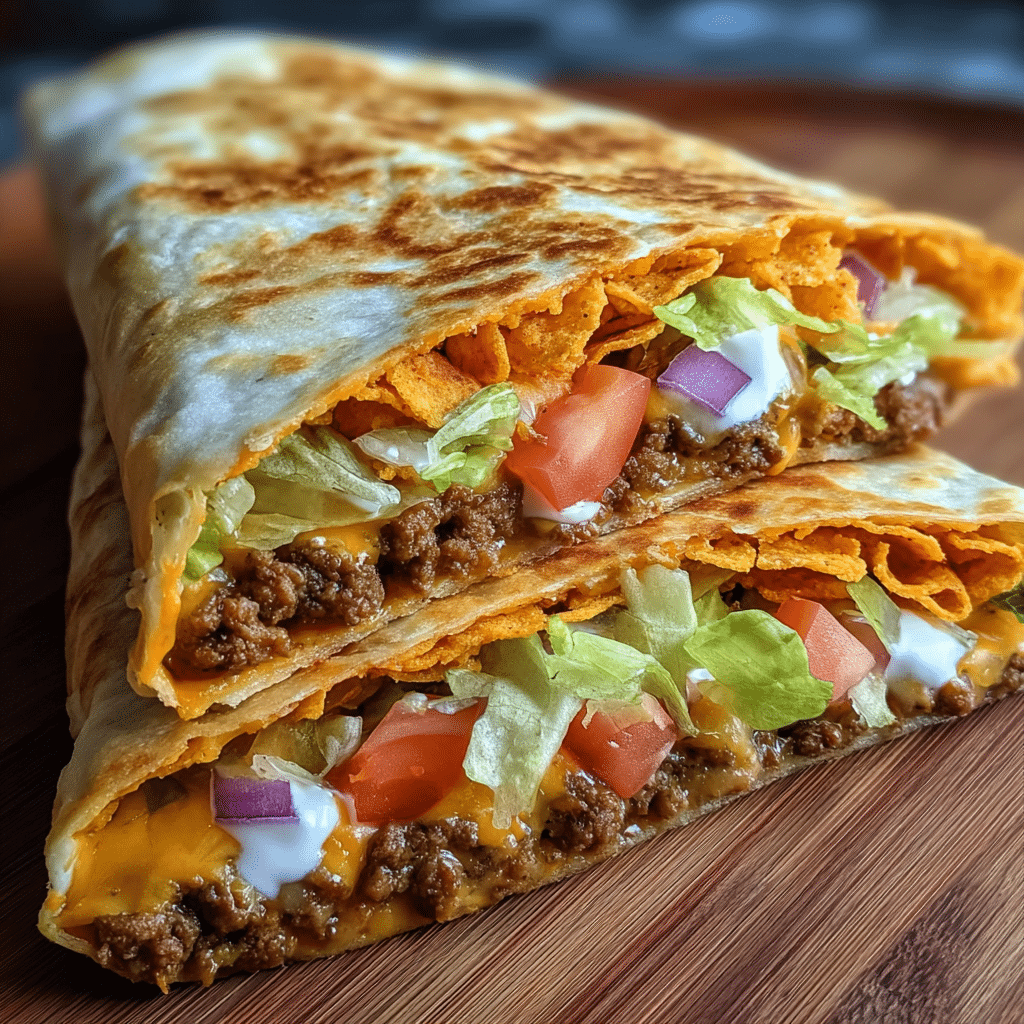
I make this version at home because it brings big fast‑food energy into my kitchen while staying fresh and customizable. I use a 12‑inch tortilla so folds are consistent and the size gives room for a crisp core and melty cheese.
I spend about an hour total—prep, cook, assemble, and toast—so timing fits a quick night in. For protein, I prefer seasoned beef, but I often swap in chicken, beans, or tofu to suit the mood.
The defining bite is the audible crunch from a tostada or a chip layer paired with warm nacho sauce and cool sour cream. I fold the fillings into a hexagon, then toast seam‑side down until golden for a portable, satisfying wrap.
This recipe proves that homemade food can taste fresher than drive‑thru and still travel well for lunches or meal prep.
Key Takeaways
- Use an extra‑large tortilla for reliable folding and better portion control.
- Seasoned beef is my go‑to, but protein swaps keep the dish flexible.
- Plan about an hour for prep, assembly, and toasting.
- The crunchy core plus melted cheese creates the signature contrast.
- This homemade version stays crisp enough for meal prep and travel.
Why I Had to Try This Bold Flaming Hot Doritos Crunchwrap at Home
I wanted a home version that delivers big flavor, extra crunch, and a more controlled level of spice. This food feels indulgent but is easy to make and tweak to taste.
I kept assembly simple by laying out ingredients on a cutting board. That keeps the center tidy for neat layering and speeds up the process when I’m cutting toppings or slicing tomatoes.
The 12‑inch tortilla size matters — it gives enough room to fold cleanly and seal without overstuffing. I use whole chips as the crunchy core or a tostada substitute when I want a different texture.
- Balance: I aim to pair heat with melty cheese and cool toppings so the spice remains craveable.
- Protein swaps: Beef on busy nights, chicken for lighter meals, or beans for a meatless option.
- Crisp finish: A thin smear of mayo on the exterior crisps more evenly than butter on medium heat.
Keep the ingredient list practical and modular. The full recipe steps coming up will show exactly how I stack layers in the center and seal a tight, tidy pocket.
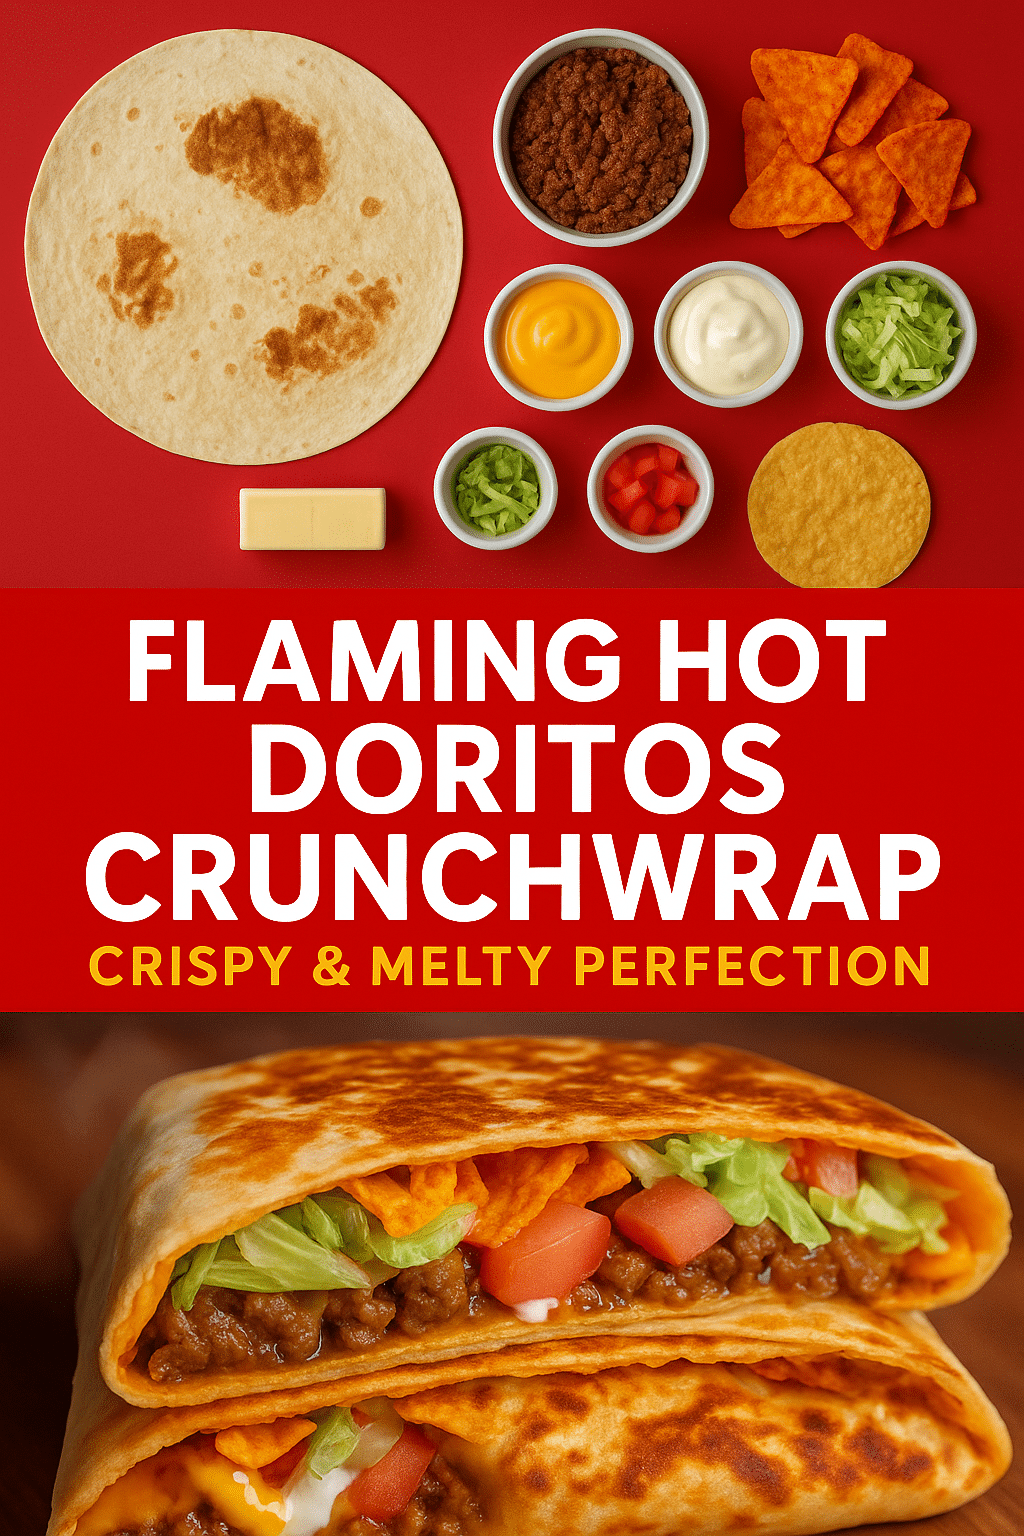
Ingredients I Used and Smart Swaps for Extra Heat and Crunch
I choose components that layer well and stand up to toasting without sogginess. Below I list what I keep on hand and why each piece matters for a tidy, crispy result.
Tortillas and why size matters
I use an XL 12‑inch tortilla so folds meet cleanly and seal. If you only have smaller rounds, add a small tortilla “cap” to help close the edges.
Proteins: beef, chicken, or beans
My go‑to is seasoned ground beef made with chili powder, cumin, onion and garlic powder, paprika, a splash of tomato sauce and water, simmered until saucy and finished with salt and pepper. I swap in shredded chicken or beans for a lighter or vegetarian option.
Cheese, sauces, and the crunch core
For melt I pick warm nacho cheese, cheddar slices, or a Tex‑Mex blend. I portion wet layers by the cup so fillings don’t slide. Cool add‑ins include sour cream, guacamole, and mayo. For crunch I use a fried tostada or whole chips; I also keep a bowl to mix crushed chips into the meat for bolder flavor.
Quick pickled jalapeños are a simple vinegar brine with water and a pinch of sugar; they add bright heat. Final checklist: tortilla, protein, cheese, crunch, sauces, and pickles—everything prepped before I layer.
Flaming Hot Doritos Crunchwrap Melt Down Recipe (Step by Step)
This step-by-step recipe shows how I move from cooked filling to a perfectly sealed, toasted wrap. I keep the prep tight so assembly is quick and tidy.
Prep on the cutting board
I brown the beef over medium‑high, then add chili powder, cumin, onion and garlic powder, paprika, and optional cayenne. I stir in tomato sauce and 1/4 cup water, simmer until slightly reduced, season with salt and pepper, and set aside.
On a clean surface I warm the cheese so it spreads easily and arrange all other ingredients within reach.
Layer in the center
I lay an XL tortilla flat and add a compact mound of beef in the center, then a generous scoop of warm nacho cheese. I press a whole tostada or chips for the crunchy core and finish with sour cream, lettuce, and tomatoes.
Fold to a hexagon
I pull the edges inward in overlapping sections to form a hexagon, managing the seam so it stays tight. If the edges look thin, I use a small cap tortilla before folding.
Toast in the pan
I heat a non‑stick pan and add 1 tsp oil. I place the wrap seam-side down first to lock the fold. Watch until the first side is golden brown, then flip and toast the other side. It takes just a few minutes per side; rest briefly before slicing.
- Cook beef and simmer; set aside to cool slightly.
- Warm cheese and arrange ingredients for fast assembly.
- Build in center, fold hexagon, manage seam and edges.
- Toast seam-side down in pan with oil until golden brown, flip, rest, and serve.
| Step | Action | Time | Tip |
|---|---|---|---|
| Prep beef | Brown, add spices & 1/4 cup water, simmer | 8–10 minutes | Set aside to avoid soggy stacking |
| Assembly | Center beef, cheese, crunch, cool toppings | 2–3 minutes | Keep ingredients close on cutting board |
| Fold | Create hexagon, seal seam and edges | 1–2 minutes | Use small cap tortilla for smaller wraps |
| Toast | Pan with 1 tsp oil, seam-side down first | 2–4 minutes per side | Flip when golden brown for even crisp |
Pro Tips I Learned for Maximum Crunch, Melt, and Flavor
Small changes in technique make the finish reliable every time. I focus on heat and timing so the center melts while the exterior crisps. These tips are the fast, practical habits I use when I cook this recipe.
Seam‑side first
I always start seam‑side down so the heat sets the fold and the edges bond before I touch it with a spatula. That first contact seals the seam and lowers the risk of splitting when you flip.
Mayo, butter, or oil?
I ran side‑by‑side tests and found mayo gives a more even, crackly finish than butter at medium heat, while neutral oil stays clean and light. Spread a thin layer from center to edges so browning is uniform.
Golden cues and timing
Preheat your pan properly; dropping a cold wrap on a cool surface creates steam, not crisp. Aim for about three minutes per side, then flip once the exterior looks golden brown and feels firm to the touch.
- Don’t overfill—too much bulk stresses the seam and ruins browning.
- Keep sauce modest inside; extras go on the side to protect the crust.
- Treat this like a recipe playbook: control heat, monitor minutes, and seal first for pro results.
Variations You’ll Love Without Losing the Signature Crunch
I experiment with layers so the crisp center stays reliable while flavors shift. Small swaps let me tailor heat, texture, and richness without changing how it holds together.
Crushed seasoning in the beef
Crush chips into a fine crumb and stir them into the cooked ground beef for bold seasoning. The crumbs bind with the meat and add an even crunch in every bite.
Whole chips vs. tostada shell
Whole chips give intense crunch and extra heat. A tostada shell provides a flatter, sturdier base that keeps the wrap tidy through toasting.
Protein swaps
I rotate shredded chicken, ground turkey, or seasoned beans to match the meal mood. With chicken I layer cheddar slices for a clear cheesy bite and finish with my favorite sauce.
Quick pickled jalapeños
I make a simple brine of vinegar, water, and a pinch of salt. They’re good in 48 hours and usually taste better after a week.
- I portion guacamole or salsa by the cup to avoid soggy pockets.
- I mix add-ins in a bowl first so seasonings disperse evenly.
- I keep an XL tortilla to preserve fold integrity across swaps.
For a full copycat guide and extra assembly tips, see my detailed crunch wrap instructions here.
| Variation | Main swap | Best use |
|---|---|---|
| Bold seasoned | Crushed chips in ground beef | Everyday comfort with consistent crunch |
| Extra heat | Whole chips layer | When you want louder texture and spice |
| Sturdy base | Tostada shell | Meal prep or travel—less breakage |
| Light & lean | Shredded chicken or ground turkey | Weeknight dinners with cheddar slices |
| Meatless | Seasoned beans + queso | Comfort food with creamy sauce |
How I Assemble, Fold, and Toast Like a Pro
I use a simple setup on my cutting board so folding feels purposeful, not messy. A clean board keeps the center clear and makes it easy to manage edges while I layer fillings. I pick the folding method based on the tortilla size and how full the wrap is.
Quadrant fold hack on a cutting board for tidy pockets
For the quadrant method I start with a single cut from the center to the edge. Then I fold each quadrant over the next, building a layered pocket that holds wet fillings better. This hack is fast and makes neat pockets that toast evenly in about 3 minutes per side.
Classic hexagon fold: stepwise edges pulled to the center
For the hexagon I pull the edges toward the center in six overlapping folds. Each pull tightens the seam and creates a compact shape that resists leaking. After six folds I place the wrap seam-side down on a preheated pan so the exterior sets immediately.
- Set up on a sturdy cutting board and choose quadrant or hexagon based on size and fill.
- Seam-side down for the first minutes to lock the fold, then flip once.
- Adjust time if extra cheese or wetter fillings are used to avoid scorching.
- Consistent pressure with a spatula helps brown evenly without cracking.
- I prefer an XL tortilla so folds overlap enough to prevent leaks.
For extra assembly detail and visuals see my detailed crunch wrap instructions.
| Technique | Key Move | Pan Time | Best Use |
|---|---|---|---|
| Quadrant fold | Cut center→edge, fold 4 quadrants sequentially | ~3 minutes per side | Wetter fillings, tidy pockets |
| Hexagon fold | Pull edges to center 6 times, seal seam | 2–4 minutes per side | High fill, tight seal for travel |
| Pan finish | Preheat pan, seam-side down first, press lightly | 2–4 minutes per side | Even browning, melted center |
Serving, Sides, and Sauces That Make It Pop
My favorite way to present it is straight from the pan with bright pico and a small lineup of sauces. I serve the wrap hot so the cheese is melty and the crunch stays crisp.
I offer a fresh pico de gallo and a creamy mayo‑based sauce on the side so each person can top their bite as they like. Inside I sometimes use a light smear of mayo, and outside I prefer mayo over butter for an even, crackly finish.
On the plate I portion salsas by the cup to keep the presentation tidy and to avoid sogging the tortilla. If I want richness, I add a dollop of store‑bought guacamole or a couple of cheddar slices melted on top during the last seconds in the pan.
- I serve the wrap hot with pico and a creamy sauce on the side.
- I top with extra cheese or guacamole without weighing down the crust.
- I plate extra whole chips on the side to echo the internal crunch and add color.
- If sharing, I cut the wrap in half on the bias so the layers show.
| Item | Why | Tip |
|---|---|---|
| Fresh pico | Bright, cooling contrast | Serve by the cup |
| Mayo‑based sauce | Creamy, to tame spice | Use inside and for toasting |
| Extra chips | Visual and textural echo | Serve whole for max crunch |
Conclusion
A few reliable steps transform an XL tortilla, seasoned ground beef, and a bold crunchy core into a weeknight winner. Keep the cooked beef to the side to cool briefly so layers stay tidy and avoid sog.
Top with warm nacho cheese and fresh toppings on the top or the side to balance heat and texture. Start seam‑side down in a hot pan with a touch of oil, flip once, and watch your time so both sides brown evenly.
I use measured cup portions and a steady fold routine for repeatable results. Slice in half to showcase the layers and serve immediately for peak crunch. For more assembly tips see my crunch wrap guide.
FAQ
What inspired my twist on the Taco Bell classic?
I wanted a bolder, crunch-forward version of the hexagonal wrap I grew up loving. I combined a crisp chip layer, seasoned ground beef, melty cheese, and a tangy mayo-based sauce to balance heat and creaminess.
Which tortilla size and type work best for clean folds and sealed edges?
I use an XL flour tortilla. It gives me enough surface to fold a tight hexagon without tearing, and the extra size helps seal the seam so fillings don’t escape while toasting.
Should I choose beef, chicken, or a vegetarian filling?
I often cook seasoned ground beef for a classic, beefy bite, but shredded chicken or well-spiced beans work great too. Choose based on texture you want: beef for richness, chicken for lean protein, beans for a meatless option.
What cheeses melt best inside the wrap?
I prefer a blend of nacho cheese and cheddar slices or a Tex-Mex mix. That combo melts quickly and gives both creamy stretch and sharp flavor.
Do I need a specific chip or tostada for the crunch core?
I layer either a tostada shell or whole flavored chips for the signature crunch. Tostadas add sturdiness; whole chips give a fresher, crisp bite. Both work—pick based on how fragile your tortilla is.
How do I keep the seam sealed when folding?
I fold toward the center in neat quadrants, pressing the edges firmly. A dab of sauce or a tiny smear of softened butter at the seam helps it stick while toasting.
What fat and heat level crisps the wrap best in a pan?
I use a light coating of oil or a small pat of butter in a preheated skillet set to medium. That gives an even golden brown without burning and keeps the inside melty.
How many minutes per side should I toast for a golden crust?
I toast about 2–4 minutes per side on medium heat. Watch for a golden brown color and a firm seam before flipping. Adjust time slightly for thicker fillings.
Can I prep fillings ahead for faster assembly?
Yes. I cook the meat, shred chicken, and mix sauces in advance. Keep components warm or reheat briefly so cheese melts properly when you assemble.
What sauces and toppings do I recommend?
I like a mayo-based spicy sauce, sour cream, pico de gallo, and sliced pickled jalapeños. These add creaminess, acidity, and bright heat that cut through the richness.
Any quick swaps to boost flavor and texture?
I add crushed chip seasoning to the cooked beef for extra punch or swap a tostada for whole chips for added crunch. A sprinkle of salt and fresh ground pepper at the end sharpens the flavors.
How do I avoid a soggy center?
I drain hot fillings well, let any saucy toppings cool slightly, and place the crunch layer between hot protein and cooler toppings. Toasting on both sides seals moisture inside without sogginess.
What equipment do I need for best results?
I use a large skillet, a cutting board for folding, and a spatula for flipping. A small bowl for sauces and a plate to set finished wraps aside help the process flow smoothly.
Are there low-effort variations for weeknight dinners?
Absolutely. I use leftover rotisserie chicken, pre-shredded cheese, and store-bought crispy shells to speed assembly. The method still yields good crunch and melty cheese with minimal time.
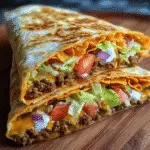
My Experience with the Flaming Hot Doritos Crunchwrap Melt Down
- Total Time: 30
- Yield: 4 1x
Description
Bold homemade version of the classic Crunchwrap Supreme featuring seasoned ground beef, melty nacho cheese, and a signature Flaming Hot Doritos crunch layer wrapped in a perfectly toasted XL tortilla. This recipe delivers big fast-food energy with fresh, customizable ingredients in about an hour.
Ingredients
1 XL flour tortilla (12-inch)
1 lb ground beef
1 packet taco seasoning (or 2 tsp chili powder, 1 tsp cumin, 1 tsp onion powder, 1 tsp garlic powder, 1/2 tsp paprika)
1/4 cup water
2 tbsp tomato sauce
1/2 cup warm nacho cheese
1 large tostada shell or handful of Flaming Hot Doritos chips
1/4 cup sour cream
1/2 cup shredded lettuce
1/2 cup diced fresh tomatoes
2 tbsp vegetable oil for cooking
Salt and black pepper to taste
Instructions
1. Brown ground beef in large skillet over medium-high heat, breaking up into small pieces as it cooks
2. Add taco seasoning, tomato sauce, and 1/4 cup water to the beef, simmer until slightly reduced and saucy, season with salt and pepper, then set aside
3. Warm nacho cheese and arrange all ingredients within reach on cutting board for quick assembly
4. Lay XL tortilla flat on cutting board, add compact mound of seasoned beef in center
5. Pour generous scoop of warm nacho cheese over beef
6. Press tostada shell or whole Flaming Hot Doritos chips on top for signature crunch layer
7. Add dollop of sour cream, handful of shredded lettuce, and diced tomatoes
8. Fold tortilla edges toward center in overlapping sections to create hexagon shape, ensuring tight seam
9. Heat non-stick pan over medium heat with 1 tsp vegetable oil
10. Place crunchwrap seam-side down first, cook 2-3 minutes until golden brown and seam is sealed
11. Flip carefully with spatula and cook other side 2-3 minutes until golden brown and crispy
12. Remove from heat, rest briefly before cutting in half on bias and serving immediately
Notes
Use XL 12-inch tortilla for best folding results – smaller tortillas may require additional small cap tortilla to seal edges properly
Keep seasoned beef slightly saucy but not overly wet to prevent soggy assembly and maintain structural integrity
Mayo can be substituted for vegetable oil when toasting exterior for extra golden crispiness
Prep all ingredients before assembly begins for smooth, efficient process
Serve immediately while nacho cheese is melty and exterior maintains crispy texture
Store leftover components separately in refrigerator and reassemble fresh when ready to eat
For meal prep, cook beef filling ahead and reheat before assembly for quicker weeknight preparation
- Prep Time: 15
- Cook Time: 15
- Category: Main Dish
- Method: Pan Frying
- Cuisine: Tex-Mex
Nutrition
- Serving Size: 1
- Calories: 650
- Sugar: 4
- Sodium: 1200
- Fat: 32
- Saturated Fat: 14
- Unsaturated Fat: 16
- Trans Fat: 1
- Carbohydrates: 58
- Fiber: 4
- Protein: 28
- Cholesterol: 85

