This innovative Sushi Sandwich combines the beloved flavors of traditional sushi with the convenient format of a Western sandwich. Featuring seasoned sushi rice, fresh vegetables, and premium seafood between slices of soft sandwich bread, this creative dish delivers all the umami goodness of sushi in a portable, easy-to-eat package that’s perfect for lunch, picnics, or entertaining.
Introduction to the Sushi Sandwich
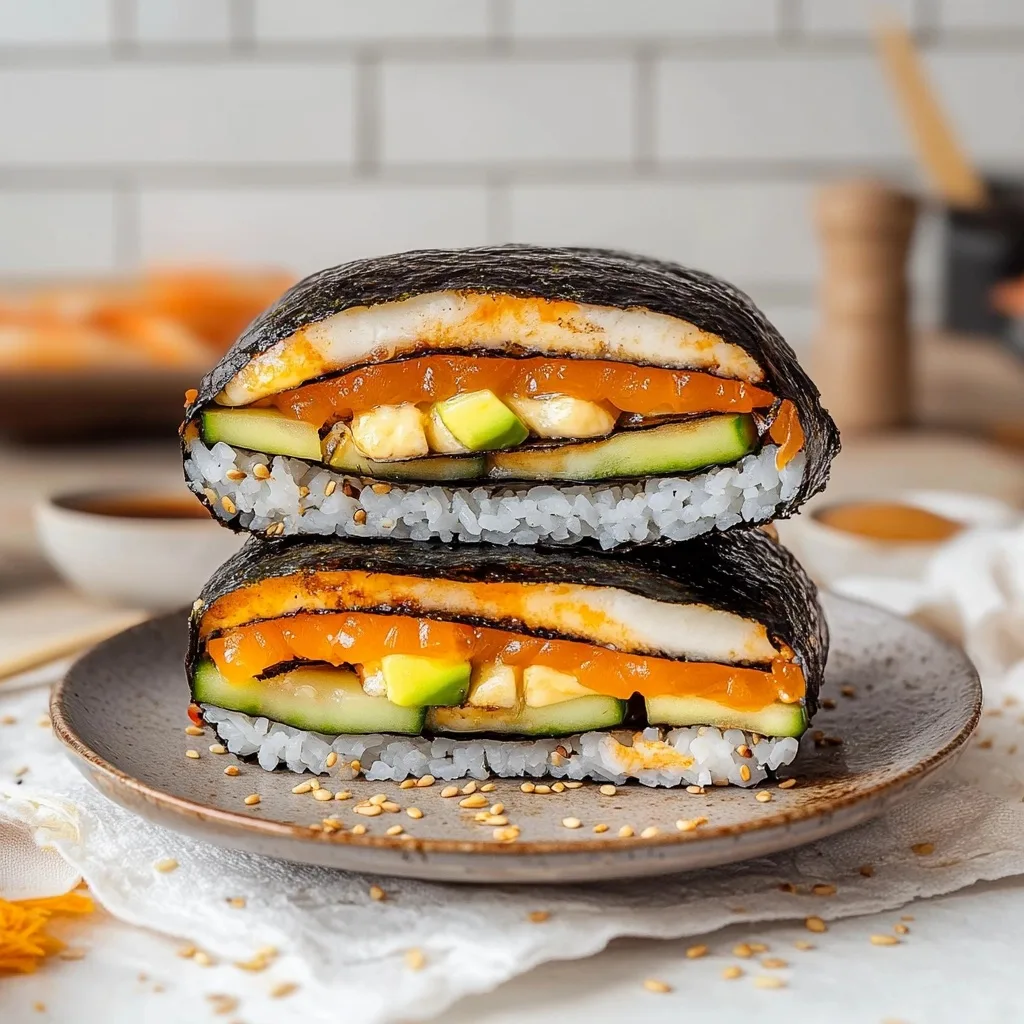
The Sushi Sandwich represents the beautiful marriage of Japanese culinary tradition and Western convenience food. This delightful fusion creation takes all the elements we love about sushi—perfectly seasoned rice, fresh seafood, crisp vegetables, and nori—and reimagines them between two slices of soft sandwich bread. The result? A cross-cultural culinary masterpiece that’s as visually stunning as it is delicious.
Unlike traditional sushi that requires specialized rolling skills and equipment, the Sushi Sandwich is remarkably approachable for home cooks of all experience levels. You don’t need a bamboo mat, perfect knife skills, or years of practice—just a few quality ingredients and about 20 minutes of your time. Yet when sliced, these sandwiches reveal an impressive cross-section of colorful ingredients that will have everyone reaching for their phones to snap a picture before taking that first delicious bite.
Whether you’re looking to shake up your lunch routine, impress guests at your next gathering, or simply try something new in the kitchen, the Sushi Sandwich delivers on all fronts. It’s customizable, portable, and offers a perfect balance of textures and flavors in every bite. Even better, this recipe makes four substantial sandwiches, enough to serve a small family or to meal prep for workday lunches.
In this comprehensive guide, we’ll explore everything you need to know about creating perfect Sushi Sandwiches at home—from selecting the right ingredients to assembly techniques and creative variations. Let’s dive into this exciting fusion dish that’s taking home kitchens and social media by storm!
Essential Ingredients for the Perfect Sushi Sandwich
The Foundation: Selecting the Right Bread and Rice
The Sushi Sandwich begins with two critical components: the bread and the rice. Each plays a vital role in the sandwich’s structure and flavor profile:
Sushi Rice: The heart of any good Sushi Sandwich is properly prepared sushi rice. Short-grain Japanese rice is ideal, as it has the perfect stickiness to hold together while maintaining distinct grains. Season your cooked rice with the classic mixture of rice vinegar, sugar, and salt to achieve that signature tangy-sweet flavor that makes sushi so irresistible. Allow the rice to cool just enough to handle comfortably, but use it while still warm enough to be pliable for the best texture.
Bread Selection: The bread you choose will significantly impact your Sushi Sandwich experience. Soft, white sandwich bread or Japanese milk bread (shokupan) works beautifully, providing a tender texture that complements the filling without competing with it. The bread’s subtle sweetness pairs wonderfully with the vinegared rice and savory fillings. While whole grain breads can work, their stronger flavors may overwhelm the delicate balance of the sushi elements.
Fresh Fillings: Seafood, Vegetables, and Spreads
The magic of the Sushi Sandwich comes from its colorful and flavorful fillings:
Seafood Options: This recipe calls for smoked salmon or cooked shrimp, both excellent choices that require no additional cooking. The smoky richness of salmon or the sweet pop of shrimp provides the protein anchor for your sandwich. Ensure your seafood is fresh and of high quality—this isn’t the place to compromise.
Fresh Vegetables: Crisp cucumber and creamy avocado create the perfect textural contrast in your Sushi Sandwich. The cucumber adds refreshing crunch, while avocado contributes buttery richness. Slice both thinly and evenly for the most visually appealing cross-section and balanced bite.
Creamy Elements: Softened cream cheese serves as both a binding agent and flavor enhancer. It creates a barrier between the bread and wet ingredients, preventing sogginess, while adding a rich tanginess that complements the other components beautifully.
Nori (Seaweed): Don’t skip the nori sheets! They provide that authentic oceanic umami flavor that makes this truly a sushi experience. Half-sheets work perfectly, covering just enough surface area without making the sandwich difficult to eat.
Garnishes and Seasonings: Toasted sesame seeds add nutty flavor and visual appeal, while optional additions like pickled ginger, wasabi mayo, or radish slices can elevate your Sushi Sandwich with punchy flavor accents.
By prioritizing fresh, quality ingredients, you’ll create a Sushi Sandwich that delights all the senses—from its colorful appearance to its complex, harmonious flavors.

Step-by-Step Guide to Creating Your Sushi Sandwich
Preparing the Components
Before assembly, each element of your Sushi Sandwich needs proper preparation:
- Cook and Season the Rice: Start by preparing 2 cups of sushi rice according to package directions. While still warm, season with the mixture of 2 tablespoons rice vinegar, 1 teaspoon sugar, and ½ teaspoon salt. Gently fold to incorporate without mashing the grains. Allow to cool until just warm and sticky but not hot—about 10-15 minutes.
- Prepare Your Vegetables: While the rice cools, focus on your produce. Julienne the cucumber into thin matchsticks about 3 inches long. Slice the avocado into thin, even slices—aim for about ⅛-inch thickness to create an even layer. If using radishes, slice these paper-thin using a mandoline if available.
- Ready Your Seafood: Ensure your smoked salmon is sliced thinly, or if using shrimp, slice cooked shrimp in half lengthwise to create flat pieces that will layer neatly in the sandwich.
- Cut the Nori: Using kitchen scissors, cut your nori sheets in half to create rectangles that will fit perfectly on your bread slices.
- Bring Cream Cheese to Room Temperature: This ensures it spreads easily without tearing the bread. If needed, you can microwave it for 10 seconds to soften.
- Optional Toast: For a subtle textural contrast, you can lightly toast your bread until just barely golden. This creates a sturdier base while maintaining the bread’s softness.
With all components prepared, you’re ready to begin the assembly process!
Assembly Techniques
Creating the perfect Sushi Sandwich is all about thoughtful layering:
- Cream Cheese Foundation: Lay out four slices of bread and spread each with approximately 1 tablespoon of cream cheese, reaching all the way to the edges. This creates a moisture barrier that helps prevent soggy bread.
- Apply the Nori: Place a half-sheet of nori directly on top of the cream cheese. Press gently to adhere it to the cream cheese beneath.
- Rice Layer: Scoop approximately ½ cup of the seasoned sushi rice onto each nori-topped slice. Using slightly damp fingers or the back of a spoon, gently press and spread the rice into an even layer, maintaining about ¼-inch thickness.
- Strategic Filling Placement: On two of the rice-topped slices, arrange your fillings with visual appeal in mind. Begin with a layer of smoked salmon or shrimp, followed by overlapping avocado slices and cucumber julienne. Leave a small margin around the edges to prevent spillage.
- Final Touches: Sprinkle the filled sides with toasted sesame seeds and add any optional ingredients like wasabi mayo or pickled ginger if desired.
- Completing the Sandwich: Take the remaining two rice-topped slices and place them rice-side down onto the filled slices, creating two complete sandwiches with bread on both exterior sides and rice facing inward.
- Gentle Compression: Press down lightly but firmly on each sandwich to compress the layers slightly, helping them adhere together.
With your sandwiches assembled, you’re just one step away from enjoying this fusion delight!
Slicing and Presentation
The final steps transform your Sushi Sandwich from delicious to show-stopping:
- Trim the Crusts: Using a sharp knife, carefully remove the crusts from each sandwich for that classic, neat appearance. A serrated knife works well for this step.
- Precise Cutting: With a very sharp knife (clean it between cuts for the neatest result), slice each sandwich diagonally to create two triangle halves. The diagonal cut provides the maximum cross-section view of all your beautiful layers.
- Arrange Artfully: Place the sandwich triangles on a serving platter, positioning them to showcase the colorful cross-sections. Stand them upright for the most dramatic presentation.
- Final Garnish: Scatter additional toasted sesame seeds over the platter and around the sandwiches for an elegant finishing touch.
- Accompaniments: Serve with small dishes of soy sauce for dipping, and perhaps some additional pickled ginger or wasabi on the side.
This careful presentation transforms a simple sandwich into an Instagram-worthy culinary creation that tastes as good as it looks!
Creative Variations and Customizations
Protein Alternatives for Your Sushi Sandwich
While smoked salmon and shrimp are excellent traditional options, don’t be afraid to experiment with other proteins:
Crab Sensation: Imitation crab (surimi) mixed with a touch of mayo and a sprinkle of furikake creates a California roll-inspired Sushi Sandwich that’s economical and delicious.
Teriyaki Chicken: Thinly sliced teriyaki chicken breast adds a sweet-savory element that appeals to those who might be hesitant about raw or smoked seafood.
Tamago (Japanese Omelette): A thin, slightly sweet Japanese omelette provides a vegetarian protein option with authentic sushi flavor.
Tofu Options: For a plant-based version, consider marinated and baked tofu slices or crumbled tofu mixed with vegan mayo and seasoned with sushi flavors.
Each protein brings its own character to the Sushi Sandwich while maintaining the spirit of the fusion concept.
Vegetarian and Vegan Adaptations
The Sushi Sandwich lends itself beautifully to plant-based variations:
All-Vegetable Delight: Combine thinly sliced avocado, cucumber, bell pepper strips, and microgreens with a thin layer of wasabi mayo for a refreshing vegetarian option.
Tempura Vegetables: Add crispy tempura sweet potato or asparagus for textural contrast and satisfying substance.
Vegan Cream Cheese: Substitute dairy cream cheese with plant-based alternatives that spread just as smoothly while providing that creamy element.
Marinated Mushrooms: Thinly sliced shiitake or king oyster mushrooms marinated in a mixture of soy sauce, mirin, and rice vinegar provide umami richness in place of seafood.
These plant-based variations are not just accommodations but worthy Sushi Sandwich variations in their own right.
Flavor Boosters and Special Touches
Elevate your Sushi Sandwich with these flavor-enhancing additions:
Spicy Mayo: Mix mayonnaise with sriracha or chili oil for a spicy kick that complements the cool, fresh ingredients.
Tobiko or Masago: A sprinkle of these tiny, colorful fish eggs adds a satisfying pop and authentic sushi bar flair.
Flavored Rice: Experiment with adding furikake (Japanese rice seasoning) to your sushi rice for additional flavor dimensions.
Citrus Zest: A light grating of lemon or lime zest over your filling ingredients brightens the entire sandwich with aromatic citrus notes.
Herb Accents: Fresh herbs like cilantro, Thai basil, or shiso leaves can transform the flavor profile, taking your Sushi Sandwich in exciting new directions.
These thoughtful additions allow you to customize your Sushi Sandwich to your personal taste preferences or create varieties to please different palates when entertaining.

Serving Suggestions and Pairings
Perfect Accompaniments
The right side dishes and condiments enhance the Sushi Sandwich experience:
Miso Soup: A small cup of warm miso soup provides a traditional Japanese starter that balances the cool sandwich perfectly.
Edamame: Steamed and salted edamame pods offer a protein-rich finger food that complements the Sushi Sandwich beautifully.
Seaweed Salad: The bright, slightly acidic flavors of seaweed salad contrast with the rich creaminess of the sandwich.
Pickled Vegetables: Quick-pickled radishes, carrots, or cucumber add a tangy crunch that refreshes the palate between bites.
Japanese Potato Salad: This creamy, slightly sweet potato salad with vegetables makes for a hearty side that still feels appropriate alongside your fusion creation.
Beverage Pairings
Choose beverages that complement rather than overwhelm the delicate flavors of your Sushi Sandwich:
Green Tea: The classic Japanese beverage pairing for sushi works just as well with the Sushi Sandwich, especially when served cold on hot days.
Cucumber Water: Infuse water with cucumber slices for a refreshing, spa-like beverage that echoes the cucumber in your sandwich.
Light Lagers or Pilsners: If serving with beer, opt for lighter varieties that won’t overpower the subtle flavors.
Sake: For an authentic touch, a smooth, slightly chilled sake brings out the best in the seafood components.
Sparkling Water: The effervescence of sparkling water with a twist of lemon provides a palate-cleansing effect between bites.
These thoughtful pairings transform a simple Sushi Sandwich meal into a complete dining experience.
Make-Ahead and Storage Tips
Timing and Preparation Strategies
With some planning, Sushi Sandwiches can be prepared in advance:
Component Prep: Cook rice and prepare fillings up to a day ahead, storing them separately in the refrigerator. This makes assembly quick and convenient for lunch or dinner.
Same-Day Assembly: For the best quality, assemble Sushi Sandwiches no more than 4-6 hours before serving. If assembled too far in advance, the rice can dry out and the bread may become soggy.
Strategic Layering: When preparing ahead, place moisture barriers (cream cheese and nori) on both slices of bread to protect them from wet ingredients.
Warm Rice Consideration: If making ahead, allow the rice to cool completely before using to prevent condensation inside the sandwich.
With these strategies, you can enjoy fresh-tasting Sushi Sandwiches even with a busy schedule.
Storage Solutions
Proper storage maintains the quality of your Sushi Sandwich:
Short-Term Storage: Wrap assembled sandwiches tightly in plastic wrap and refrigerate for up to 4 hours.
Longer Storage: For longer storage, wrap individual components separately and assemble just before serving.
Transport Tips: When packing for lunch or picnics, use rigid containers to protect the sandwich structure and include an ice pack to keep seafood safely chilled.
Not Freezer-Friendly: Sushi Sandwiches do not freeze well due to the rice and fresh vegetables, so plan to consume them within the same day for best quality.
With proper storage techniques, you can enjoy this delightful fusion creation at home or on the go without compromising on taste or texture.

Nutritional Benefits and Dietary Considerations
Balanced Nutrition Profile
The Sushi Sandwich offers surprising nutritional benefits:
Complex Carbohydrates: The combination of sushi rice and bread provides energy-sustaining complex carbohydrates.
Lean Protein: Seafood options like salmon and shrimp deliver high-quality protein with essential omega-3 fatty acids.
Healthy Fats: Avocado contributes heart-healthy monounsaturated fats that support brain function and nutrient absorption.
Vegetables: Cucumber and optional additions like radish provide fiber, vitamins, and minerals with minimal calories.
Seaweed Benefits: Nori is rich in iodine, which supports thyroid function, and contains a variety of minerals including calcium, iron, and magnesium.
One Sushi Sandwich serving (half of a full sandwich) contains approximately 250-300 calories, making it a satisfying yet reasonable lunch or dinner option.
Adapting for Dietary Restrictions
With some modifications, the Sushi Sandwich can accommodate various dietary needs:
Gluten-Free Option: Substitute gluten-free bread or use gluten-free rice paper wrappers instead of bread for a completely different but equally delicious take on the concept.
Low-Carb Adaptation: Replace one slice of bread with a large lettuce leaf for an open-faced Sushi Sandwich with reduced carbohydrates.
Allergen Considerations: For fish allergies, substitute with cooked chicken or tofu; for dairy allergies, replace cream cheese with avocado mashed with a touch of rice vinegar.
Reduced Sodium: Use low-sodium soy sauce for dipping and minimize added salt in the rice seasoning for those watching their sodium intake.
These adaptations ensure that almost everyone can enjoy some version of this innovative fusion dish regardless of dietary restrictions.
Frequently Asked Questions About Sushi Sandwiches
Common Questions and Expert Answers
Q: Can I use brown rice instead of white sushi rice? A: Yes, you can use short-grain brown rice, but the texture will be different. Cook it longer and add a touch more vinegar mixture to help it stick together properly.
Q: How do I prevent my Sushi Sandwich from falling apart? A: The keys are using rice that’s still slightly warm when assembling, applying cream cheese as a binding agent, and wrapping the completed sandwich tightly in plastic wrap for at least 10 minutes before slicing.
Q: Is raw fish safe in a Sushi Sandwich? A: This recipe calls for smoked salmon or cooked shrimp for safety and convenience. If you wish to use raw fish, ensure it’s sushi-grade and consume the sandwich immediately after preparation.
Q: Can I make Sushi Sandwiches for a party ahead of time? A: Yes, but with limitations. Prepare all components in advance but assemble no more than 4 hours before serving. Keep refrigerated until ready to serve.
Q: Why is my rice not sticky enough? A: Proper sushi rice requires thorough rinsing before cooking and the addition of seasoned vinegar while the rice is still warm. Using medium or long-grain rice instead of short-grain will also result in less sticky rice.
Q: How do I achieve the cleanest cut for presentation? A: Use a very sharp knife, clean and slightly dampen the blade between cuts, and employ a gentle sawing motion rather than pressing straight down.
These practical answers help troubleshoot common issues and ensure Sushi Sandwich success.
Why You’ll Love This Sushi Sandwich Recipe
The Unique Appeal of Fusion Cuisine
The Sushi Sandwich exemplifies the best aspects of thoughtful fusion cooking:
Accessibility: This recipe transforms potentially intimidating sushi into a familiar sandwich format that appeals to both sushi enthusiasts and newcomers alike.
Visual Impact: Few dishes offer such impressive presentation with relatively simple technique—the multi-layered cross-section creates an instant wow factor.
Texture Harmony: The combination of soft bread, sticky rice, creamy avocado, and crisp cucumber creates a multidimensional textural experience in every bite.
Flavor Balance: The subtle sweetness of the bread, tangy rice, rich seafood, and fresh vegetables create a perfectly balanced flavor profile that satisfies without overwhelming.
Customization Potential: The basic framework allows for endless personalization, making this recipe one you can return to again and again with different variations.
Whether you’re an experienced cook looking for something new or a beginner seeking an impressive yet achievable recipe, the Sushi Sandwich offers something special that elevates everyday sandwich making to a culinary adventure.
More Related Recipes You Might Enjoy
If you enjoyed this Sushi Sandwich recipe, you might also like these other creative dishes from our collection:
- Summer Grilled Veggie Prep – These grilled vegetables would make an excellent side dish to complement your Sushi Sandwich, offering a warm contrast to the cool sandwich.
- Sweet Potato Ghost Pancakes – Another creative fusion dish that transforms traditional ingredients into something playful and unexpected, perfect for breakfast before enjoying Sushi Sandwiches for lunch!
- Sushi Burger Recipe – If you love the Sushi Sandwich concept, this Sushi Burger takes fusion cuisine to the next level, using rice “buns” and traditional sushi fillings in burger form.
Each of these recipes shares the Sushi Sandwich’s innovative spirit, transforming familiar ingredients and techniques into exciting new culinary experiences.
Conclusion: Mastering the Art of the Sushi Sandwich
The Sushi Sandwich represents everything wonderful about modern home cooking—it’s creative, approachable, visually stunning, and delicious. By combining the beloved flavors of Japanese sushi with the familiar format of a Western sandwich, this recipe bridges culinary traditions in a way that feels both innovative and comforting.
What makes the Sushi Sandwich truly special is its versatility. The basic technique can be adapted countless ways to suit different tastes, dietary needs, and ingredient availability. Whether you’re preparing a quick lunch, an impressive appetizer for guests, or a fun weekend cooking project with family, the Sushi Sandwich delivers satisfaction on all fronts.
As you master this recipe, you’ll likely discover your own favorite variations and serving styles. Perhaps you’ll create a spicy tuna version with sriracha mayo, or a vegetarian masterpiece with marinated shiitake mushrooms and pickled daikon. The possibilities are limited only by your imagination.
So gather your ingredients, embrace the fusion spirit, and enjoy the process of creating these beautiful Sushi Sandwiches. They’re sure to become a new favorite in your culinary repertoire—a dish that brings a touch of global inspiration to your everyday dining experience.
Print
Sushi Sandwich: 7 Amazing Ways to Make This Ultimate Fusion Dish
- Total Time: 20 minutes
- Yield: 4 sandwiches 1x
Description
This innovative Sushi Sandwich combines the beloved flavors of traditional sushi with the convenient format of a Western sandwich. Perfect for lunch, picnics, or entertaining!
Ingredients
- 2 cups sushi rice, cooked and lightly seasoned with 2 tablespoons rice vinegar, 1 teaspoon sugar, and ½ teaspoon salt
- 8 slices of soft sandwich bread (white or milk bread works beautifully)
- 4 sheets nori (seaweed), cut in half
- 4 ounces smoked salmon or deli-grade cooked shrimp, thinly sliced
- 1 avocado, peeled, pitted, and thinly sliced
- 1 small cucumber, julienned
- 4 tablespoons cream cheese, softened
- 2 teaspoons toasted sesame seeds
- Optional: pickled ginger, wasabi mayo (mix 2 tablespoons mayo with ½ teaspoon wasabi paste), or thinly sliced radish
Instructions
- In a large bowl, gently fluff your warm sushi rice with a wooden spoon. Drizzle in the rice vinegar mixture and fold to coat evenly. Let it cool just enough so it’s still pliable.
- For a little crunch contrast, you can lightly toast your bread slices (optional).
- Lay out four slices of bread. Spread each with about 1 tablespoon of cream cheese right to the edges.
- Place one half-sheet of nori on top of the cream cheese. Mound about ½ cup of sushi rice onto each nori-topped slice, pressing gently to create an even layer.
- On two of the rice-topped slices, arrange slices of smoked salmon (or shrimp), avocado, and cucumber julienne. Sprinkle each with a pinch of toasted sesame seeds. Add optional wasabi mayo or pickled ginger if desired.
- Top with the remaining two rice-topped slices, rice-side down, to form two closed sandwiches. Press them lightly to seal.
- Using a sharp knife, trim off the crusts if desired, then cut each sandwich in half diagonally.
- Pile on a platter, scatter a few extra sesame seeds, and serve with soy sauce for dipping.
Notes
- Use rice while still slightly warm for easier spreading and better adhesion
- A sharp knife is essential for clean cuts – clean the blade between cuts
- For best results, assemble no more than 4 hours before serving
- Store wrapped tightly in plastic wrap in the refrigerator
- Prep Time: 20 minutes
- Cook Time: 0 minutes (aside from rice cooking)
- Category: Lunch
- Method: No-Cook
- Cuisine: Fusion, Japanese
Nutrition
- Serving Size: 1 sandwich
- Calories: 320
- Sugar: 3g
- Sodium: 480mg
- Fat: 12g
- Saturated Fat: 4g
- Unsaturated Fat: 7g
- Trans Fat: 0g
- Carbohydrates: 42g
- Fiber: 3g
- Protein: 12g
- Cholesterol: 25mg