Transform your kitchen into a sushi bar with this easy-to-make Sushi Wrap recipe that brings restaurant-quality flavors straight to your dining table. Perfect for sushi lovers who want a simplified, family-friendly approach to this beloved Japanese cuisine!
Introduction to the Perfect Homemade Sushi Wrap
There’s something magical about the way sushi brings together simple ingredients to create complex, satisfying flavors. But let’s be honest—traditional sushi-making can seem intimidating with its precise techniques and specialized equipment. That’s where the Sushi Wrap comes in—an American chef-inspired take on this Japanese classic that maintains all the delicious elements while simplifying the process for home cooks.
This Sushi Wrap recipe combines the essentials of traditional sushi—seasoned rice, nori sheets, and fresh fillings—in a format that’s more forgiving and adaptable to your family’s tastes. Whether you’re a sushi aficionado looking for a weeknight shortcut or a novice eager to try making sushi at home, this recipe bridges the gap between authentic flavors and practical preparation.
What makes this Sushi Wrap special is its flexibility. You can stick with classic fillings like shrimp and cucumber or experiment with ingredients you already have in your refrigerator. It’s an excellent way to introduce children to sushi in a familiar wrap format, and the assembly process makes for a fun family cooking activity where everyone can customize their own creation.
In this comprehensive guide, I’ll walk you through each step of creating perfect Sushi Wraps, from properly cooking the rice to mastering the rolling technique. By the end, you’ll have a new go-to recipe that brings the experience of your favorite sushi restaurant right to your family kitchen—without the hefty bill or the need for specialized training.
Essential Ingredients for a Perfect Sushi Wrap
The Foundation: Sushi Rice
The heart of any good Sushi Wrap starts with properly prepared sushi rice. Unlike regular white rice, sushi rice (also called short-grain Japanese rice) has a higher starch content, giving it that characteristic sticky texture that holds your wrap together.
When shopping for sushi rice, look for packages labeled “sushi rice” or “short-grain Japanese rice.” Brands like Nishiki, Kokuho Rose, or Tamaki Gold are excellent choices. While it’s tempting to substitute another type of rice, the unique stickiness of sushi rice is essential for creating Sushi Wraps that don’t fall apart.
The seasoning for sushi rice—a simple mixture of rice vinegar, sugar, and salt—is equally important. This seasoning, called “sushi su,” gives the rice its distinctive tangy-sweet flavor that balances the other ingredients in your Sushi Wrap. Rice vinegar has a milder flavor than other vinegars, so it’s worth seeking out specifically for this recipe rather than substituting with white or apple cider vinegar.
Nori: The Essential Wrapper
Nori sheets are thin, dried seaweed sheets that serve as the outer wrapper for your Sushi Wrap. They come in different grades of quality, with higher grades being thicker, less brittle, and having a more vibrant dark green-black color.
For beginners, look for packages labeled “sushi nori” or “yaki nori” (toasted seaweed sheets). Store unused nori in an airtight container with a desiccant packet to prevent it from becoming stale and losing its crispness. One important tip: always keep the shiny side of the nori facing down when assembling your Sushi Wrap—this side will be on the outside of your finished roll.
Fresh Fillings Make the Difference
The beauty of Sushi Wraps lies in their versatility when it comes to fillings. This recipe includes classic options like cucumber, avocado, and shrimp or imitation crab, but don’t be afraid to experiment.
When selecting avocados, look for ones that yield slightly to gentle pressure—too firm and they’ll lack flavor, too soft and they’ll turn mushy in your wrap. Cucumbers should be firm and crisp; English or Persian varieties work well because they have fewer seeds and a thinner skin.
For the protein component, both cooked shrimp and imitation crab (surimi) are excellent options for beginners because they’re pre-cooked and ready to use. The Japanese mayonnaise (Kewpie brand is most popular) adds creaminess and richness to the seafood mixture. It differs from American mayonnaise with its smoother texture and slight sweetness, but regular mayonnaise can be substituted in a pinch.
Don’t forget the julienned carrots and green onions, which add color, crunch, and freshness to balance the rich flavors of the other ingredients. These small details elevate your Sushi Wrap from good to great.

Step-by-Step Guide to Making the Perfect Sushi Wrap
Mastering Sushi Rice Preparation
The foundation of an exceptional Sushi Wrap is perfectly cooked and seasoned rice. Here’s how to achieve it:
First, thoroughly rinse the sushi rice until the water runs clear—this removes excess starch that can make your rice too gummy. Use a fine mesh strainer and cold water, gently rubbing the rice between your fingers. This process usually takes 4-5 rinses.
When cooking the rice, the ratio of 2 cups rice to 2½ cups water creates the ideal texture. Bring to a boil uncovered, then reduce to a low simmer with the lid on. Resist the urge to peek during cooking—the steam is essential for proper cooking!
After the 18-20 minute cooking time and 10-minute rest period, your rice should be tender but still have a slight firmness to each grain. Transfer it to a wide, non-metallic bowl—traditionally, a wooden hangiri bowl is used, but any large glass or ceramic bowl works well. The wide surface area helps the rice cool evenly.
The seasoning mixture should be warm but not hot when added to the rice. Using a cutting and folding motion rather than stirring prevents the rice grains from breaking and becoming mushy. Fan the rice as you fold to help it cool more quickly and give it a beautiful glossy appearance.
Preparing Your Fillings for Maximum Flavor
Proper preparation of fillings ensures your Sushi Wrap has balanced flavors and textures in every bite:
When making the shrimp or crab mixture, chop the seafood into small, consistent pieces before mixing with the Japanese mayonnaise and sriracha. Let this mixture sit for 10-15 minutes to allow the flavors to meld while you prepare the other ingredients.
Slice the avocado just before assembly to prevent browning. A thin, even slice about 1/8-inch thick provides the perfect creamy texture without overwhelming the other components. A squeeze of lemon juice helps maintain its bright green color.
For cucumber, after cutting into matchsticks, lightly salt them and let sit for 5 minutes, then pat dry. This draws out excess moisture that could make your Sushi Wrap soggy and enhances the cucumber’s natural flavor.
Julienne the carrots as finely as possible using a sharp knife or mandoline slicer. The thinner the strips, the more elegant your finished Sushi Wrap will look and the better the texture will be when eaten.
The Art of Rolling Your Sushi Wrap
The rolling technique might seem challenging at first, but with a few attempts, you’ll quickly get the hang of it:
Position your nori sheet shiny-side down on a bamboo rolling mat or clean work surface. If using a bamboo mat, cover it with plastic wrap first to prevent sticking and make cleanup easier.
When spreading the rice, keep a small bowl of water nearby to wet your hands—this prevents the rice from sticking to your fingers. Spread the rice in an even layer about 1/4-inch thick, applying gentle pressure to ensure it adheres to the nori but doesn’t get compacted.
The key to a tight roll is in the initial fold. After arranging your fillings in a horizontal line across the bottom third of the rice-covered nori, lift the bottom edge of the mat with your thumbs while holding the fillings in place with your fingers. Pull the edge up and over the fillings, then use the mat to continue rolling forward while applying even pressure.
For a clean seal, lightly wet the bare 1/2-inch strip at the top of the nori sheet before completing the roll. This moisture activates the natural adhesive properties of the seaweed, creating a secure closure.
Allow the completed roll to rest for 1-2 minutes before slicing. This brief rest lets the nori soften slightly and bond with the rice, resulting in cleaner cuts.
Slicing and Presentation Tips
The final steps transform your Sushi Wrap from rustic to restaurant-quality:
Use a very sharp knife for cutting—a dull blade will crush rather than slice through your roll. Wipe the blade clean and re-wet it between each cut to prevent sticking.
For the most attractive presentation, trim a small piece from each end of the roll before slicing into 6-8 equal pieces. These end pieces often have less filling but make a perfect chef’s treat!
Arrange your sliced Sushi Wrap on a serving platter in a slightly overlapping pattern that displays the colorful fillings. Place small dishes of soy sauce, wasabi, and pickled ginger alongside for dipping and palate cleansing.
For an extra touch of elegance, garnish the plate with additional sliced green onions, a sprinkle of sesame seeds, or a few small drops of sriracha for color and flavor accents.
Creative Variations and Customizations for Sushi Wrap
Family-Friendly Filling Adaptations
One of the greatest advantages of making Sushi Wrap at home is the ability to customize fillings based on preferences and dietary needs:
For picky eaters or children new to sushi, simplify with familiar proteins like cooked chicken strips, scrambled egg, or even thinly sliced deli ham. The familiar flavors make the Sushi Wrap concept more approachable.
Vegetarian options abound: try roasted red peppers, steamed asparagus spears, thinly sliced mango, or strips of firm tofu marinated in soy sauce. These vegetables and fruits add beautiful color variety and different nutritional profiles.
For those who love spice, incorporate thinly sliced jalapeño or a sprinkle of togarashi (Japanese seven-spice blend) into your Sushi Wrap. The heat complements the coolness of cucumber and creaminess of avocado beautifully.
Consider “Americanized” adaptations that blend cultural influences, such as adding a thin layer of cream cheese (Philadelphia roll style), substituting smoked salmon for shrimp, or even incorporating crispy bacon bits for a surprising twist.
Sauce and Seasoning Variations
Customizing the sauces and seasonings takes your Sushi Wrap to the next level:
Create a quick spicy mayo by mixing Japanese mayonnaise with additional sriracha or Korean gochujang for a deeper, more complex heat. Drizzle this over your roll before cutting or serve alongside for dipping.
For an umami-rich variation, brush the nori with a mixture of unagi sauce (eel sauce) and rice vinegar before adding the rice. This adds a sweet-savory note that enhances the overall flavor profile.
Experiment with adding different seasonings to your sushi rice, such as furikake (a Japanese dry seasoning typically containing seaweed, sesame seeds, and dried fish), toasted sesame seeds, or even a light sprinkle of shichimi togarashi for heat.
For a fusion approach, try a cilantro-lime rice variation by adding finely chopped cilantro and lime zest to your seasoned sushi rice. This creates a refreshing, slightly Mexican-inspired flavor that pairs wonderfully with avocado.
Presentation Styles Beyond Traditional Rolls
While the classic rolled Sushi Wrap is delicious, there are other presentation methods that offer visual variety and different eating experiences:
Try the “hand roll” style (temaki) by forming the nori into a cone shape and filling it with rice and fillings. This casual, ice-cream-cone-like presentation is perfect for family sushi nights where everyone assembles their own.
For an inside-out roll (uramaki), place plastic wrap over your bamboo mat, spread the rice on the nori, flip it over so the rice faces down, add fillings, then roll. Finish by coating the exterior with sesame seeds or tobiko (flying fish roe) for extra texture and visual appeal.
Create a deconstructed Sushi Wrap bowl (chirashi style) by placing seasoned rice in a bowl and artfully arranging your prepared fillings on top. This approach eliminates the rolling step entirely while maintaining all the flavors.
For a party-friendly option, make mini Sushi Wrap bites by cutting nori sheets in half before assembly, creating smaller, two-bite rolls that are perfect for appetizer trays or bento boxes.

Nutritional Benefits and Dietary Adaptations
Health Benefits of Sushi Wrap Ingredients
The Sushi Wrap isn’t just delicious—it’s packed with nutritional benefits:
Nori sheets are surprisingly nutritious, containing significant amounts of iodine (essential for thyroid function), vitamins A, C, and E, along with minerals like calcium and iron. They’re also a rare plant source of vitamin B12, making them valuable for vegetarian diets.
Avocado provides heart-healthy monounsaturated fats, fiber, and potassium. Its creamy texture adds richness to the Sushi Wrap without the need for high-calorie sauces or excessive amounts of mayo.
Cucumber delivers hydration, vitamin K, and silica—a compound that supports skin, hair, and nail health. Its crisp texture and mild flavor make it a perfect counterpoint to the other ingredients.
Seafood components like shrimp offer lean protein and valuable nutrients such as selenium and vitamin D, while being low in calories. Even imitation crab, though more processed, provides a good amount of protein with minimal fat.
Carrots add beta-carotene (which converts to vitamin A in the body), supporting eye health and immune function. Their natural sweetness also balances the tangy rice and savory fillings.
Adapting for Dietary Restrictions
The versatile Sushi Wrap can be modified to accommodate various dietary needs:
For gluten-free diets, ensure your soy sauce is specifically labeled gluten-free, as traditional soy sauce contains wheat. Also check imitation crab ingredients, as many varieties contain wheat starch or other gluten-containing binders.
Those following low-carb or keto diets can create a rice-free version by using thinly sliced cucumber or lettuce leaves as the wrapper instead of nori and rice. Alternatively, use cauliflower “rice” seasoned with rice vinegar, sugar substitute, and salt as a convincing stand-in.
Vegan Sushi Wraps are simple to create by omitting the seafood and mayonnaise. Try marinated tofu, tempeh, or roasted mushrooms for umami flavor, and use vegan mayo or a thin layer of mashed avocado as the binding component.
For those watching sodium intake, reduce the salt in the sushi rice seasoning and use low-sodium soy sauce for dipping. Adding fresh herbs and citrus zest can compensate for the reduced salt while adding brightness to the flavor profile.
Serving and Storage Recommendations
Creating a Complete Sushi Wrap Meal Experience
Elevate your Sushi Wrap from a single dish to a complete dining experience:
Start with a simple miso soup or a small seaweed salad as an appetizer to set the tone for your meal. These light starters prepare the palate for the main course without filling guests up.
Serve your Sushi Wrap with traditional accompaniments arranged in small dishes: soy sauce for dipping, wasabi for heat, and pickled ginger for palate cleansing between bites. Consider adding a small dish of seasoned rice vinegar for an extra dipping option.
For a family-style meal, create a Sushi Wrap “board” with sliced rolls alongside additional Japanese-inspired sides like edamame, cucumber salad with rice vinegar dressing, or simple steamed vegetables with sesame seeds.
Complete the meal with a light dessert that continues the theme—try green tea ice cream, mochi, or fresh fruit with a ginger-infused simple syrup for a refreshing finish that won’t overwhelm after the complex flavors of the Sushi Wrap.
Proper Storage and Make-Ahead Tips
While Sushi Wrap is best enjoyed fresh, there are ways to prepare components ahead of time:
The seasoned sushi rice can be made up to 6 hours ahead and stored at room temperature covered with a damp towel. Refrigerating makes it hard and unworkable, so if you need to make it a day ahead, allow time for it to come back to room temperature before assembly.
Prepare fillings the day before and store separately in airtight containers in the refrigerator. The seafood mixture with mayonnaise actually improves with a few hours of resting time as the flavors meld.
Fully assembled Sushi Wraps can be wrapped tightly in plastic wrap and refrigerated for up to 24 hours before slicing and serving. The nori will soften over time, but many people enjoy this texture for make-ahead sushi.
If you have leftover sliced Sushi Wrap, store it in an airtight container in the refrigerator and consume within 24 hours. The texture will change somewhat, but the flavor remains enjoyable for a quick lunch the next day.

Troubleshooting Common Sushi Wrap Challenges
Solving Rice Issues
The most common challenges when making Sushi Wrap involve the rice preparation:
If your rice is too sticky and gummy, you likely used too much water or didn’t rinse it sufficiently before cooking. Next time, be more thorough with the rinsing process and double-check your water measurements.
Conversely, if the rice is too dry or falls apart when rolling, you may have used too little water or overcooked it, causing moisture loss. Adding a bit more of the vinegar mixture can help salvage dry rice by adding moisture and binding properties.
When the rice sticks excessively to your hands during assembly, make sure you’re keeping a bowl of water nearby and regularly wetting your fingertips. Some cooks also like to keep a solution of 1 part rice vinegar to 2 parts water for hand-dipping, which prevents sticking while adding minimal flavor.
If your seasoned rice lacks flavor, adjust the vinegar mixture next time by slightly increasing the sugar and salt. Remember that properly seasoned sushi rice should taste distinctly tangy-sweet, as it counterbalances the other ingredients in the roll.
Rolling and Cutting Solutions
The technical aspects of assembly and slicing can also present challenges:
For rolls that fall apart during cutting, the culprit is usually either overfilling or not rolling tightly enough. Use less filling next time and focus on creating tension as you roll by pulling back slightly on the bamboo mat with each turn.
If you’re struggling with the nori tearing during rolling, it may have absorbed moisture from humid air. Passing the nori briefly over a gas flame or electric burner before use can help restore its crispness and prevent tearing.
When your knife crushes rather than cleanly slices through the roll, it’s definitely not sharp enough. Between cuts, wipe the blade clean and dip it in warm water to prevent sticking. A serrated knife is a poor substitute, as it will saw through and damage the presentation.
For unevenly sized pieces, try this professional technique: cut the roll in half first, align the halves, then cut each half into thirds or quarters. This methodical approach yields more consistently sized pieces than trying to eyeball equal portions along the entire roll.
Frequently Asked Questions About Sushi Wrap
How do I know when my sushi rice is properly cooked?
Perfectly cooked sushi rice should be tender throughout with no hard center, yet still maintain distinct grains without being mushy. When you press a grain between your fingers, it should flatten completely but not dissolve into paste. After the cooking and resting period, each grain should be slightly firm but yield easily when bitten.
Can I prepare Sushi Wrap without a bamboo rolling mat?
Absolutely! While a bamboo mat (makisu) makes the process easier, you can successfully roll Sushi Wrap using a clean kitchen towel, a silicone mat, or even a piece of parchment paper. Some home cooks simply use their hands for rolling, applying gentle, even pressure to form the cylinder shape. The key is maintaining consistent tension throughout the rolling process, regardless of what tool you use.
How do I prevent my avocado from browning in the Sushi Wrap?
To keep avocado looking fresh, slice it just before assembly and immediately brush with a small amount of lemon or lime juice. When storing prepared Sushi Wrap, the rice and nori actually help protect the avocado from air exposure, slowing the browning process. For advance preparation, consider adding avocado only to rolls that will be consumed immediately, substituting cucumber or another green vegetable in rolls intended for later consumption.
What’s the best way to serve Sushi Wrap at a party?
For entertaining, consider creating a variety of Sushi Wrap options with different fillings, clearly labeled for guests. Slice the rolls just before serving and arrange them on platters with small dishes of soy sauce, wasabi, and pickled ginger for each guest or group. Provide both chopsticks and small forks for ease of eating. A creative presentation might include placing the sliced rolls on individual spoons for one-bite appetizers or arranging them in a spiral pattern on a round platter for visual impact.
How can I make my Sushi Wrap taste more like restaurant sushi?
The secret to restaurant-quality flavor often lies in the details: use the highest quality nori you can find, properly season your rice (it should taste distinct on its own), and include a small amount of wasabi inside the roll during assembly rather than only serving it on the side. Many sushi restaurants also brush the completed rolls with a mixture of rice vinegar and mirin (sweet cooking sake) for shine and flavor enhancement. Finally, allowing the assembled roll to rest for 5-10 minutes before slicing helps the flavors meld and the texture stabilize.
Enjoy Your Homemade Sushi Wrap Creation
Making Sushi Wrap at home is more than just preparing a meal—it’s creating an experience that brings together tradition, creativity, and fresh flavors. This American chef-style recipe respects the essential elements of traditional sushi while adapting the techniques and presentations to be accessible for home cooks of all skill levels.
The beauty of the Sushi Wrap lies in its versatility. Once you’ve mastered the basic techniques—cooking perfectly seasoned rice, preparing fresh fillings, and rolling with confidence—you have the foundation to create countless variations that suit your taste preferences and dietary needs. Whether you stick with classic combinations or venture into fusion territory, the result is always a visually striking, flavor-packed meal that’s sure to impress.
Don’t be discouraged if your first attempt doesn’t look picture-perfect. Like any culinary skill, rolling Sushi Wrap improves with practice, and even imperfectly rolled sushi is delicious! The hands-on nature of this recipe makes it an ideal activity for family cooking nights, where everyone can customize their own roll and develop their techniques together.
So gather your ingredients, clear some counter space, and dive into the rewarding world of homemade Sushi Wrap. Your family kitchen might just become your new favorite sushi bar!
More Related Recipes You Might Enjoy
- Cranberry Meatballs – These tangy-sweet appetizers offer the same hand-held appeal as sushi wraps, perfect for entertaining with contrasting flavors like your sushi wrap.
- Grilled Lemon Herb Chicken Bowls – If you enjoy the customizable nature of sushi wraps, these fresh grain bowls give you the same build-your-own experience with bright, zesty flavors.
- Witch Hat Chocolate Cookies – After enjoying your savory sushi wraps, these whimsical treats provide a sweet finish that’s just as fun to make as they are to eat.

Sushi Wrap Magic: 7 Incredible Secrets for Restaurant-Quality
- Total Time: 1 hour
- Yield: 6 rolls (serves 3-4 people) 1x
Description
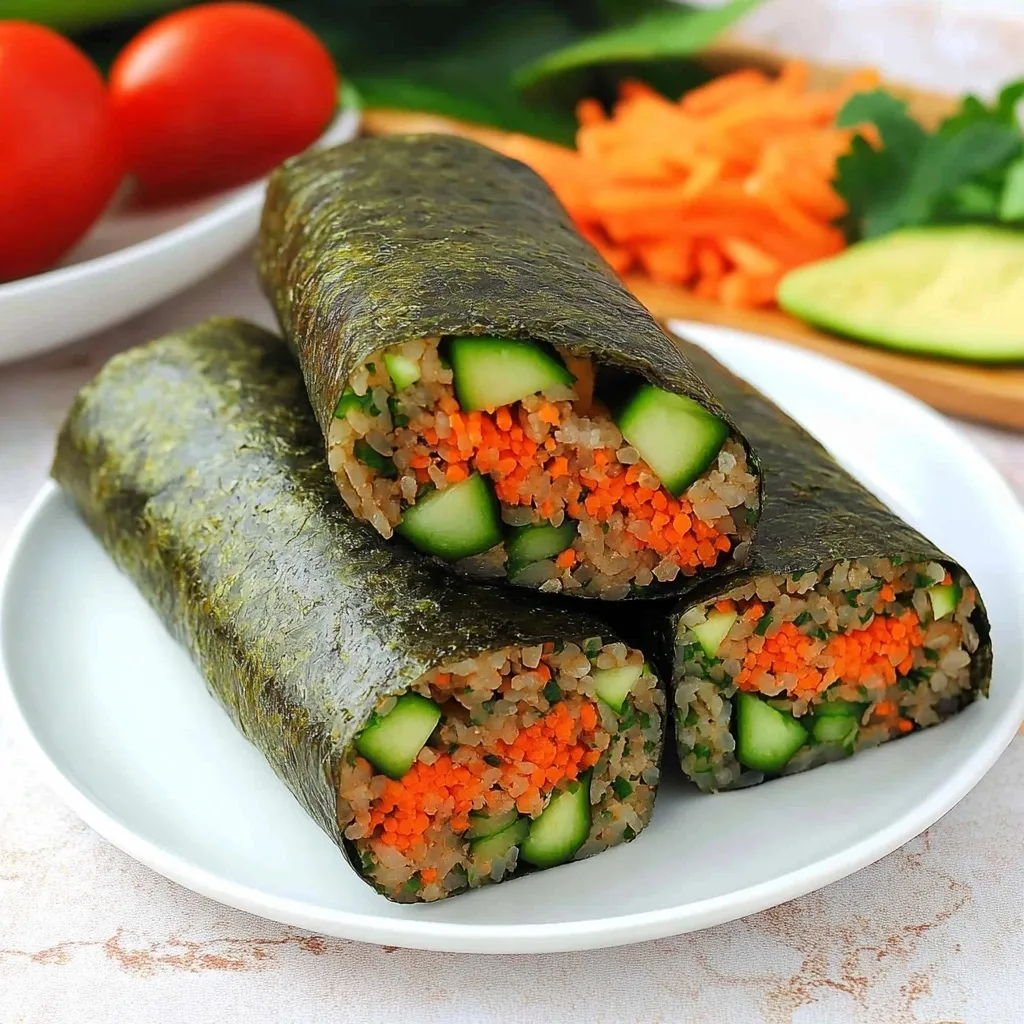
Homemade Sushi Wrap combines the flavors of traditional sushi in an easy-to-make format perfect for family meals. This American chef-style recipe features seasoned sushi rice, fresh vegetables, and seafood wrapped in nori sheets for a delicious and customizable meal that’s as fun to make as it is to eat.
Ingredients
- 2 cups sushi rice (uncooked)
- 2 ½ cups water
- ¼ cup rice vinegar
- 2 tablespoons granulated sugar
- 1 teaspoon kosher salt
- 6 large nori sheets
- 1 avocado, thinly sliced
- 1 small cucumber, cut into matchsticks
- 6 ounces cooked shrimp or imitation crab sticks, shredded
- 2 tablespoons Japanese mayonnaise (or regular mayo)
- 1 teaspoon sriracha (optional, for a little kick)
- 1 carrot, julienned
- 2 green onions, thinly sliced
- Soy sauce, pickled ginger, and wasabi for serving
Instructions
- Cook the rice: Rinse sushi rice under cold water until the water runs clear. Combine rice and 2½ cups water in a pot, bring to a boil, then reduce to low, cover, and simmer 18–20 minutes. Remove from heat and let rest, covered, 10 minutes.
- Season the rice: While rice rests, gently heat the rice vinegar, sugar, and salt in a small saucepan just until sugar dissolves. Transfer rice to a large bowl and pour the vinegar mixture over it. Using a wooden spoon or rice paddle, fold the rice—don’t smash it—to cool and season evenly.
- Prep your fillings: In a small bowl, mix the shredded shrimp or crab with Japanese mayo and sriracha. Set aside. Slice avocado, julienne carrot, cut cucumber into sticks, and thinly slice green onions.
- Assemble the wraps: Lay one nori sheet shiny-side down on a bamboo mat or clean countertop. With wet hands, grab a handful of rice and spread a thin, even layer over the nori, leaving a ½-inch border at the top edge.
- Add fillings: On the rice’s bottom third, arrange a line of the shrimp/crab-mayo mix, then add cucumber sticks, carrot, avocado slices, and a sprinkle of green onion.
- Roll it up: Lift the edge of the nori closest to you and roll away, pressing gently but firmly to form a tight cylinder. Seal the edge with a dab of water. Repeat with remaining sheets and fillings.
- Slice and serve: Using a sharp, wet knife, cut each roll into 6–8 bite-sized pieces. Serve family-style with soy sauce, pickled ginger, and a touch of wasabi on the side.
Notes
- Keep a small bowl of water nearby to wet your fingers when handling the rice to prevent sticking.
- For best results, use a very sharp knife and wipe it clean between cuts.
- Substitute fillings based on preferences and dietary needs – try using cooked chicken, tofu, or additional vegetables.
- For a spicier version, add more sriracha to the mayo mixture or include thinly sliced jalapeño as a filling.
- Prep Time: 30 minutes
- Cook Time: 30 minutes
- Category: Main Dish
- Method: No-Cook
- Cuisine: Japanese-American
Nutrition
- Serving Size: 1 roll
- Calories: 295
- Sugar: 4g
- Sodium: 450mg
- Fat: 8g
- Saturated Fat: 1.5g
- Unsaturated Fat: 6g
- Trans Fat: 0g
- Carbohydrates: 45g
- Fiber: 3g
- Protein: 12g
- Cholesterol: 45mg