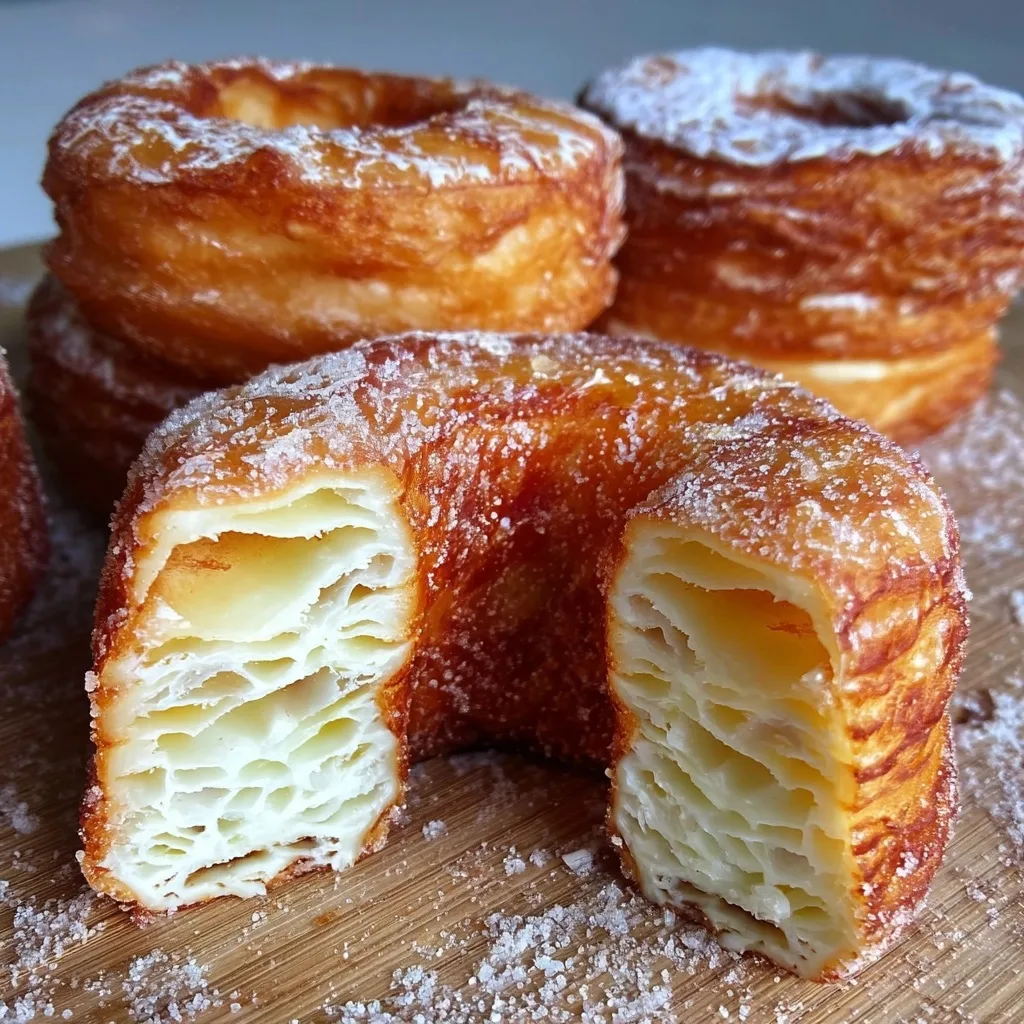
There’s something absolutely magical about the moment when a croissant meets a donut and creates pure breakfast bliss. Cronuts have taken the culinary world by storm since their debut in 2013, and for good reason – they’re flaky, buttery, sweet, and completely irresistible. Moreover, making homemade cronuts in your own kitchen isn’t just possible; it’s an incredibly rewarding experience that’ll make you the hero of every breakfast table.
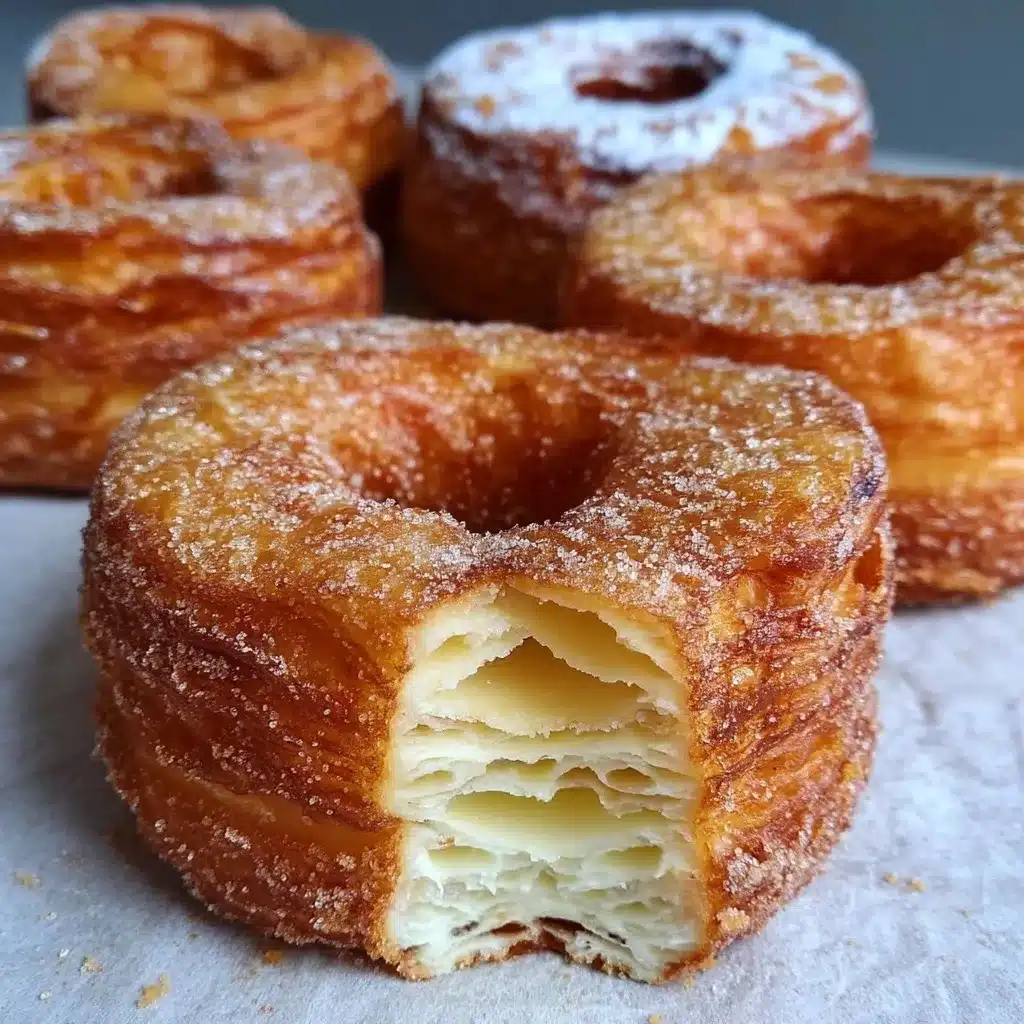
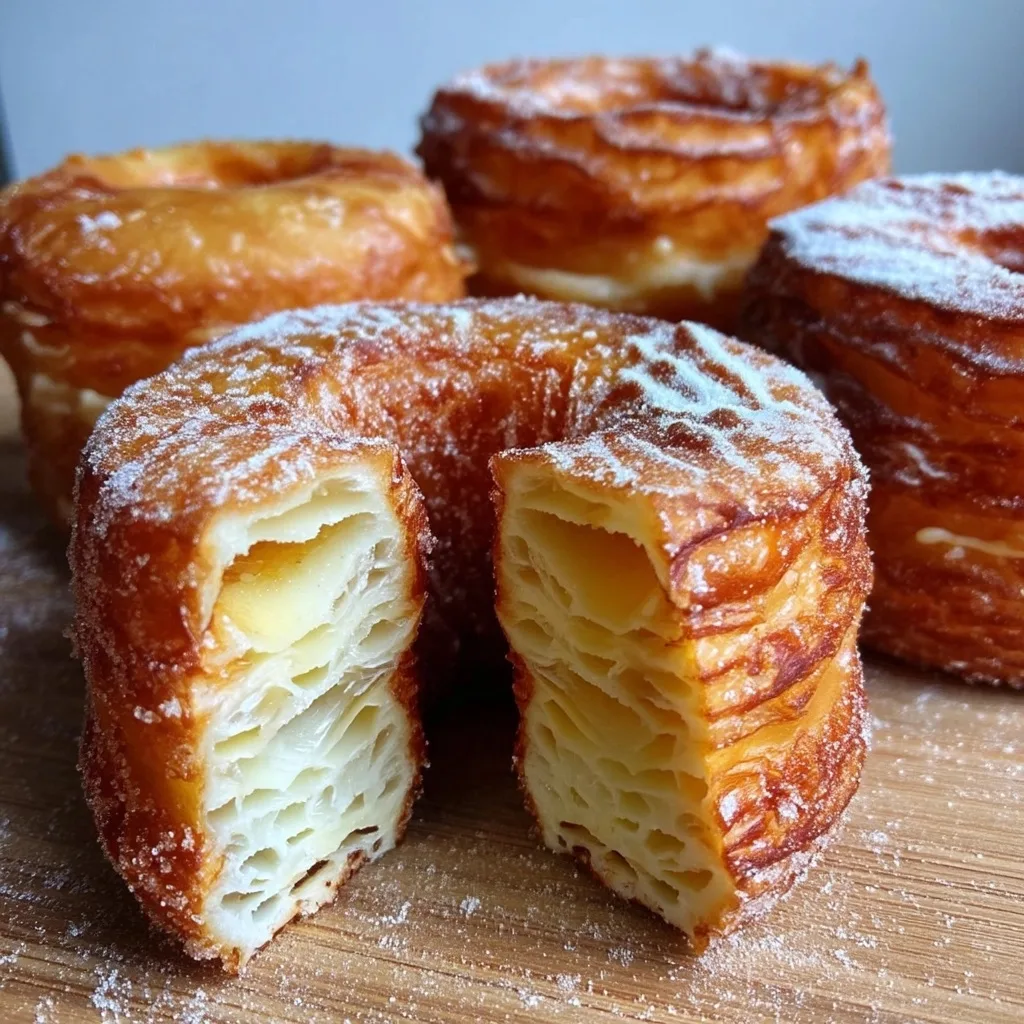
These heavenly hybrid pastries combine the best of both worlds: the laminated, buttery layers of a classic French croissant with the fried golden perfection of an American donut. Furthermore, when you bite into a perfectly made cronut, you’ll experience the satisfying crunch of the exterior giving way to those delicate, flaky layers inside. It’s a textural symphony that’s simply unmatched in the pastry world.
The beauty of making cronuts at home lies not only in the incredible taste but also in the process itself. Additionally, there’s something deeply satisfying about creating these complex pastries from scratch, watching the dough transform through multiple stages into something truly spectacular.
What Makes Cronuts So Special?
Cronuts represent a perfect marriage of French pastry technique and American comfort food sensibilities. Unlike traditional donuts that rely on a simple yeasted dough, cronuts require the sophisticated lamination process typically reserved for croissants and puff pastry. Consequently, each bite delivers those signature flaky layers that make croissants so beloved.
The magic happens during the lamination process, where butter is folded into the dough multiple times, creating hundreds of distinct layers. When these layers hit the hot oil during frying, they separate and puff dramatically, creating that distinctive cronut texture. Moreover, the yeasted dough provides a tender, slightly chewy interior that perfectly balances the crispy exterior.
What truly sets cronuts apart from other pastries is their versatility. They’re substantial enough to serve as a special breakfast or brunch centerpiece, yet indulgent enough to satisfy any dessert craving. Furthermore, they can be filled with countless varieties of creams, jams, and custards, making them endlessly customizable.
The Science Behind Perfect Cronuts
Understanding the science behind cronuts is crucial for success. The lamination process creates distinct layers of dough and butter that remain separate until they hit the hot oil. Additionally, the yeast provides lift and flavor development, while the butter contributes richness and creates those coveted flaky layers.
Temperature control is absolutely critical throughout the entire process. The butter must remain pliable enough to roll without breaking, yet firm enough not to melt into the dough. Similarly, the oil temperature must be precisely maintained at 350°F to ensure the cronuts cook evenly without becoming greasy.
The magic number for lamination is typically four “turns” or folds, creating hundreds of layers. Each turn doubles the number of layers, so after four turns, you’ll have created over 250 individual layers. Consequently, this is what gives cronuts their distinctive appearance and texture.
Essential Ingredients for Perfect Cronuts
The Foundation: Quality Matters
Flour Selection: All-purpose flour provides the perfect balance of protein for structure without creating too much gluten development. High-protein bread flour would make the dough too tough, while cake flour wouldn’t provide enough structure for the lamination process.
Butter Quality: This is where you absolutely cannot skimp. European-style butter with higher fat content (82% or higher) works best because it remains pliable during rolling while maintaining distinct layers. Additionally, the superior flavor of high-quality butter shines through in the final product.
Yeast Activation: Active dry yeast needs to be properly activated in warm milk to ensure good rise and flavor development. The milk temperature should feel comfortably warm to your wrist – too hot and you’ll kill the yeast, too cool and it won’t activate properly.
Supporting Players
Whole Milk: The fat content in whole milk contributes to the rich flavor and tender texture. Moreover, it provides the perfect liquid base for yeast activation and dough development.
Sugar and Vanilla: These provide essential flavor development and help feed the yeast during fermentation. The sugar also contributes to the beautiful golden color during frying.
Salt: Never underestimate salt’s role in pastry – it enhances all other flavors and helps control yeast activity, preventing over-fermentation.
Step-by-Step Cronut Creation Process
Day One: Building the Foundation
Creating exceptional cronuts is a two-day process that requires patience and planning. However, the results are absolutely worth the time investment. Begin by activating your yeast in warm milk, watching for that telltale foamy action that indicates healthy, active yeast.
Once your yeast is foaming enthusiastically, incorporate the egg, sugar, and vanilla. This mixture forms the flavorful base of your dough. Subsequently, add the flour and salt, mixing until a soft, slightly sticky dough forms. Don’t worry if it seems a bit rough at this stage – the kneading process will transform it.
Knead the dough for 5-6 minutes until it becomes smooth and elastic. Proper kneading develops the gluten structure necessary for successful lamination. Furthermore, well-kneaded dough will stretch without tearing when you begin the folding process.
The Art of Butter Preparation
While your dough chills, prepare the butter block. This step is crucial and often overlooked by home bakers. Roll the cold butter between parchment paper into a neat 6×6-inch square. The butter should be cold but pliable – not so hard that it cracks when rolled, but not so soft that it melts into the dough.
Pro Tip: The butter and dough should be similar temperatures when you begin lamination. If the butter is too hard, it will break through the dough. If it’s too soft, it will merge with the dough instead of creating distinct layers.
Mastering the Lamination Process
Lamination is the heart of cronut-making and requires patience and technique. Roll your chilled dough into a 10×10-inch square, then place the butter square diagonally in the center like a diamond. This positioning allows you to fold the dough corners over the butter like an envelope.
Seal the seams carefully to prevent butter leakage during rolling. Then begins the magical transformation: roll the dough into a rectangle, approximately 12×8 inches. Fold it into thirds like a business letter – this is your first “turn.”
Chill the dough for 30 minutes between each turn. This rest period allows the gluten to relax and keeps the butter at the proper temperature. Repeat this roll-fold-chill process three more times for a total of four turns. Consequently, you’ll have created the hundreds of layers that make cronuts so special.
Shaping and Final Rise
After the final turn and chill, roll the dough to about ½-inch thickness. Use a donut cutter or two round cutters to create the classic donut shape. The larger cutter should be about 3-4 inches in diameter, with a smaller 1-inch cutter for the center hole.
Place the shaped cronuts on a floured tray, cover lightly with a clean kitchen towel, and allow them to rise at room temperature for about an hour. They should increase in size by about 50% and feel slightly puffy when gently touched. Moreover, this final rise ensures the cronuts will be light and airy after frying.
The Frying Process: Achieving Golden Perfection
Oil Temperature Control: Maintaining the correct oil temperature is absolutely critical for perfect cronuts. Heat your oil to exactly 350°F and monitor it constantly with a reliable thermometer. Too hot, and the exterior will brown before the interior cooks through. Too cool, and the cronuts will absorb excess oil and become greasy.
Frying Technique: Fry cronuts in small batches to maintain oil temperature. Gently slide them into the oil and fry for 2-3 minutes per side until deep golden brown. The cronuts should puff dramatically when they hit the oil, creating those beautiful layers.
Drainage and Coating: Immediately drain fried cronuts on paper towels, then roll them in cinnamon sugar while still warm. The residual heat helps the coating adhere perfectly. Additionally, this is when the cronuts smell absolutely incredible and test your willpower to the limit.

Filling and Flavor Variations
Classic Fillings
Pastry Cream: The gold standard for cronut filling, pastry cream provides rich, vanilla-scented luxury. Use a piping bag fitted with a long tip to inject the cream into the center of each cronut.
Fruit Jams and Preserves: High-quality jams add bright, fruity contrast to the rich pastry. Raspberry, strawberry, and apricot work particularly well. Moreover, the acidity helps balance the butter richness.
Chocolate Options: From Nutella to homemade chocolate ganache, chocolate fillings satisfy serious indulgence cravings. Dark chocolate provides sophisticated depth, while milk chocolate offers comfort-food appeal.
Creative Flavor Combinations
Seasonal Specials: Pumpkin spice filling for fall, peppermint cream for winter, or fresh berry creams for summer keep your cronut game exciting year-round.
International Inspirations: Matcha cream for Japanese influence, dulce de leche for Latin flair, or cardamom-rose cream for Middle Eastern sophistication.
Savory Possibilities: While unconventional, savory cronuts filled with herbed cream cheese or smoked salmon spread can create unique brunch offerings.
Troubleshooting Common Cronut Challenges
Butter Leakage Issues
If butter leaks during lamination, your dough or butter temperature is likely off. The butter should be pliable but not soft. Additionally, ensure all seams are properly sealed before rolling.
Solution: Chill the dough longer between turns and work quickly during rolling. Furthermore, dust with flour as needed to prevent sticking.
Dense or Heavy Cronuts
This usually indicates insufficient lamination or over-proofing. Each turn must create distinct layers, and the final rise should be monitored carefully.
Prevention: Count your turns carefully and maintain proper temperatures throughout the process. Moreover, don’t let the final rise go too long – cronuts should be puffy but not doubled in size.
Greasy Results
Incorrect oil temperature is the primary culprit. Oil that’s too cool causes excess absorption, while oil that’s too hot creates an uneven cook.
Fix: Invest in a reliable thermometer and maintain strict temperature control. Additionally, don’t overcrowd the fryer, which can cause temperature drops.
Make-Ahead Strategies and Storage
Advance Preparation Options
The laminated dough can be prepared through the final turn and stored in the refrigerator for up to 24 hours before shaping. This actually improves flavor development and makes the dough easier to handle.
Freezing Strategy: Shaped cronuts can be frozen before the final rise. Arrange on parchment-lined trays, freeze solid, then transfer to freezer bags. They’ll keep for up to one month.
Storage and Reheating
Fresh cronuts are best enjoyed within hours of frying, but they can be stored at room temperature for up to two days. For longer storage, freeze filled cronuts and thaw at room temperature.
Reheating Tips: Warm day-old cronuts in a 300°F oven for 3-4 minutes to restore crispness. Avoid microwaving, which makes them soggy.
Equipment Essentials for Cronut Success
Must-Have Tools
Stand Mixer: While not absolutely necessary, a stand mixer makes dough preparation much easier and ensures proper gluten development.
Rolling Pin: A large, heavy rolling pin provides better control during lamination. French-style pins without handles offer the most control.
Deep-Fry Thermometer: Accurate temperature monitoring is crucial for perfect results. Digital probe thermometers provide the most reliable readings.
Donut Cutters: While you can improvise with round cutters, proper donut cutters create cleaner cuts and more uniform shapes.
Helpful Additions
Scale: Measuring ingredients by weight ensures consistency and better results. Professional bakers always weigh ingredients.
Bench Scraper: Essential for handling sticky dough and cleaning work surfaces efficiently.
Piping Bags and Tips: Necessary for filling cronuts with creams and custards.
The Perfect Cronut Serving Experience
Presentation Excellence
Cronuts deserve presentation that matches their special status. Arrange them on elegant platters or individual plates with small bowls of additional fillings or dipping sauces. Furthermore, fresh berries or mint sprigs add beautiful color contrast.
Temperature Matters: Serve cronuts at room temperature or slightly warm for the best texture and flavor experience. The layers are most apparent and the flavors most pronounced when not cold.
Pairing Suggestions
Coffee Companions: The rich, buttery nature of cronuts pairs beautifully with robust coffee. Espresso, French roast, or cold brew all complement the pastry’s richness.
Tea Time: Earl Grey or English Breakfast tea provide elegant accompaniments. The bergamot in Earl Grey particularly complements vanilla-filled cronuts.
Brunch Integration: Cronuts work wonderfully as part of larger brunch spreads, alongside fresh fruit, yogurt parfaits, and savory options.
More Related Recipes You Might Enjoy
If you loved making these incredible homemade cronuts, you’ll definitely want to explore these other fantastic recipes that share similar techniques or indulgent appeal:
- Classic Potato Latkes – Another fried favorite that requires careful temperature control and timing, perfect for mastering your oil-frying skills
- Air Fryer Okra – A lighter approach to achieving crispy, golden textures without traditional deep frying
- No-Bake Peppermint Oreo Truffles – Indulgent treats that share the same special-occasion appeal as cronuts, perfect for holiday entertaining
Professional Tips from Pastry Chefs
Temperature Management
Professional pastry chefs emphasize that cronuts are all about temperature control. Keep your kitchen cool when possible, and if your butter becomes too soft during lamination, don’t hesitate to chill the dough again.
Seasonal Considerations: Summer cronut-making requires extra vigilance with temperatures. Consider working in the early morning when kitchens are coolest.
Quality Shortcuts
While cronuts require time and technique, some steps can be streamlined. The dough can be made in a stand mixer, and store-bought pastry cream can substitute for homemade in a pinch.
Batch Production: Once you’ve mastered the technique, consider making larger batches. The laminated dough freezes beautifully and can be shaped and fried as needed.
The Cultural Impact of Cronuts
Since their introduction, cronuts have become more than just a pastry – they’re a cultural phenomenon. They represent the innovation possible when traditional techniques meet creative thinking. Moreover, they’ve inspired countless other hybrid pastries and demonstrated the power of social media in food trends.
Home Baking Renaissance: Cronuts have encouraged home bakers to tackle more complex projects, proving that professional-level pastries are achievable in home kitchens with patience and practice.
Final Thoughts and Success Motivation
Creating homemade cronuts represents a significant achievement in home baking. They require patience, technique, and attention to detail, but the results are absolutely extraordinary. Furthermore, the process itself is deeply satisfying, connecting you to centuries of pastry-making tradition while creating something uniquely modern.
Don’t be discouraged if your first batch isn’t perfect – cronut-making is a skill that improves with practice. Each attempt teaches valuable lessons about dough handling, temperature control, and timing. Moreover, even imperfect cronuts are still incredibly delicious and far superior to anything you can buy.
The joy of serving homemade cronuts to family and friends is unmatched. Watching faces light up as they bite into those flaky, buttery layers makes every moment of the process worthwhile. Additionally, you’ll have gained skills in lamination and yeast handling that apply to countless other pastries.
Remember, the best cronuts come from patience, practice, and high-quality ingredients. Take your time with each step, maintain proper temperatures, and trust the process. Soon, you’ll be creating cronuts that rival the best bakeries, all from the comfort of your own kitchen.
These heavenly hybrid pastries represent the perfect fusion of technique and creativity, tradition and innovation. By mastering homemade cronuts, you’re not just learning a recipe – you’re developing skills that will elevate your entire baking repertoire and create memories that last a lifetime.
Print
Homemade cronuts: complete layering and frying guide
- Total Time: 2 days 1 hr 10 minutes
- Yield: 8 cronuts 1x
- Diet: Vegetarian
Description
These homemade cronuts combine the flaky, buttery layers of a croissant with the crisp, sugar-coated exterior of a donut. After a careful lamination and fry, each pastry is dusted in cinnamon sugar and can be filled with pastry cream, jam, or your favorite spread for an indulgent breakfast or brunch treat.
Ingredients
2 ¼ tsp active dry yeast (1 packet)
¼ cup granulated sugar
1 large egg, room temperature
1 tsp vanilla extract
3 ½ cups all-purpose flour
1 tsp salt
1 cup cold unsalted European-style butter (82% fat), cubed
Extra flour for dusting
Vegetable oil, for frying (about 2 qts)
½ cup granulated sugar
1 tsp ground cinnamon
-
Optional fillings: pastry cream, fruit jam, Nutella, or whipped cream
1 ¼ cups warm whole milk (110°F)
Instructions
Activate yeast & mix dough: In a small bowl, whisk warm milk, yeast, and 1 tsp sugar; let sit 5 min until foamy. Whisk in egg, remaining sugar, and vanilla.
Build dough: In a stand mixer bowl, combine flour and salt. Add milk mixture and knead on medium speed 5–6 min until smooth and elastic. Form into a disk, wrap, and chill 30 min.
Prepare butter block: On parchment, roll butter into a 6×6″ square. Chill until firm but pliable (about 10 min).
First turn: Roll dough to 10×10″. Place butter diagonally in center; fold dough corners over to seal. Roll to a 12×8″ rectangle; fold into thirds like a letter. Wrap and chill 30 min.
Repeat turns: Perform three more roll-fold-chill cycles (total of four turns), always chilling 30 min between turns.
Shape cronuts: Roll final dough to ½″ thickness. Use a 3″ cutter for outer ring and a 1″ cutter for the hole. Place shapes on a floured tray, cover lightly, and proof 1 hr at room temperature until puffy.
Fry cronuts: Heat oil to 350°F. Fry cronuts in batches, 2–3 min per side, until deep golden and puffed.
Coat & fill: Drain on paper towels. While warm, toss in cinnamon-sugar. If filling, use a piping bag to inject pastry cream or jam.
Notes
Keep dough and butter at similar cold temperatures to prevent leakage.
Work quickly during lamination and dust with flour to avoid sticking.
Use a digital thermometer to maintain oil at 350°F.
Do not overcrowd fryer—small batches keep temperature steady.
- Prep Time: 2 days (active: ~1 hr + chilling & laminations)
- Cook Time: 10 minutes
- Category: Breakfast, Dessert
- Method: Frying, Lamination
- Cuisine: French-American
Nutrition
- Serving Size: 1 cronut
- Calories: 360 kcal
- Sugar: 12 g
- Sodium: 200 mg
- Fat: 20 g
- Saturated Fat: 12 g
- Unsaturated Fat: 7 g
- Trans Fat: 0.5 g
- Carbohydrates: 38 g
- Fiber: 1 g
- Protein: 4 g
- Cholesterol: 50 mg

