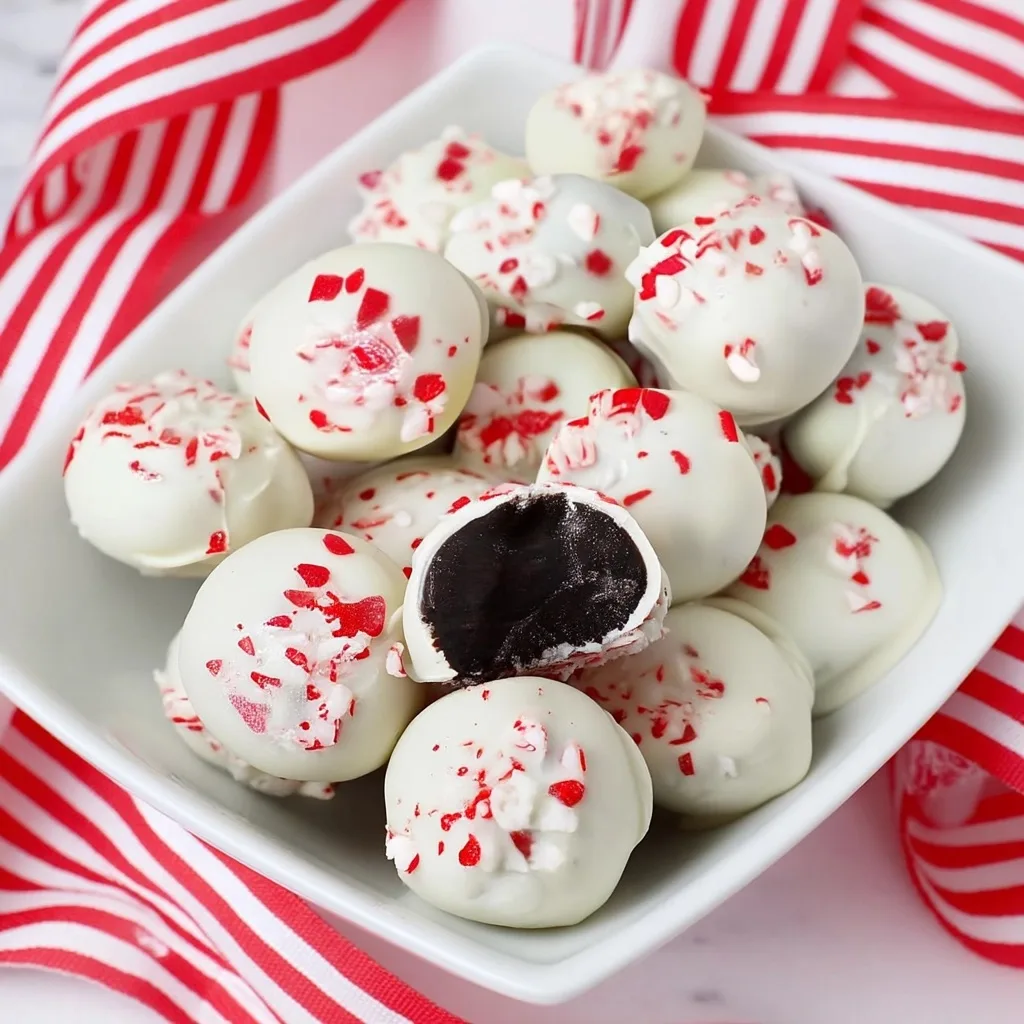
When the holiday season arrives, there’s nothing quite like the magic of No-Bake Peppermint Oreo Truffles to transform your kitchen into a winter wonderland of sweet aromas and festive flavors. These delightful bite-sized treasures combine the beloved taste of Oreo cookies with the refreshing coolness of peppermint, all wrapped in a luxurious white chocolate coating that melts on your tongue like fresh snowflakes.
What makes these No-Bake Peppermint Oreo Truffles truly special is their incredible simplicity paired with an elegant presentation that rivals any professional confectionery creation. Unlike traditional baking that requires precise temperatures and timing, these truffles come together with minimal effort while delivering maximum impact. They’re the perfect solution for busy holiday hosts who want to impress guests without spending hours in the kitchen, and they’re equally fantastic for last-minute gift-giving or spontaneous holiday gatherings.
The beauty of No-Bake Peppermint Oreo Truffles lies in their versatility and forgiving nature. Whether you’re a seasoned baker or someone who typically avoids the kitchen altogether, this recipe welcomes everyone with open arms. The no-bake aspect means no worry about oven temperatures, no stress about perfect timing, and absolutely no risk of burning your precious creations. Instead, you’ll spend your time enjoying the therapeutic process of rolling these delicious morsels while anticipating the joy they’ll bring to everyone who tastes them.
The Irresistible Appeal of No-Bake Holiday Treats
Holiday baking traditions have evolved significantly over the years, and no-bake desserts have carved out their own special place in our seasonal celebrations. No-Bake Peppermint Oreo Truffles represent the perfect marriage of convenience and indulgence, allowing home cooks to create stunning desserts without the stress and complexity of traditional baking methods.
The peppermint flavor profile has deep roots in holiday traditions, originally associated with candy canes and winter festivities dating back centuries. When combined with the modern beloved Oreo cookie, which has been America’s favorite cookie since 1912, you get a contemporary twist on classic holiday flavors that appeals to both children and adults. The cool, refreshing sensation of peppermint provides a delightful contrast to the rich, chocolatey depth of Oreos, creating a flavor combination that’s both nostalgic and exciting.
From a nutritional standpoint, while these No-Bake Peppermint Oreo Truffles are certainly an indulgent treat, they do offer some benefits when enjoyed in moderation. The cream cheese provides protein and calcium, while the peppermint extract contains menthol, which can aid digestion and provide a cooling effect. Additionally, the portion-controlled nature of truffles makes it easier to enjoy a sweet treat without overindulging, as one or two pieces can satisfy cravings beautifully.
The social aspect of making No-Bake Peppermint Oreo Truffles cannot be understated. These treats are perfect for making with children, as there’s no dangerous hot ovens or sharp equipment involved. The rolling process is particularly enjoyable for little hands, and kids love getting involved in the crushing and mixing stages. This recipe creates wonderful opportunities for family bonding and creating lasting holiday memories together.
Understanding Your Essential Ingredients
The Foundation: Oreo Cookies
The star ingredient in these No-Bake Peppermint Oreo Truffles is, naturally, the iconic Oreo cookie. When selecting your Oreos, you have several delicious options to consider. Classic Oreos provide the traditional chocolate cookie and vanilla cream combination that everyone knows and loves, creating a reliable flavor base that pairs beautifully with peppermint. However, if you’re feeling particularly festive, peppermint-flavored Oreos can intensify the mint experience and add an extra layer of holiday spirit to your truffles.
The quality of your Oreos directly impacts the final texture and flavor of your No-Bake Peppermint Oreo Truffles. Fresh cookies will crush more evenly and blend more smoothly with the cream cheese, while older cookies might create a grittier texture. When crushing your Oreos, aim for a consistency that resembles fine breadcrumbs with a few slightly larger pieces for textural interest. This provides the perfect foundation for your truffle mixture to hold together properly while maintaining that distinctive Oreo flavor throughout each bite.
For those with dietary restrictions, there are now gluten-free and vegan Oreo alternatives available that work wonderfully in this recipe. The key is ensuring whatever cookie you choose has enough structural integrity to bind well with the cream cheese and maintain its flavor profile after mixing.
The Binding Agent: Cream Cheese
Cream cheese serves as the crucial binding element that transforms crushed cookies into the smooth, moldable mixture essential for perfect No-Bake Peppermint Oreo Truffles. The importance of using properly softened cream cheese cannot be overstated – it should be pliable enough to blend easily with the cookie crumbs but not so warm that it becomes runny or difficult to work with.
The richness and tanginess of cream cheese provide a beautiful counterpoint to the sweetness of the Oreos and the coolness of the peppermint. This balance prevents the truffles from becoming overwhelmingly sweet while adding a luxurious, velvety texture that makes each bite feel indulgent and satisfying. Full-fat cream cheese works best for this recipe, as the fat content is necessary for proper binding and the richest flavor experience.
When working with cream cheese, timing is everything. Remove it from the refrigerator about 30-45 minutes before you plan to make your No-Bake Peppermint Oreo Truffles, or soften it quickly in the microwave using 15-second intervals. The goal is achieving a consistency that’s soft enough to blend smoothly but still cool enough to help the mixture hold its shape during the rolling process.
The Flavor Star: Peppermint Extract
Peppermint extract is what elevates these treats from simple Oreo balls to true No-Bake Peppermint Oreo Truffles. The key to success with peppermint extract lies in restraint – a little goes a very long way. Too much can overpower the delicate balance of flavors and create an almost medicinal taste, while too little leaves you wondering where the peppermint went.
High-quality peppermint extract will provide a clean, refreshing flavor without any artificial aftertaste. Some extracts are more concentrated than others, so it’s wise to start with a smaller amount and taste-test your mixture before adding more. The peppermint should enhance and complement the Oreo flavor rather than dominating it, creating a harmonious blend that delights the palate.
For those who prefer natural alternatives, you can substitute peppermint extract with finely crushed fresh peppermint leaves, though this will create a slightly different flavor profile and may affect the texture of your No-Bake Peppermint Oreo Truffles. Another option is using peppermint oil, but be extremely cautious with quantities as oils are typically much more concentrated than extracts.
The Luxurious Coating: White Chocolate
The white chocolate coating transforms humble truffle centers into elegant, professional-looking confections worthy of any holiday dessert table. When selecting white chocolate for your No-Bake Peppermint Oreo Truffles, you have two primary options: genuine white chocolate or white candy melts. True white chocolate contains cocoa butter and provides a richer, more complex flavor with a smooth, creamy texture that melts beautifully on the tongue.
White candy melts, while not technically chocolate, offer practical advantages for home candy makers. They melt more easily and consistently than real chocolate, are less temperamental about temperature changes, and set up more quickly. They also tend to be more forgiving if you accidentally overheat them. The choice between the two often comes down to personal preference and comfort level with chocolate work.
Proper melting technique is crucial for achieving a smooth, glossy coating on your No-Bake Peppermint Oreo Truffles. Whether using the microwave method or a double boiler, patience is key. Rushing the melting process by using too high heat will result in seized, grainy chocolate that’s difficult to work with and won’t provide the beautiful finish you’re seeking.
The Festive Finishing Touch: Crushed Peppermint Candies
The final element that makes these No-Bake Peppermint Oreo Truffles truly spectacular is the crushed peppermint candy topping. This addition serves multiple purposes: it provides a delightful textural contrast with its satisfying crunch, adds visual appeal with its festive red and white colors, and delivers an extra burst of peppermint flavor that complements the extract in the truffle center.
Candy canes are the traditional choice for this garnish, but peppermint hard candies work equally well. The key is achieving the right size crush – pieces should be small enough to adhere well to the white chocolate coating but large enough to provide noticeable texture and visual impact. Crushing them while they’re still in their wrappers can help contain the pieces and prevent them from flying around your kitchen.
For the most vibrant appearance, use a combination of pure white peppermint candies and traditional red-striped candy canes. This creates a beautiful holiday color scheme that makes your No-Bake Peppermint Oreo Truffles look as festive as they taste.

Mastering the Perfect Technique
The Art of Crushing Oreos
Creating the perfect base for your No-Bake Peppermint Oreo Truffles begins with properly crushing your Oreo cookies. A food processor is the most efficient method, allowing you to achieve consistent results quickly and easily. Pulse the cookies rather than running the processor continuously – this gives you better control over the final texture and prevents you from accidentally turning your cookies into powder.
If you don’t have a food processor, the zip-top bag and rolling pin method works wonderfully and can actually be quite therapeutic. Place the Oreos in a sturdy zip-top bag, seal it tightly, and use a rolling pin to crush them systematically. Start gently and gradually increase pressure, moving the rolling pin across the bag in different directions to ensure even crushing. This method takes a bit more time and effort, but many people find it satisfying and enjoyable.
The ideal texture for your crushed Oreos should resemble coarse breadcrumbs with some slightly larger pieces remaining. This provides the perfect foundation for your No-Bake Peppermint Oreo Truffles to hold together properly while maintaining interesting texture throughout each bite. Avoid crushing them too fine, as this can result in truffles that are too dense and lack the characteristic Oreo texture that makes them so appealing.
Creating the Perfect Mixture
Once your Oreos are properly crushed, the next crucial step in making exceptional No-Bake Peppermint Oreo Truffles is combining them with the cream cheese and peppermint extract to create a cohesive, workable mixture. The cream cheese should be soft enough to blend easily but not so warm that it makes the mixture too loose to handle.
Add the peppermint extract gradually, starting with less than the full amount and tasting as you go. Remember that flavors will intensify as the mixture chills, so what seems like a subtle peppermint flavor during mixing will become more pronounced in the finished truffles. The mixture should hold together when pinched but not feel wet or sticky. If it seems too dry, add a small amount of additional softened cream cheese. If it’s too wet, add more crushed Oreos.
The mixing process is important for developing the right texture in your No-Bake Peppermint Oreo Truffles. Whether using a food processor or mixing by hand, ensure all ingredients are thoroughly combined and evenly distributed. The mixture should look homogeneous, with no streaks of cream cheese or dry pockets of cookie crumbs remaining.
Rolling Technique for Perfect Spheres
The rolling stage is where your No-Bake Peppermint Oreo Truffles really take shape, literally and figuratively. Start by scooping uniform portions using a cookie scoop or tablespoon – consistency in size ensures even coating and professional appearance. Roll each portion between your palms using gentle pressure, creating smooth, round spheres.
Working with slightly damp hands can help prevent the mixture from sticking to your palms, but be careful not to use too much water as this can affect the texture of your truffles. Some bakers prefer to lightly dust their hands with powdered sugar or cocoa powder for easier handling.
The initial chilling period after rolling is crucial for the success of your No-Bake Peppermint Oreo Truffles. This 30-minute rest in the refrigerator allows the spheres to firm up sufficiently for dipping without falling apart. Don’t skip this step, as attempting to dip warm or soft truffles will result in a messy coating process and less attractive final results.
Dipping and Coating Mastery
The dipping process is where your No-Bake Peppermint Oreo Truffles transform from simple candy centers into elegant, professional-looking confections. Properly melted white chocolate should be smooth, glossy, and warm but not hot. Test the temperature by dipping a spoon – the chocolate should coat smoothly without being so thin that it drips off immediately or so thick that it creates a heavy coating.
Use a fork or dipping tool to lower each chilled truffle into the melted chocolate, ensuring complete coverage. Gently tap the fork against the side of the bowl to remove excess chocolate – this prevents a thick, heavy coating that overwhelms the delicate truffle center. The goal is a thin, even layer that enhances rather than masks the flavors within.
Apply the crushed peppermint candy garnish immediately after dipping, while the white chocolate is still wet. Work quickly but calmly, as the chocolate will begin to set within a few minutes. If you’re making a large batch of No-Bake Peppermint Oreo Truffles, consider working in smaller batches to ensure you have adequate time to apply the garnish before the coating sets.
Complete No-Bake Peppermint Oreo Truffles Recipe
Ingredients
- 1 (14.3 oz) package Oreo cookies (classic or peppermint)
- 1 (8 oz) block cream cheese, softened
- ½ teaspoon peppermint extract
- 10 oz white chocolate or white candy melts
- ¼ cup crushed peppermint candies or candy canes
Equipment Needed
- Food processor or zip-top bag and rolling pin
- Large mixing bowl
- Cookie scoop or tablespoon
- Baking sheet
- Parchment paper
- Microwave-safe bowl or double boiler
- Fork for dipping
- Airtight storage container
Instructions
Step 1: Crush It Like You Mean It Place all Oreo cookies in a food processor and pulse until they resemble fine, chocolatey crumbs with some slightly larger pieces remaining. If using the manual method, place cookies in a sturdy zip-top bag and crush with a rolling pin until you achieve the desired consistency. The mixture should look like rich, dark breadcrumbs.
Step 2: Make It Creamy Add the softened cream cheese and peppermint extract to the cookie crumbs. Pulse in the food processor or mix by hand until the mixture forms a thick, cohesive dough that holds together when pinched. The consistency should be similar to cookie dough – moldable but not sticky. Taste and adjust peppermint extract if desired, keeping in mind that the flavor will intensify as the truffles chill.
Step 3: Roll ‘Em Up Using a cookie scoop or tablespoon, portion the mixture into uniform pieces and roll each between your palms to form smooth, round balls. Place the rolled truffles on a parchment-lined baking sheet, ensuring they don’t touch each other. Refrigerate for 30 minutes or until firm enough to handle without losing their shape.
Step 4: Dip & Decorate Melt the white chocolate in a microwave-safe bowl using 30-second intervals, stirring between each heating, until smooth and glossy. Alternatively, use a double boiler for more controlled melting. The chocolate should be warm but not hot. Using a fork, dip each chilled truffle into the melted chocolate, allowing excess to drip off. Immediately sprinkle with crushed peppermint candy before the coating sets. Place on a clean parchment-lined baking sheet.
Step 5: Chill Again & Serve Return the coated No-Bake Peppermint Oreo Truffles to the refrigerator for at least 15 minutes or until the white chocolate coating is completely set and firm. Serve chilled for the best texture and flavor experience. Store covered in the refrigerator for up to one week.

Expert Tips and Troubleshooting
Temperature Control Secrets
Success with No-Bake Peppermint Oreo Truffles often comes down to understanding and controlling temperatures throughout the process. The cream cheese should be softened but still cool – room temperature is perfect. If it’s too warm, your mixture will be too soft to roll properly. If it’s too cold, it won’t blend smoothly with the cookie crumbs.
For the white chocolate coating, aim for a temperature that’s warm enough to flow smoothly but not so hot that it melts the truffle centers. Test by dipping a spoon – the chocolate should coat evenly without being too thick or thin. If your chocolate becomes too thick during the dipping process, reheat it gently in short intervals.
Room temperature also affects your No-Bake Peppermint Oreo Truffles during the assembly process. In very warm kitchens, you may need to chill the rolled truffles longer before dipping, or even pop them in the freezer for 10-15 minutes. Conversely, in cooler environments, you might be able to work more quickly without concerns about melting.
Texture Perfection Techniques
The texture of your finished No-Bake Peppermint Oreo Truffles should be smooth and creamy on the inside with a satisfying snap from the white chocolate coating. If your truffles are too dense or heavy, you may have over-crushed the Oreos or used too much cream cheese. For lighter truffles, leave more texture in the crushed cookies and use just enough cream cheese to bind the mixture.
If your mixture is too wet or sticky to roll properly, gradually add more crushed Oreos until you reach the right consistency. Conversely, if the mixture is too dry and crumbly, add small amounts of softened cream cheese until it holds together properly.
The coating should be thin and even, allowing the truffle flavor to shine through while providing textural contrast. If your coating is too thick, your chocolate may be too cool, or you may not be allowing enough excess to drip off during the dipping process.
Storage and Serving Recommendations
Proper storage ensures your No-Bake Peppermint Oreo Truffles maintain their optimal texture and flavor. Store them in an airtight container in the refrigerator, separating layers with parchment paper if stacking. They’ll stay fresh for up to one week, though they’re best enjoyed within the first few days.
For serving, remove the truffles from the refrigerator about 10-15 minutes before presenting to allow them to come slightly closer to room temperature. This softens the texture slightly and allows the flavors to bloom more fully. However, don’t leave them out too long in warm environments, as the coating may begin to soften.
These No-Bake Peppermint Oreo Truffles freeze beautifully for longer storage. Place them in a freezer-safe container with parchment between layers and freeze for up to three months. Thaw in the refrigerator before serving, allowing several hours for complete thawing.
Creative Variations and Customizations
The basic No-Bake Peppermint Oreo Truffles recipe serves as an excellent foundation for countless variations and personal touches. Consider rolling some truffles in cocoa powder instead of coating them in white chocolate for a different presentation and flavor profile. You could also try dark chocolate coating for those who prefer less sweetness.
For special occasions, experiment with different extract flavors while maintaining the Oreo base. Orange extract creates a delightful citrus version, while almond extract provides a sophisticated, elegant flavor. Coffee extract can create mocha-inspired truffles that coffee lovers will adore.
The garnish possibilities are endless beyond crushed peppermint candies. Try toasted coconut, chopped nuts, mini chocolate chips, or even edible glitter for special celebrations. Each garnish adds its own unique texture and flavor element to complement the basic truffle.
For themed parties or special dietary needs, consider using different cookie bases. Chocolate wafer cookies, vanilla wafers, or even graham crackers can create interesting variations. Golden Oreos provide a vanilla-forward base that pairs beautifully with different extract flavors and coatings.

Presentation and Gift-Giving Ideas
No-Bake Peppermint Oreo Truffles make exceptional gifts when presented thoughtfully. Place them in small paper candy cups and arrange in decorative boxes or tins for elegant gift presentations. Clear cellophane bags tied with festive ribbons also showcase their beautiful appearance while keeping them fresh.
For holiday parties, arrange your truffles on tiered serving platters alongside other small desserts for an impressive dessert spread. Their individual size makes them perfect for cocktail parties or gatherings where guests are mingling and need easily manageable treats.
Consider creating themed presentations using coordinating colors and decorations. Silver and white presentations feel elegant and sophisticated, while red and white themes celebrate traditional holiday colors. Adding fresh mint sprigs as garnish can enhance both the visual appeal and aromatic experience.
Frequently Asked Questions
Can I make these truffles ahead of time? Absolutely! No-Bake Peppermint Oreo Truffles actually improve in flavor when made a day or two ahead, allowing the peppermint and chocolate flavors to meld beautifully. Store them covered in the refrigerator and add any final garnishes just before serving.
What if I don’t have peppermint extract? You can substitute with other extracts like vanilla, almond, or orange, adjusting the quantity to taste. Alternatively, crush peppermint candies very finely and incorporate them directly into the truffle mixture for peppermint flavor.
Why are my truffles falling apart during dipping? This usually indicates the truffle centers weren’t chilled long enough before dipping, or the mixture was too soft to begin with. Ensure proper chilling time and check that your mixture holds together well when pinched before rolling.
Can I use different types of chocolate for coating? Certainly! Dark chocolate, milk chocolate, or even colored candy melts all work wonderfully. Adjust the flavor balance by considering how the coating chocolate will complement the peppermint and Oreo flavors.
Why No-Bake Peppermint Oreo Truffles Are Perfect for Any Occasion
These delightful No-Bake Peppermint Oreo Truffles represent the perfect intersection of simplicity, elegance, and irresistible flavor. They require no special equipment, no baking experience, and no stress about perfect timing, yet they deliver professional-quality results that will impress anyone lucky enough to taste them.
The beauty of this recipe lies in its accessibility and reliability. Whether you’re creating them for a special celebration, bringing them to a potluck, or simply wanting to treat yourself to something special, these truffles deliver consistent, delicious results every time. We encourage you to make this recipe your own by experimenting with different flavors, coatings, and presentations. Share your creations with friends and family, and don’t be surprised when requests for the recipe start pouring in!
More Related Recipes You Might Enjoy
- Pumpkin Muffins – Another delightful no-fuss treat that’s perfect for seasonal celebrations and easy enough for beginning bakers
- Haunted Oreo Graveyard Cake – If you love working with Oreos, this spooky cake takes the beloved cookie to the next creative level
- Summer Fruit Tart – For those who enjoy creating beautiful, impressive desserts that look professional but are surprisingly simple to make

No-Bake Peppermint Oreo Truffles: Ultimate Holiday Recipe
- Total Time: 15 minutes + chilling
- Yield: about 24 truffles 1x
Description
These No-Bake Peppermint Oreo Truffles combine crushed Oreo cookies, cream cheese, and peppermint extract, all coated in white chocolate and sprinkled with crushed candy cane for a festive, melt-in-your-mouth holiday treat.
Ingredients
1 (8 oz) block full-fat cream cheese, softened
½ tsp peppermint extract
10 oz white chocolate or white candy melts
-
¼ cup crushed peppermint candies or candy canes
1 (14.3 oz) package Oreo cookies (classic or peppermint)
Instructions
Crush: Place Oreos in a food processor and pulse to fine crumbs (or seal in a zip-top bag and crush with a rolling pin).
Mix: In a bowl, combine crumbs, cream cheese, and peppermint extract until a uniform, pliable dough forms.
Roll: Scoop tablespoonfuls and roll into 1″ balls. Arrange on a parchment-lined sheet; chill 30 minutes.
Dip: Melt white chocolate per package directions. Using a fork, dip each truffle, tap off excess, and place back on parchment. Immediately sprinkle with crushed candy cane.
Set: Chill 15 minutes more, then serve.
Notes
For firmer truffles in warm kitchens, freeze 10 minutes before dipping.
Swap dark or milk chocolate for white chocolate coating.
Store in an airtight container in the fridge for up to 1 week or freeze up to 3 months.
- Prep Time: 15 minutes
- Cook Time: 0 minutes
- Category: Dessert
- Method: No-Bake
- Cuisine: American
Nutrition
- Serving Size: 1 truffle
- Calories: 110 kcal
- Sugar: 9 g
- Sodium: 50 mg
- Fat: 7 g
- Saturated Fat: 4 g
- Unsaturated Fat: 2 g
- Trans Fat: 0 g
- Carbohydrates: 12 g
- Fiber: 0.5 g
- Protein: 1 g
- Cholesterol: 15 mg